Two Week(14-days) Japan Itinerary from India
We traveled to Japan during peak sakura season as a couple — our first trip to Japan. Cherry blossoms transform every city, every street, every temple into something unlike anything we had seen before. The crowds show up, but the experience delivers far more than expected. Go during sakura season. You won’t regret it.
This is a first-timer's guide to a 14-day Japan itinerary from India. From visa paperwork to bullet trains, this two-week Japan itinerary covers every step of the planning process.
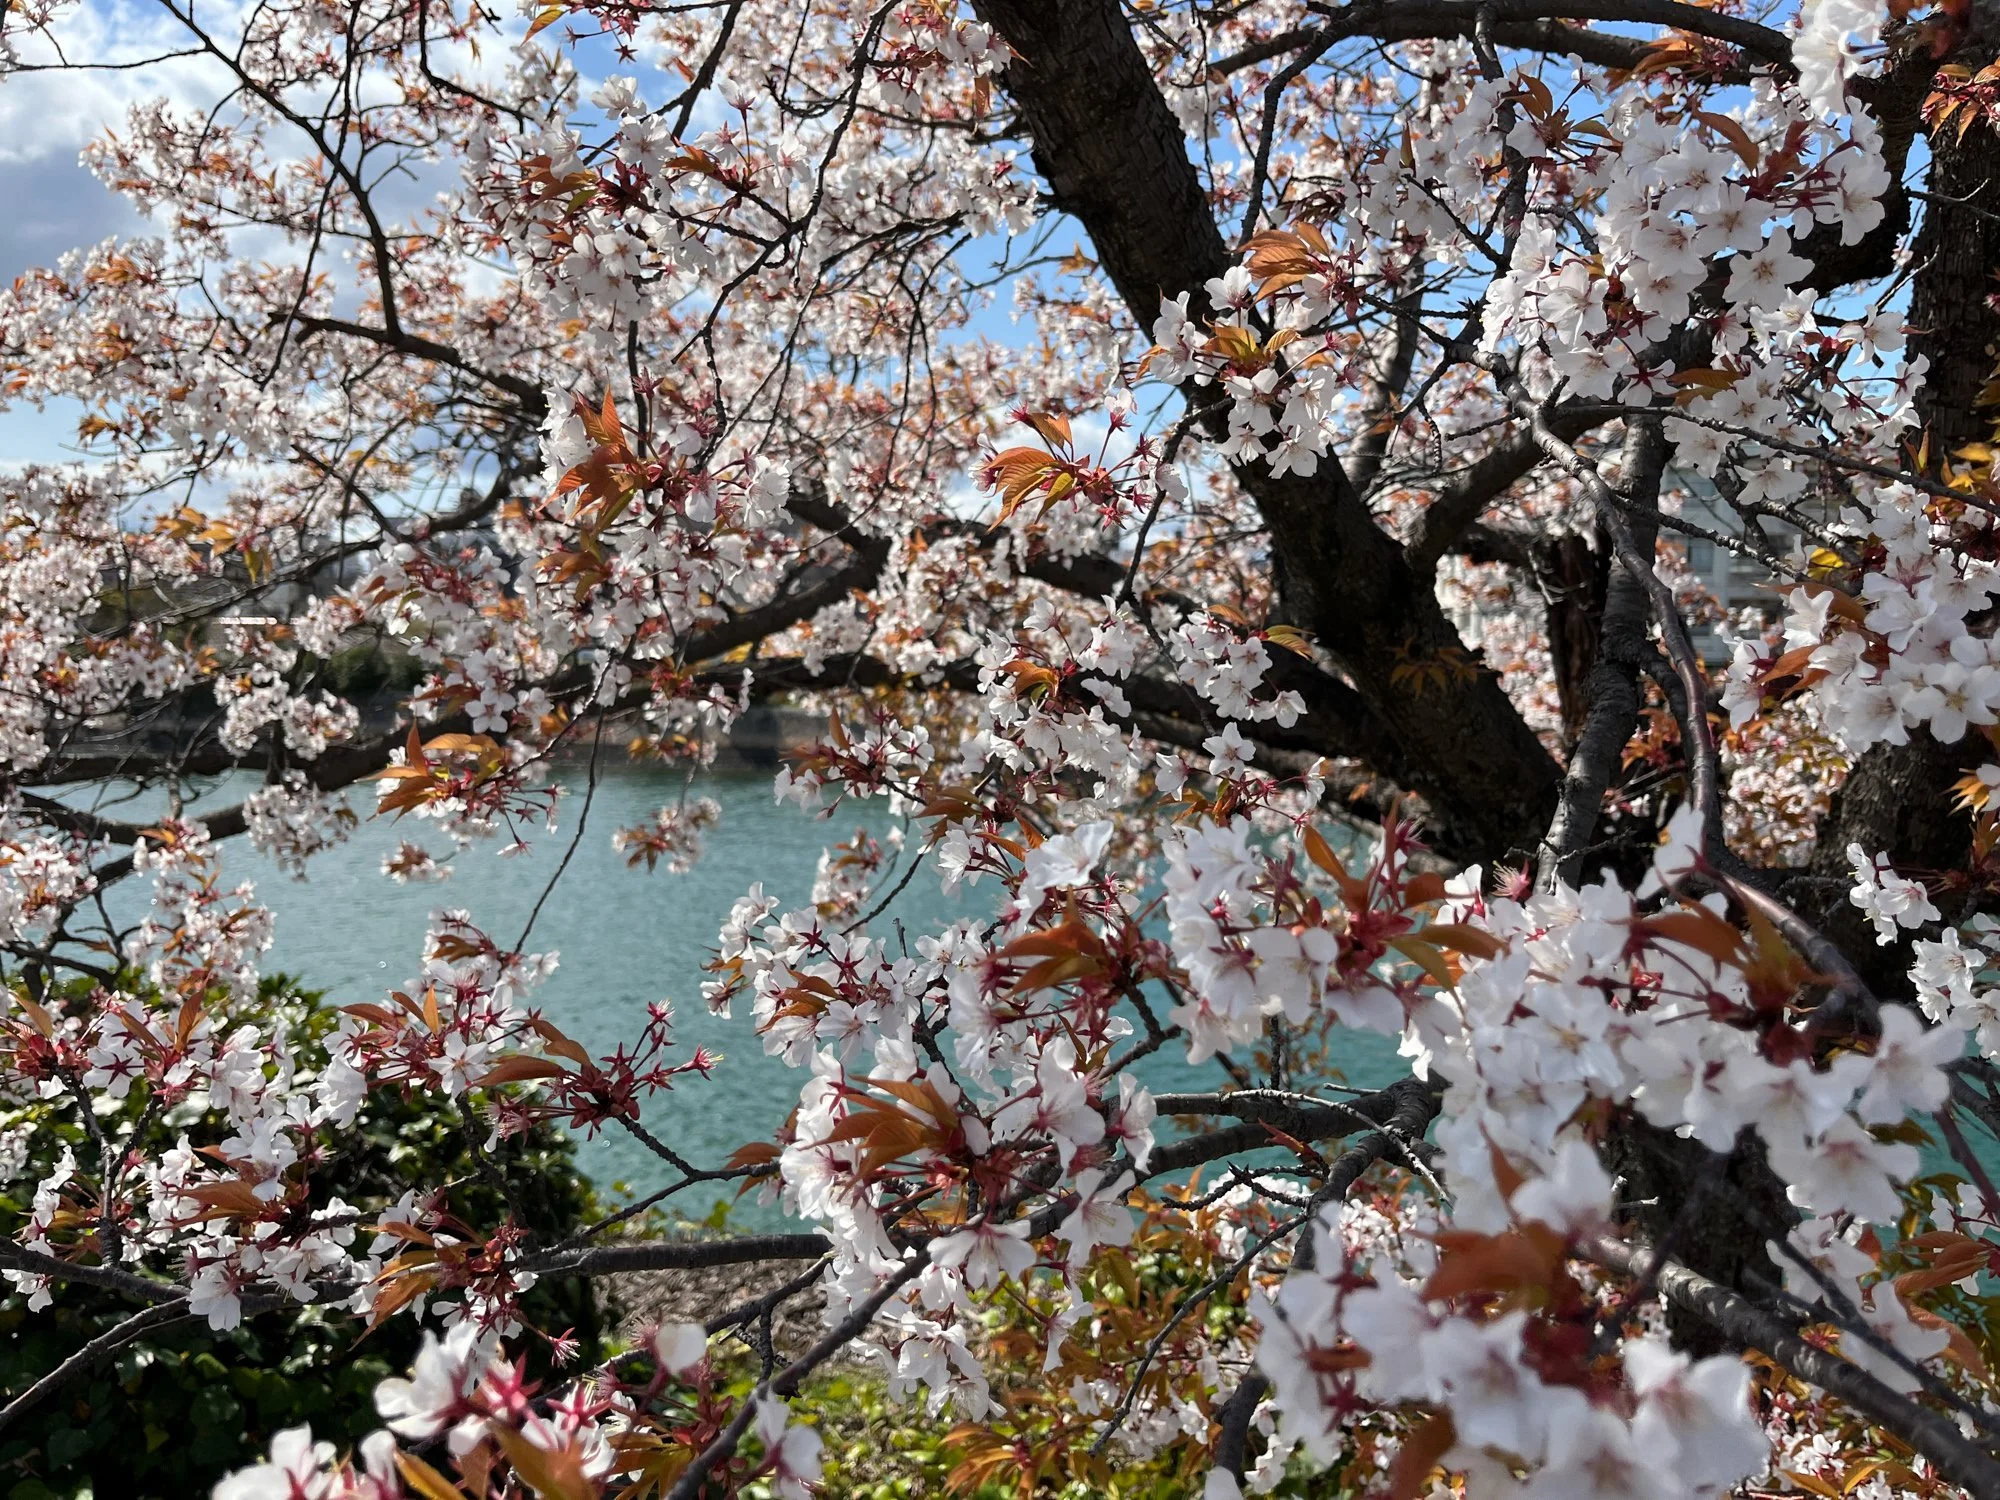
petals fall like snow
pink silence fills every street
Japan, for a breath
Part 1: Planning Your Itinerary
Start with the 14-day limit
You get 90 days on a standard tourist visa, but most people stick to a 2-week trip. This timeframe is the primary constraint for planning, dictating both the number of cities you can realistically visit and the duration of each stay.
Find your cities
Start your research on Reddit. The r/JapanTravel subreddit and India-specific travel subreddits hold hundreds of itineraries from travelers worldwide. Collect 20–30 of them and note which cities appear most often. This exercise quickly gives you a shortlist.
The usual suspects:
• Tokyo
• Kyoto
• Osaka
• Hiroshima
• Hokkaido (popular mainly in winter)
Once you have this list, go deeper. Search each city on Reddit and Google Images. Read reviews. Collect 10–15 places you want to visit per city. This tells you which cities deserve more days.
The answer depends on what you enjoy:
• Love shopping? Give Tokyo extra days.
• Want calm and culture? Kyoto rewards more time.
• Do you love nature? Stay longer near Mt. Fuji.
With 14 days and 4–5 cities, a rough starting point gives each city 2–3 days. Adjust from there.
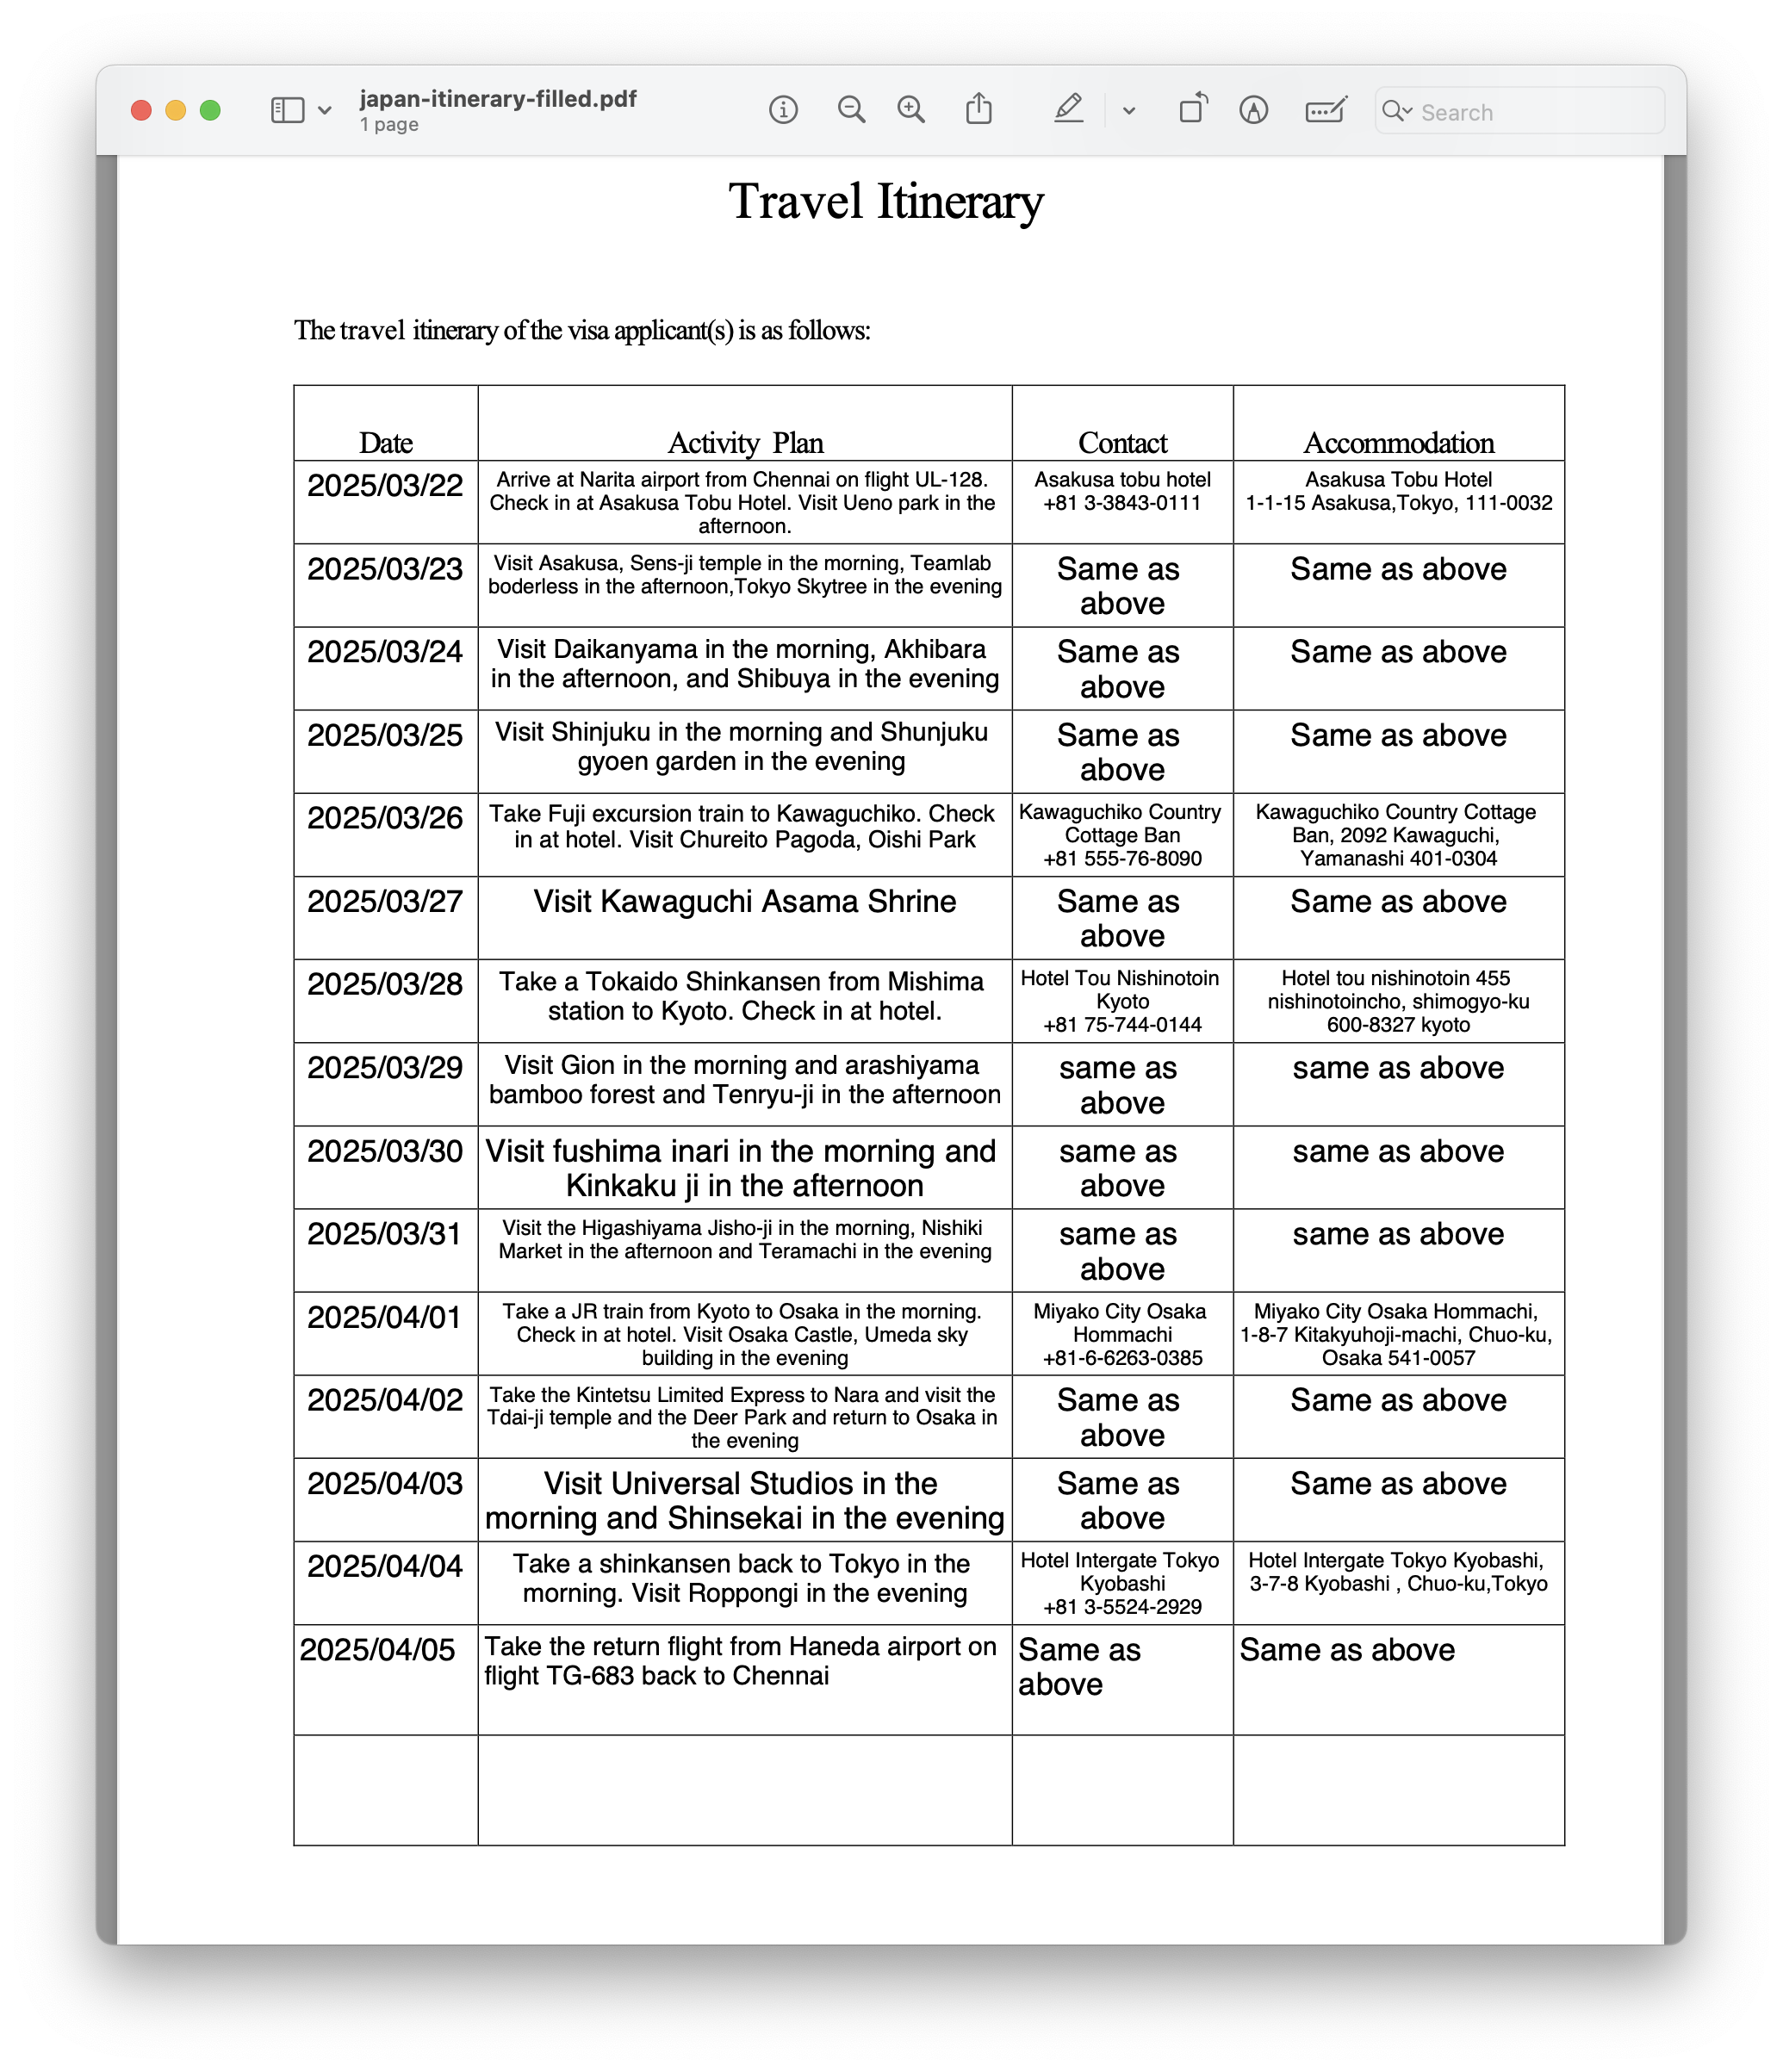
Travel itinerary that we submitted during the visa application.
Plan each day with Google Maps
Google Maps does more than show directions. Use it to:
• Browse photos and 360° views of any place before you visit
• Measure distances between spots
• Build a custom map with all your planned locations
At the start of each day, open your custom map, see what’s nearby, and plan your stops in order of distance. This prevents rushing, missed trains, and backtracking. Many travelers on Reddit share their full Japan custom maps — use those as a starting point, then build your own.
Books that helped
We bought Lonely Planet Japan, Lonely Planet Tokyo, and Lonely Planet Kyoto in PDF form and read them cover to cover. For Kyoto especially, the books added historical context and hidden spots that most Reddit posts skip. If you have patience for a book, these guides pay off.
Travel books uncovered more hidden gems than Instagram ever did. Skip the over-photographed spots — the quieter places reward you far more.
Part 2: Our 14-Day Route
We flew into Narita Airport (about 1 hour from central Tokyo) and departed from Haneda Airport (about 30 minutes from the city).
City / Days
Tokyo — 4 days
Lake Kawaguchiko (Mt. Fuji) — 2 days
Kyoto — 3 days
Osaka — 3 days
Hiroshima & Nara — day trips
Tokyo (final day) — 1 day

Cities we visited in Japan(EXIF location data from mobile photographs)
Stay flexible
Treat your itinerary as a guide, not a rigid schedule. Several days in Japan, we dropped the plan entirely — a half day wandering bookshops in Osaka, stumbling into temple streets in Kyoto we never planned to visit. Your itinerary keeps you in the right city on the right day. Let the city fill the rest.
Our daily ad-hoc plans.
Mt. Fuji: stay two nights
Most travelers do a single day trip to Mt. Fuji and risk poor weather or clouds blocking the view. We stayed two nights at Lake Kawaguchiko, the nearest town with a direct view of Fuji. Two chances at a clear view, peaceful evenings by the lake, and no rush — well worth the extra day.
Give Kyoto more time
Many itineraries cut Kyoto short to spend more time in Tokyo and Osaka. Kyoto rewards slow exploration — every street and temple holds centuries of history. We spent three full days and left wishing for more.
Part 3: Applying for the Japan Visa
The basics
• Application fee: ₹500 (refunded if rejected)
• Approval time: 5–7 working days
• Approval rate: higher than Schengen or New Zealand visas
Find a good travel agent
We applied with barely a month to go and hired a travel agent to handle the visa. After speaking to 15+ agents, most gave vague or confusing advice. The one agent who worked well for us broke down each document, flagged red flags early, and gave clear, actionable steps. A good agent saves significant stress.
Applying from Chennai (which has a Japan consulate) made the process slightly smoother. If your city has a consulate, apply there.
Part 4: Documents Checklist
Bank statements
• 3 months of bank statements
• No fixed rule, but 3–5 lakhs per person serves as a safe benchmark
• Every page needs bank attestation — a seal and signature from your bank. Visit the branch in person for this.
• UPI-heavy accounts can produce 50+ pages. Print every single page.
The bank balance answers two questions for the embassy: can you afford the trip, and do you have a reason to return home? A steady salary history across three months also works in your favor.
Identity documents
• Aadhaar card (or driver’s license)
• Current passport (original)
• Expired passport, if you have one
Travel documents
• Return flight tickets — book refundable tickets to reduce risk. Avoid dummy bookings; embassies sometimes reject them.
• Hotel bookings with free cancellation — confirm the booking without paying upfront, then use the confirmation as proof.
• Shinkansen (bullet train) tickets
• Pre-booked attraction tickets (e.g., TeamLab)
Employment documents
NOC letter from your employer on company letterhead, signed by a manager or HR. It must include:
• Your full name
• Company name, address, and registration number
• Duration of employment
• Annual salary
• Your passport number
• Travel dates (must match your visa application dates)
• A statement that you will return to work after the trip
Also include:
• Last 3 months of pay slips
• ITR acknowledgement for the last 3 years
Travel insurance
Including travel insurance signals careful planning to the embassy. Not a formal requirement, but a positive signal for approval. We used HDFC Ergo.
Married couples without a marriage certificate
A spouse’s name in your passport works as basic proof. The embassy may still call asking for more — we submitted our wedding invitation and a health insurance document listing each other as nominee. Both together satisfied the requirement.
Part 5: Tips & Tricks
Shinkansen (Bullet Trains)
Book Shinkansen tickets on the Smart EX app website before you leave India. Register with a credit card, select your trains, and confirm your seats. We booked five rides:
• Mishima → Kyoto
• Kyoto → Osaka
• Osaka → Hiroshima
• Hiroshima → Osaka
• Osaka → Tokyo
Pre-booking guarantees seats during sakura season and keeps you on schedule. It also naturally anchors your day-to-day plan.

Cabs
Taxis in Japan cost far more than in India. We used GO Taxi — the only cab app that accepted our Indian credit card.
Critical tip: add your Indian credit card to the GO Taxi app before you leave India. Adding a card from within Japan doesn’t work.
The higher cost made sense for us. After spending so much to reach Japan, saving 20 minutes per location mattered more than saving on cab fare.
TeamLab
TeamLab offers two immersive digital art exhibitions in Tokyo — TeamLab Borderless and TeamLab Planets. Both exceeded our expectations. Book tickets at least a month in advance during peak season.
eSIM and Phone Plan
• Data: Ubigi eSIM — install the Ubigi app and activate your plan while still in India. The moment you land in Japan, it connects automatically.
• Calls: Airtel international roaming — enough for calls home to family.
Luggage Courier Service (Takkyubin)
One of the best-kept travel secrets in Japan: you don’t need to carry your suitcases between cities.
Most travelers from India bring two large suitcases for a 14-day trip. Lugging those through packed metro trains, narrow bus aisles, and busy Shinkansen carriages turns every city transfer into a physical ordeal. The Shinkansen also enforces a strict luggage rule — bags with total dimensions (length + width + height) above 160 cm require a free advance reservation for an oversized baggage space. Without that reservation, you pay an on-the-spot ¥1,000 surcharge per item.
The solution: takkyubin — Japan’s door-to-door luggage courier service. You hand your bags to your hotel, and they arrive at your next hotel, usually overnight.
How it works:
• Tell your hotel the evening before you check out — give them the name and address of your next hotel.
• The front desk calls ahead to confirm the booking at the destination hotel.
• Fill and sign a short delivery form. The charge depends on bag size and weight — typically ¥1,700–2,500 per bag.
• Your bags vanish in the morning and appear in the lobby of your next hotel within one to two days.
Timing tip: Ask your hotel how long delivery takes to your next city. Tokyo to Kyoto or Osaka typically takes one day. If delivery takes two days, send the bags a day before you plan to leave. For short hops like Kyoto to Osaka, same-day delivery often works.
The most reliable service:Yamato Transport (also known as Kuroneko Yamato, meaning Black Cat Yamato — look for the black cat carrying a kitten on the logo). It stands as Japan’s largest and most trusted courier. Most hotels have a direct tie-up with Yamato or Sagawa Express, the second major provider. You can also drop bags at any 7-Eleven, FamilyMart, or Lawson convenience store displaying the Yamato logo.
Hotel receptionists would help out in checking with the next destination hotel and to fill up the form.
We used the service three times across the trip without a single problem. For first-timers, handing over a suitcase to a courier feels unfamiliar — but Japan runs this system with the same reliability it brings to everything else. Your bags will reach the destination intact and on time.
14 Days in Japan: What We Did, City by City
This section covers the day-by-day account of our 14-day trip. For the planning, visa, and booking process, refer to Part 1 of this guide.
Day 1 — Landing in Tokyo
We landed at Narita Airport at 6 a.m. Narita sits about 60 km from central Tokyo, roughly 1.5 hours by bus. Immigration moved fast — fingerprints, iris scan, a few questions from an officer, and we walked out in under 10 minutes despite the sakura-season crowds.
Get a Suica card before leaving the airport
The Suica card functions as a universal prepaid card throughout Japan. Use it for metro trains, local buses, and purchases at convenience stores, grocery shops, and vending machines. One card covers nearly everything.
To get one, head one floor down from arrivals and find the transit kiosk. Insert yen, press a few buttons, and the machine dispenses the card. Travelers from India cannot top up via Apple Pay, so carry enough yen to load it at the kiosk. You can reload with cash at any of these locations:
• Convenience store cashier counters (7-Eleven, FamilyMart, MiniStop)
• 7-Eleven (Seven Bank) ATMs
Maximum balance: ¥20,000. Top up in ¥1,000 increments.
Getting from Narita to the city
Airport limousine buses run directly from Narita to hotels across central Tokyo. We pre-booked our tickets online after receiving our visa — on peak days, walk-up passengers can wait 2–3 hours for an available slot. With a booking, you show a QR code and board.
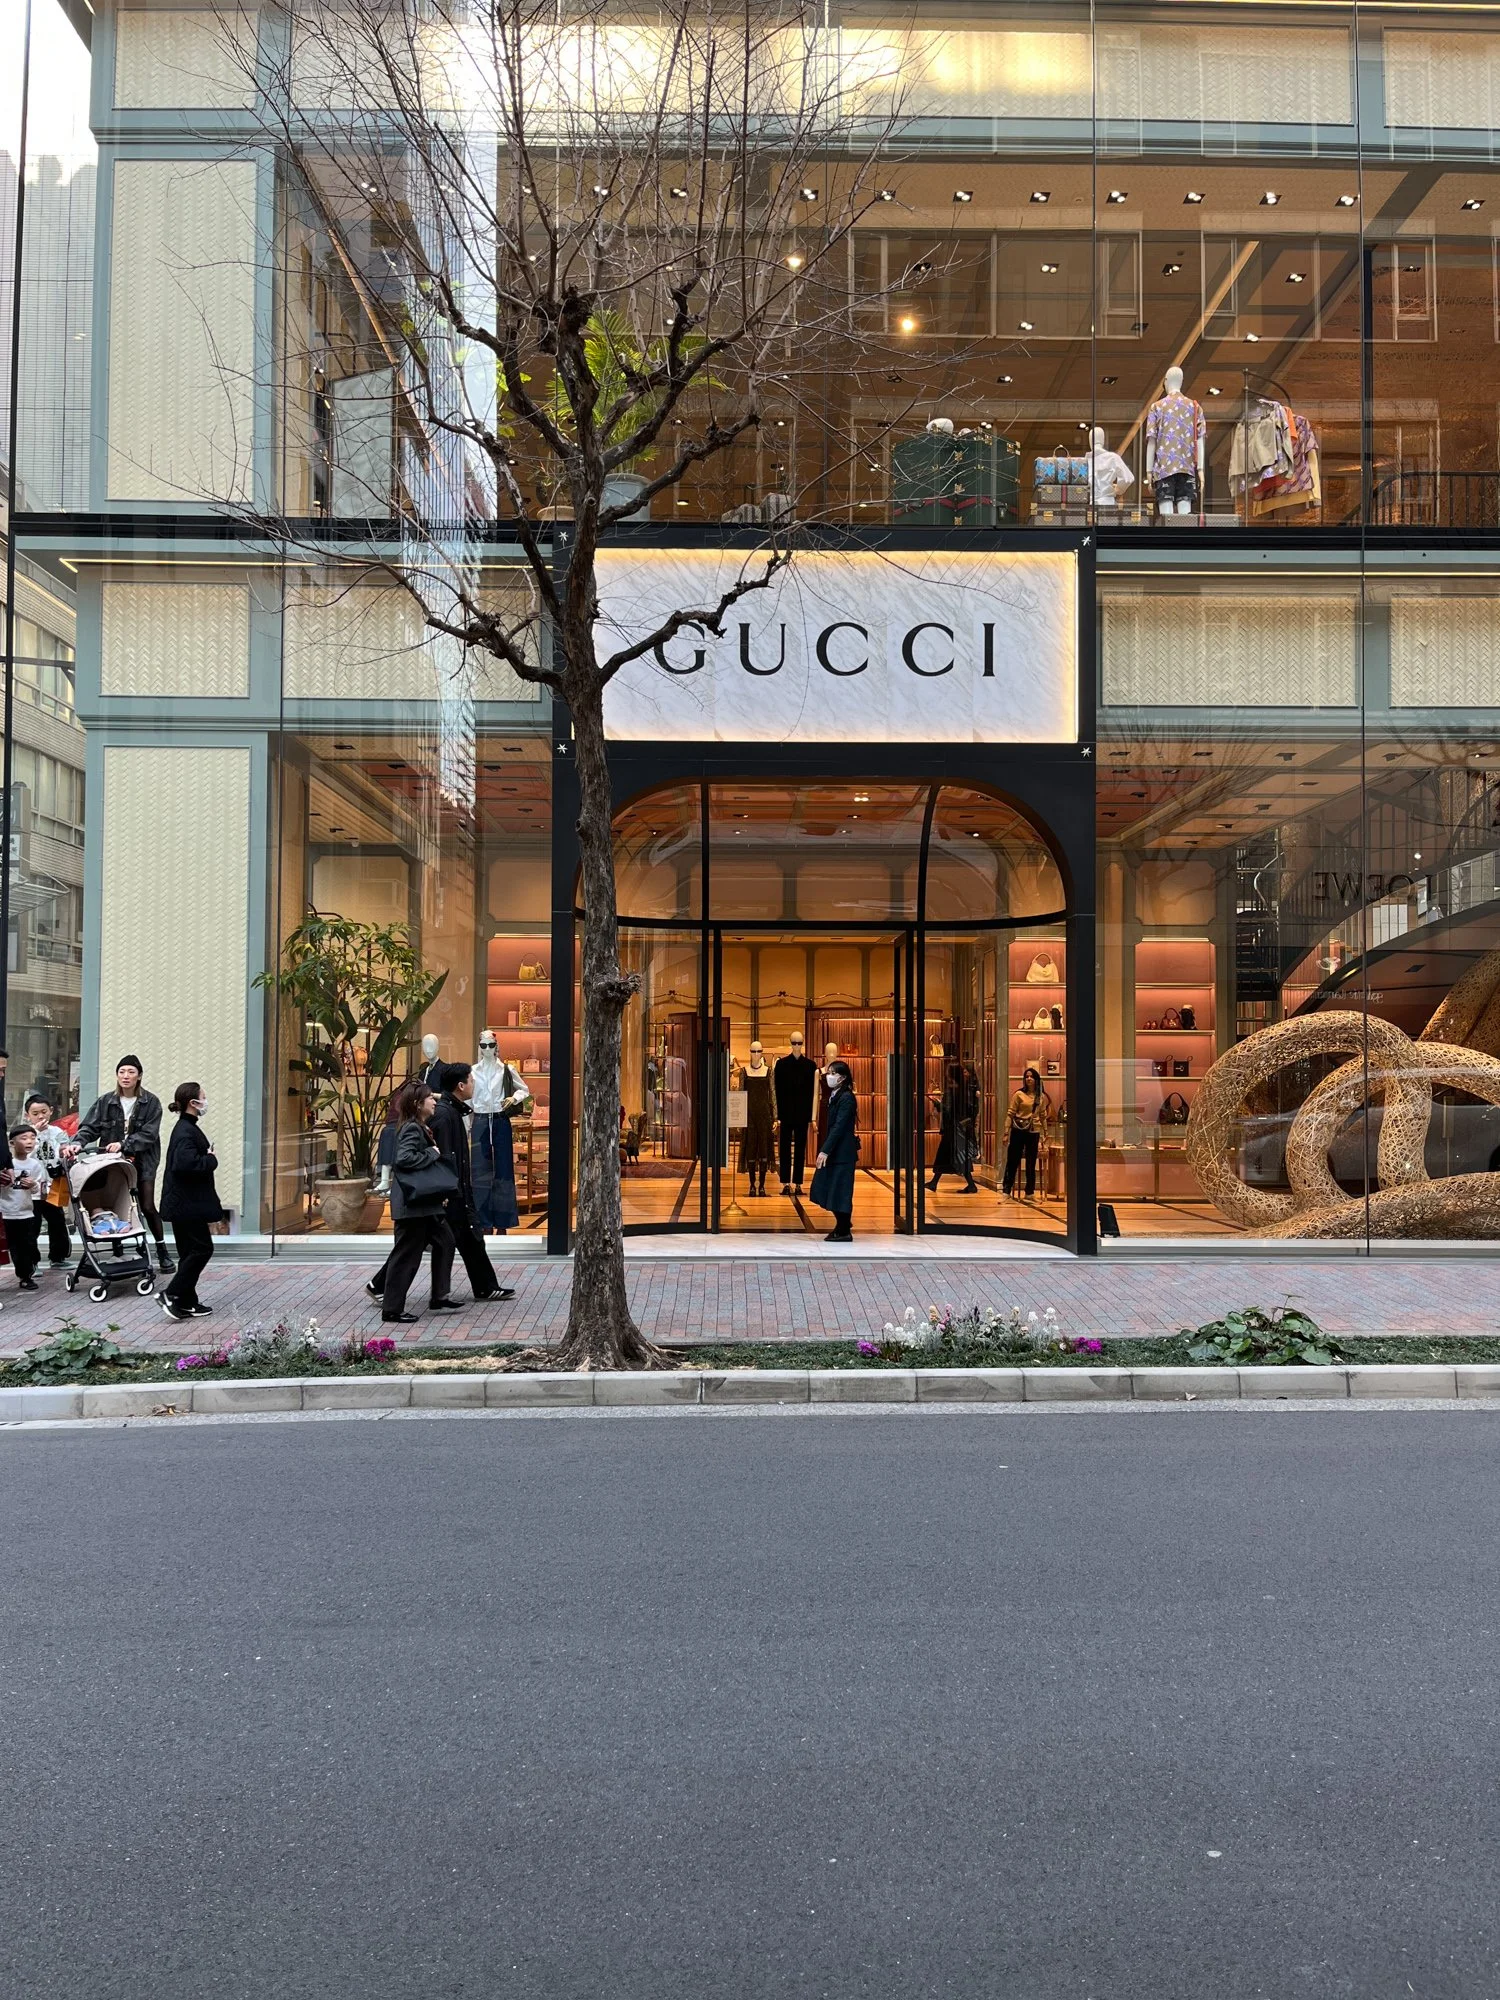
We chose to stay in Ginza — a high-end shopping district and a central location that made navigating the city simple.
Getting around: trains and buses
Tokyo’s train network looks overwhelming at first. After a couple of rides, it becomes second nature. Google Maps handles everything — it names the line, the train number, and exactly which stop to exit. Most station signage also appears in English.
Buses deserve more credit than most tourists give them. In most Tokyo buses, the fare stays flat regardless of distance — about ¥200 when we visited. Board, find a seat, follow Google Maps, and tap your Suica card at the exit near the driver. Simple and reliable.
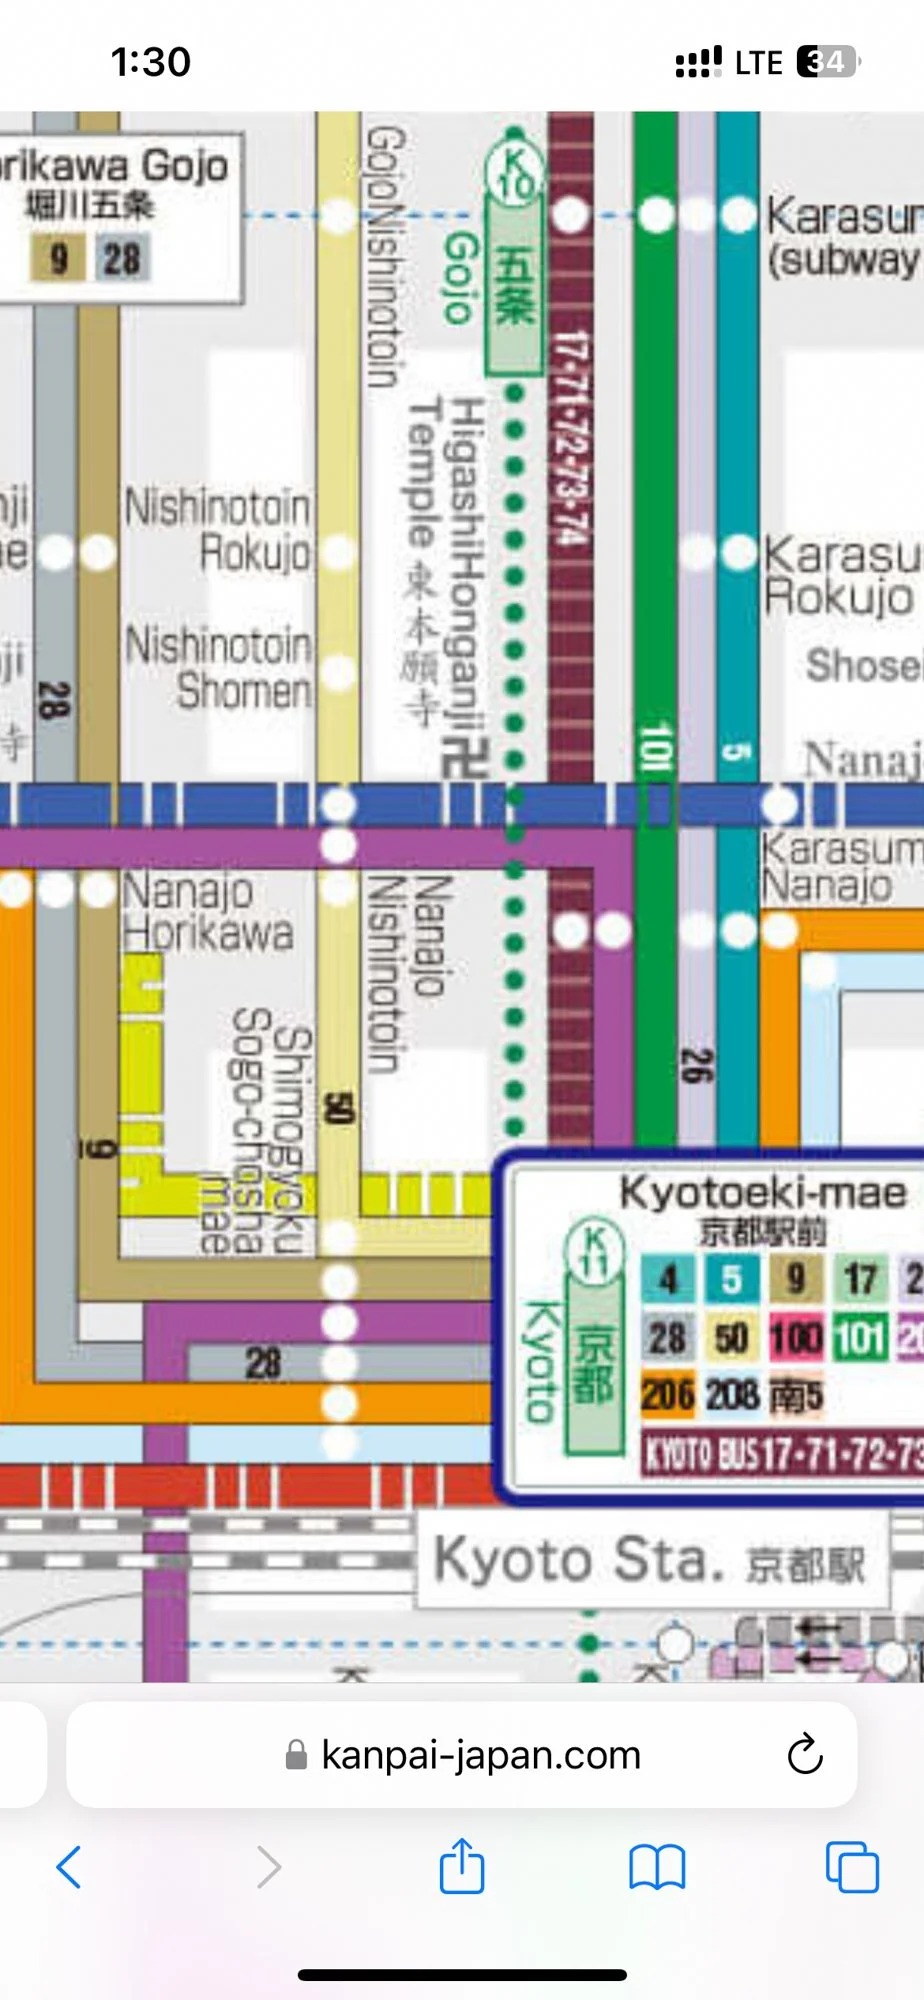
Transit maps look overwhelming at first — cryptic colour codes, dozens of lines. After a day or two of use, reading them becomes muscle memory.
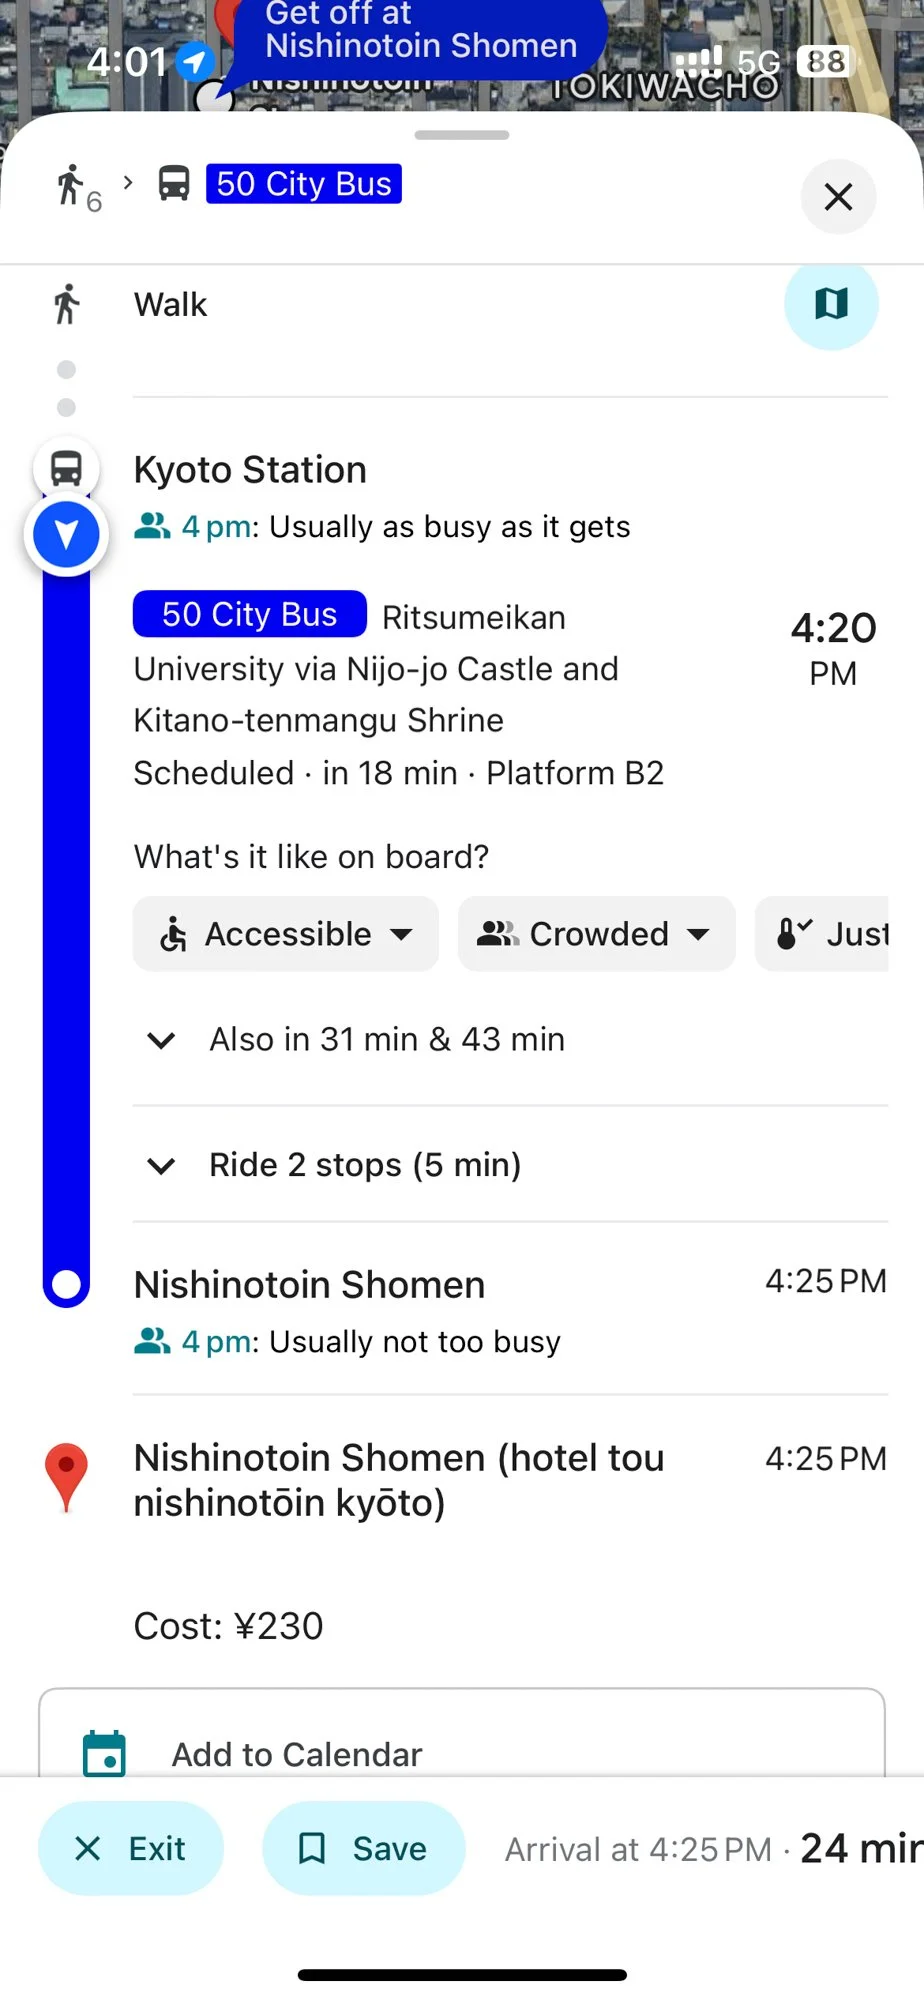
Google Maps works remarkably well for navigating Japan's transit — it shows scheduled bus and train times, stop numbers, line names, and step-by-step transfer instructions across Tokyo and Osaka's complex networks. It won't always reflect live delays, but for planning and day-to-day navigation it stays accurate enough to rely on completely. The best part is, it is so real-time, just follow what it tells you — the right stop, the right train, the right exit — and it rarely lets you down.
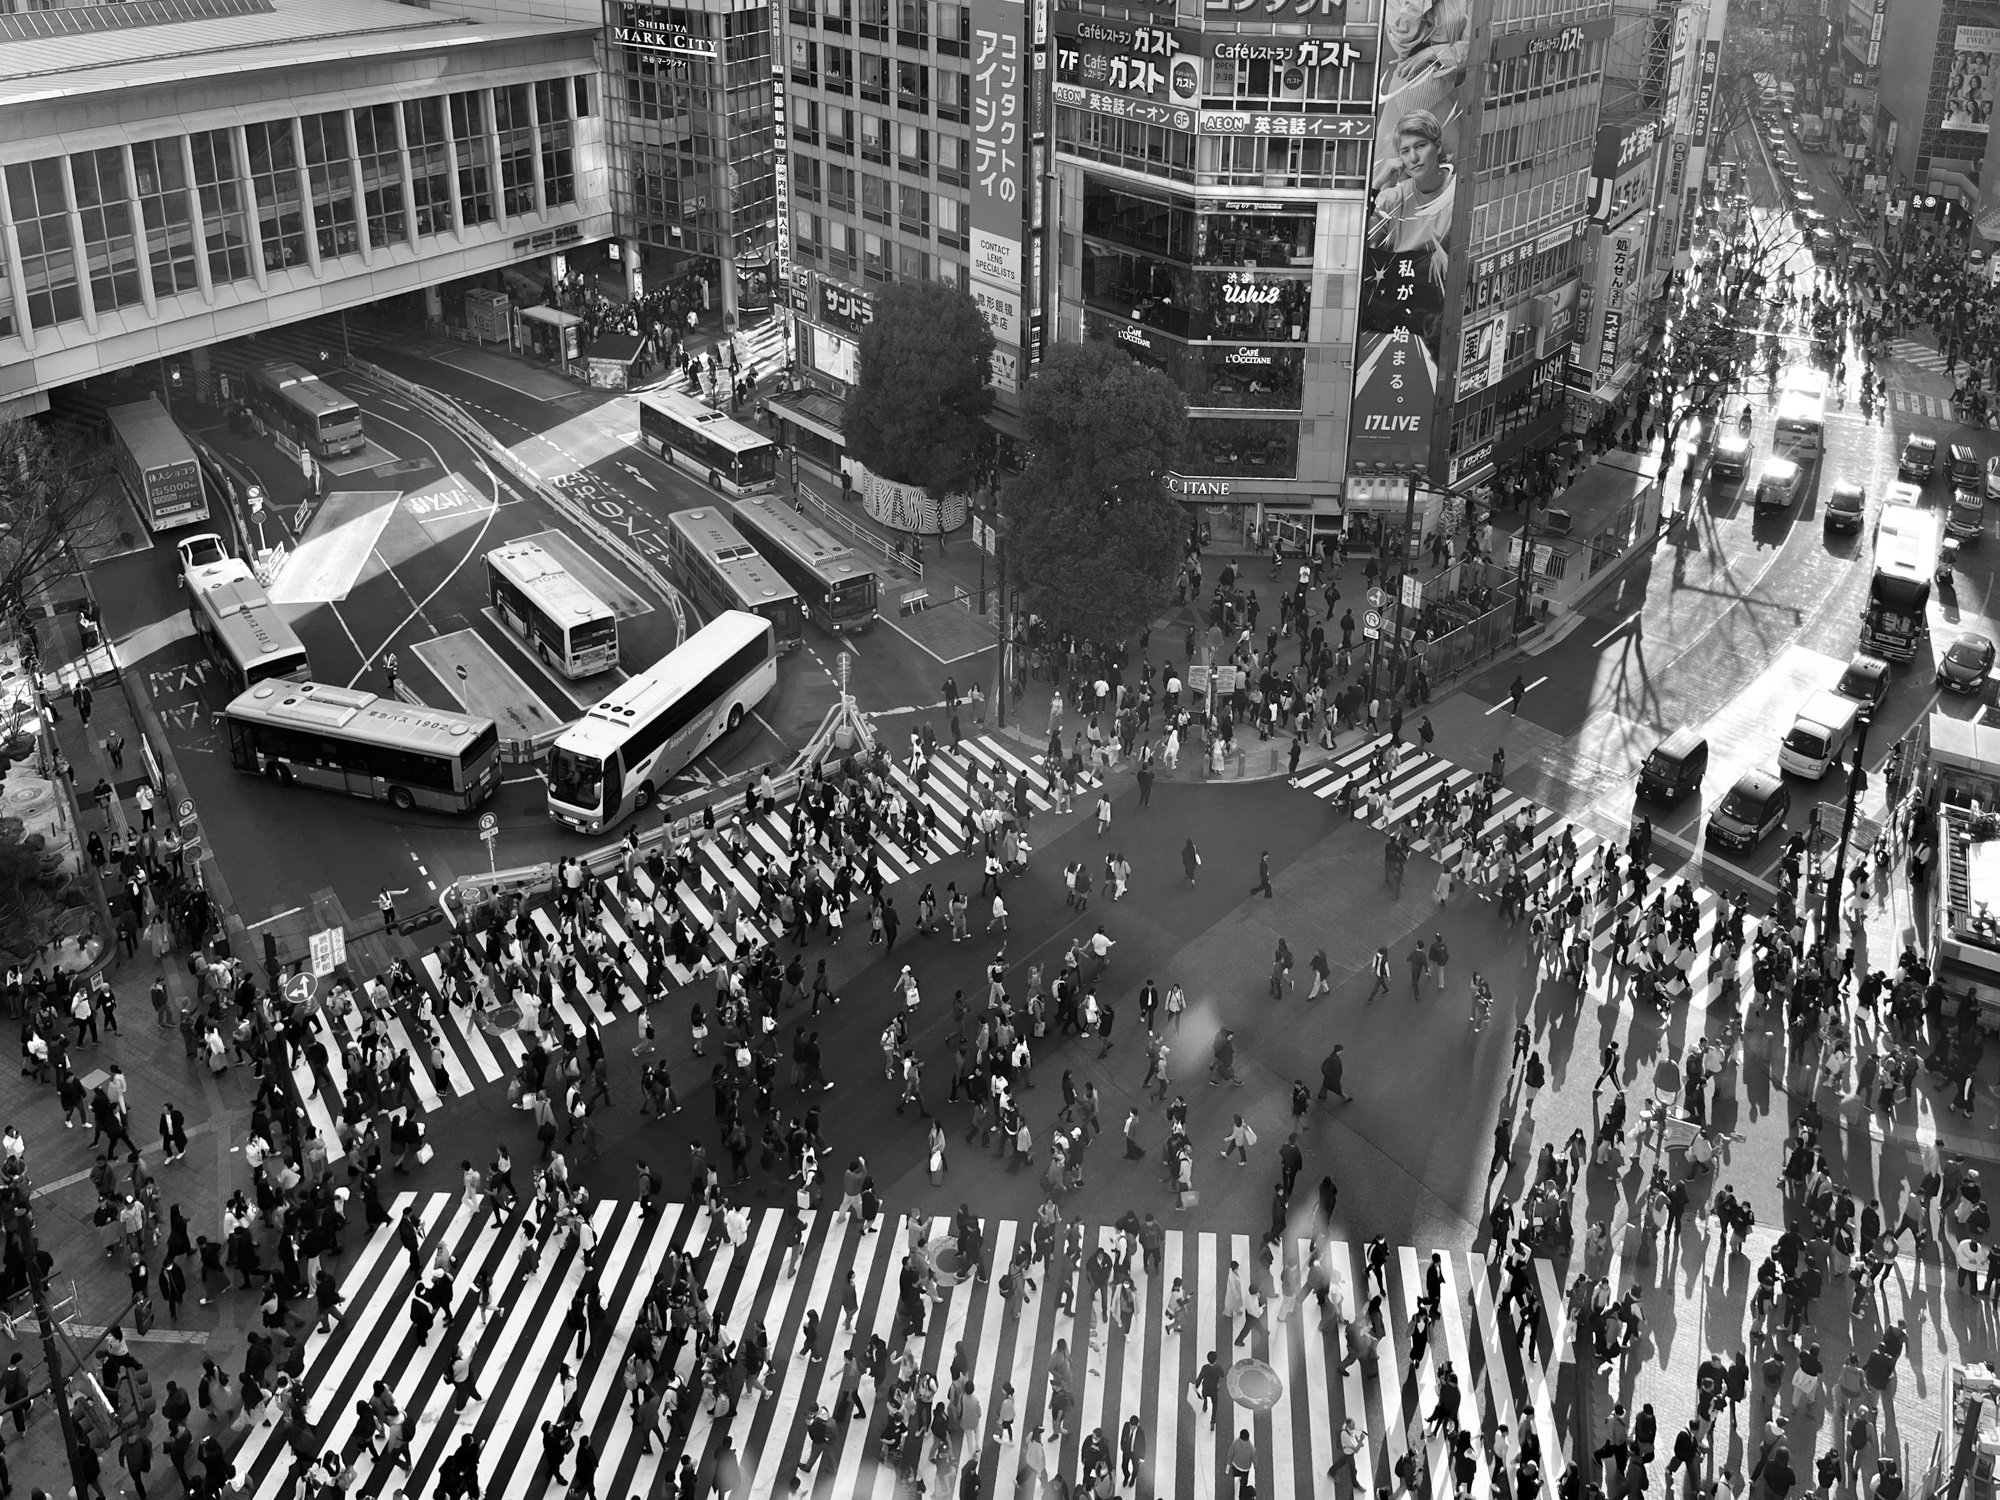
Day 1 places: Ginza shopping district, Shibuya Crossing
Days 2–4 — Exploring Tokyo
Day 2: Sensō-ji Temple in Asakusa (one of Tokyo’s oldest and most visited temples), then Ueno Park.
Day 3: Daikanyama (a quiet, tree-lined neighbourhood good for cafes and boutiques), TeamLab Borderless, Tokyo Skytree.
Day 4 (morning): TeamLab Planets, Odaiba Seaside Park, Shinjuku.
TeamLab note: Both TeamLab Borderless and TeamLab Planets rank among the best experiences in Tokyo. Book tickets at least a month ahead during sakura season.
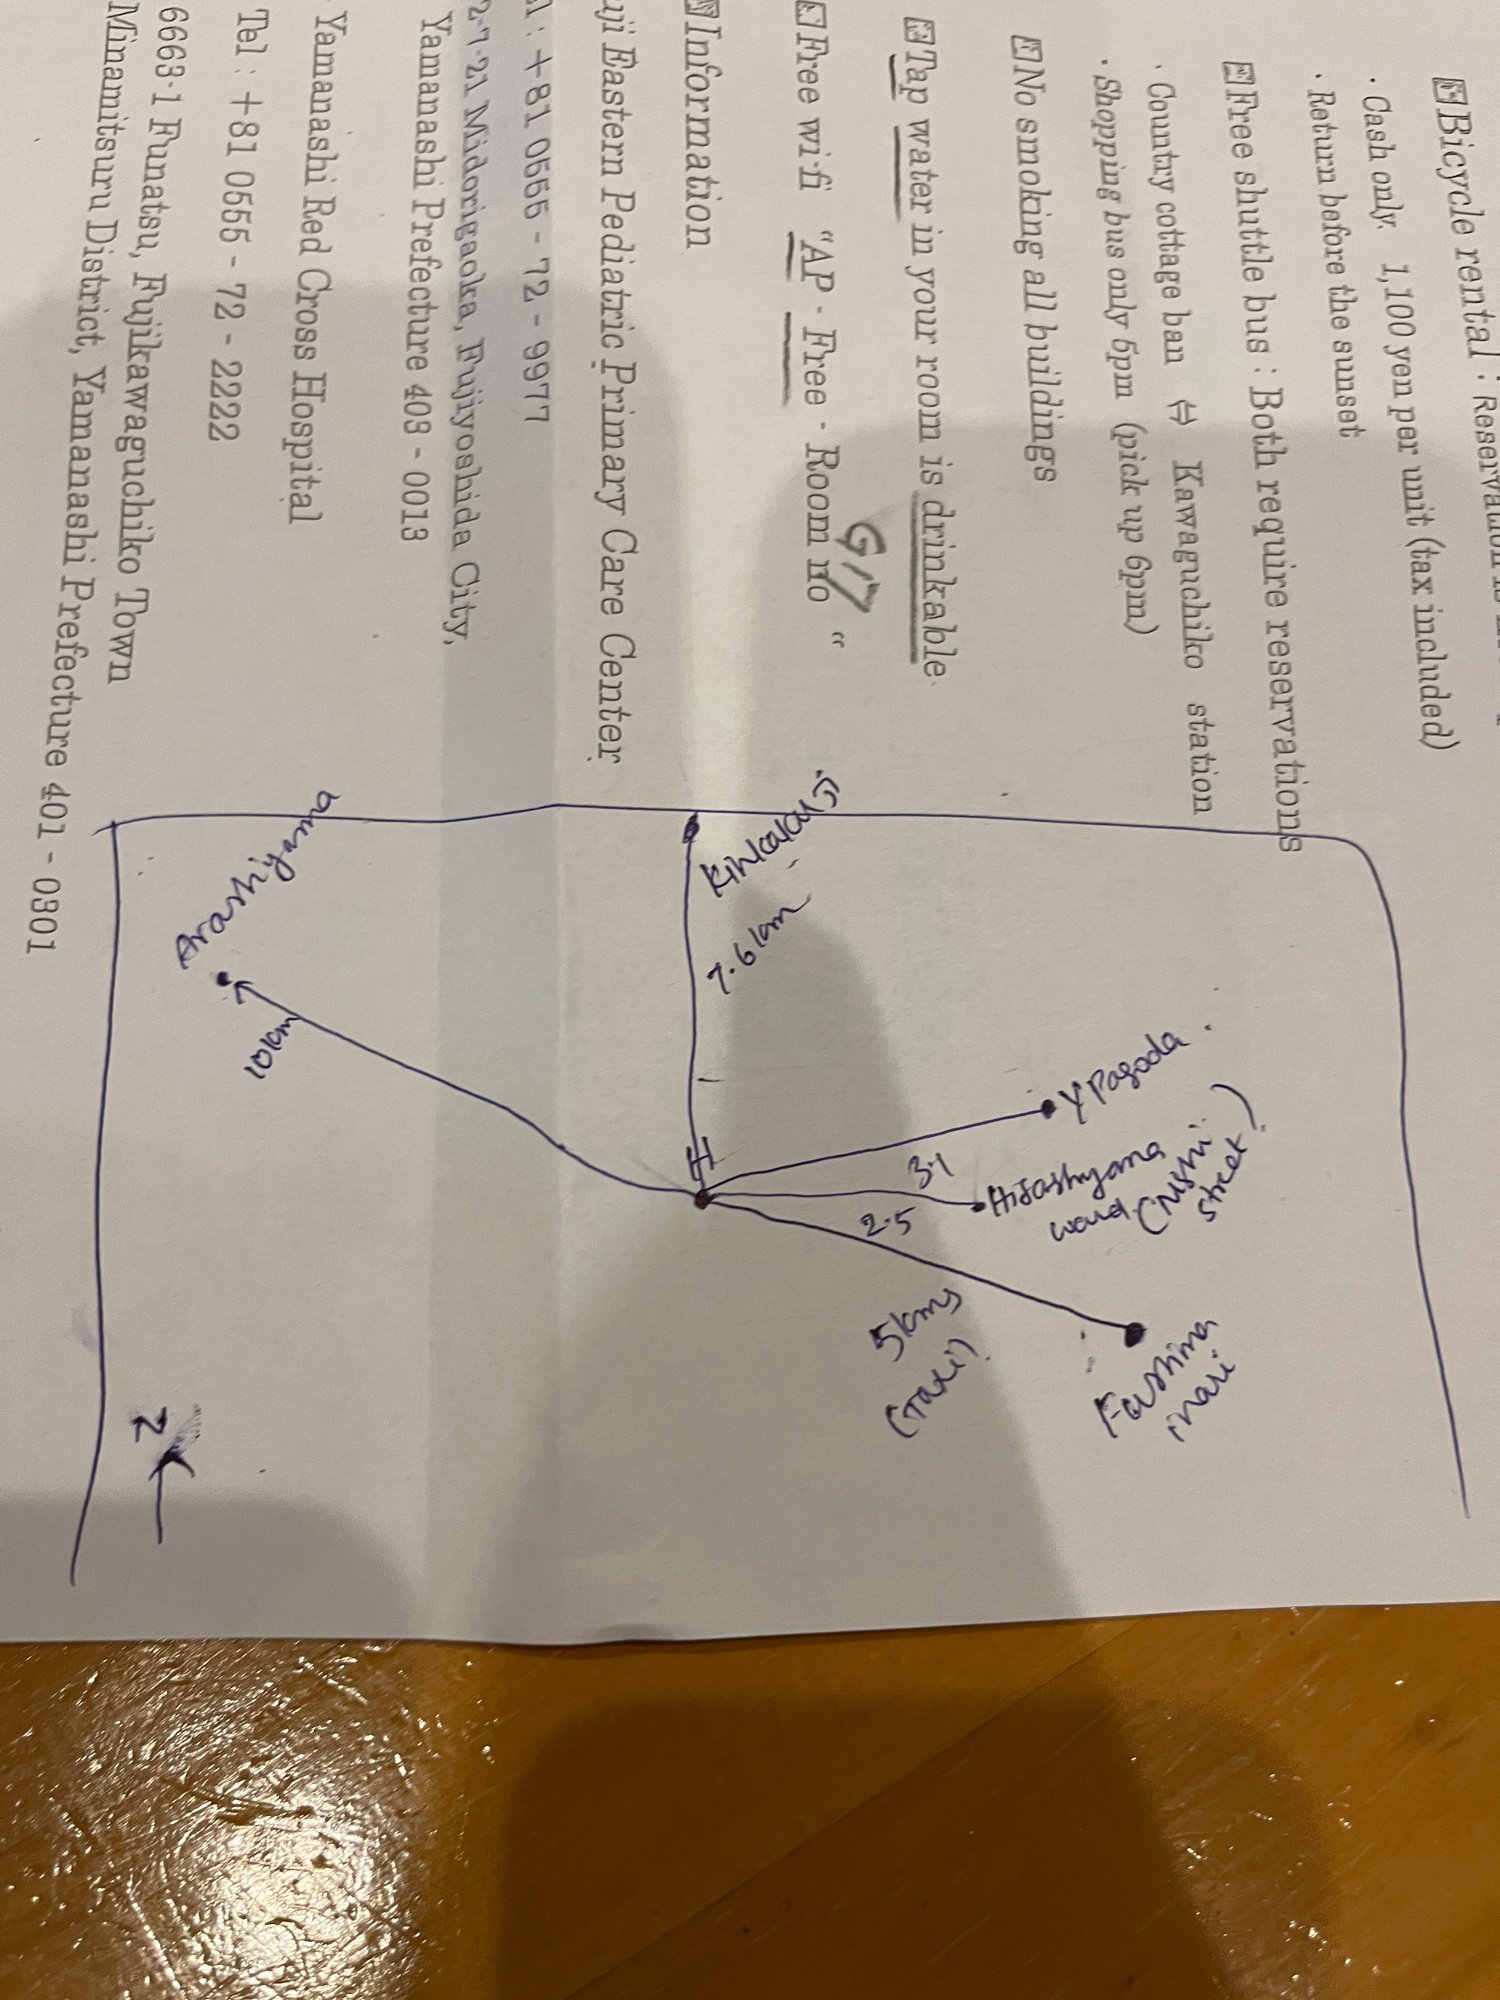
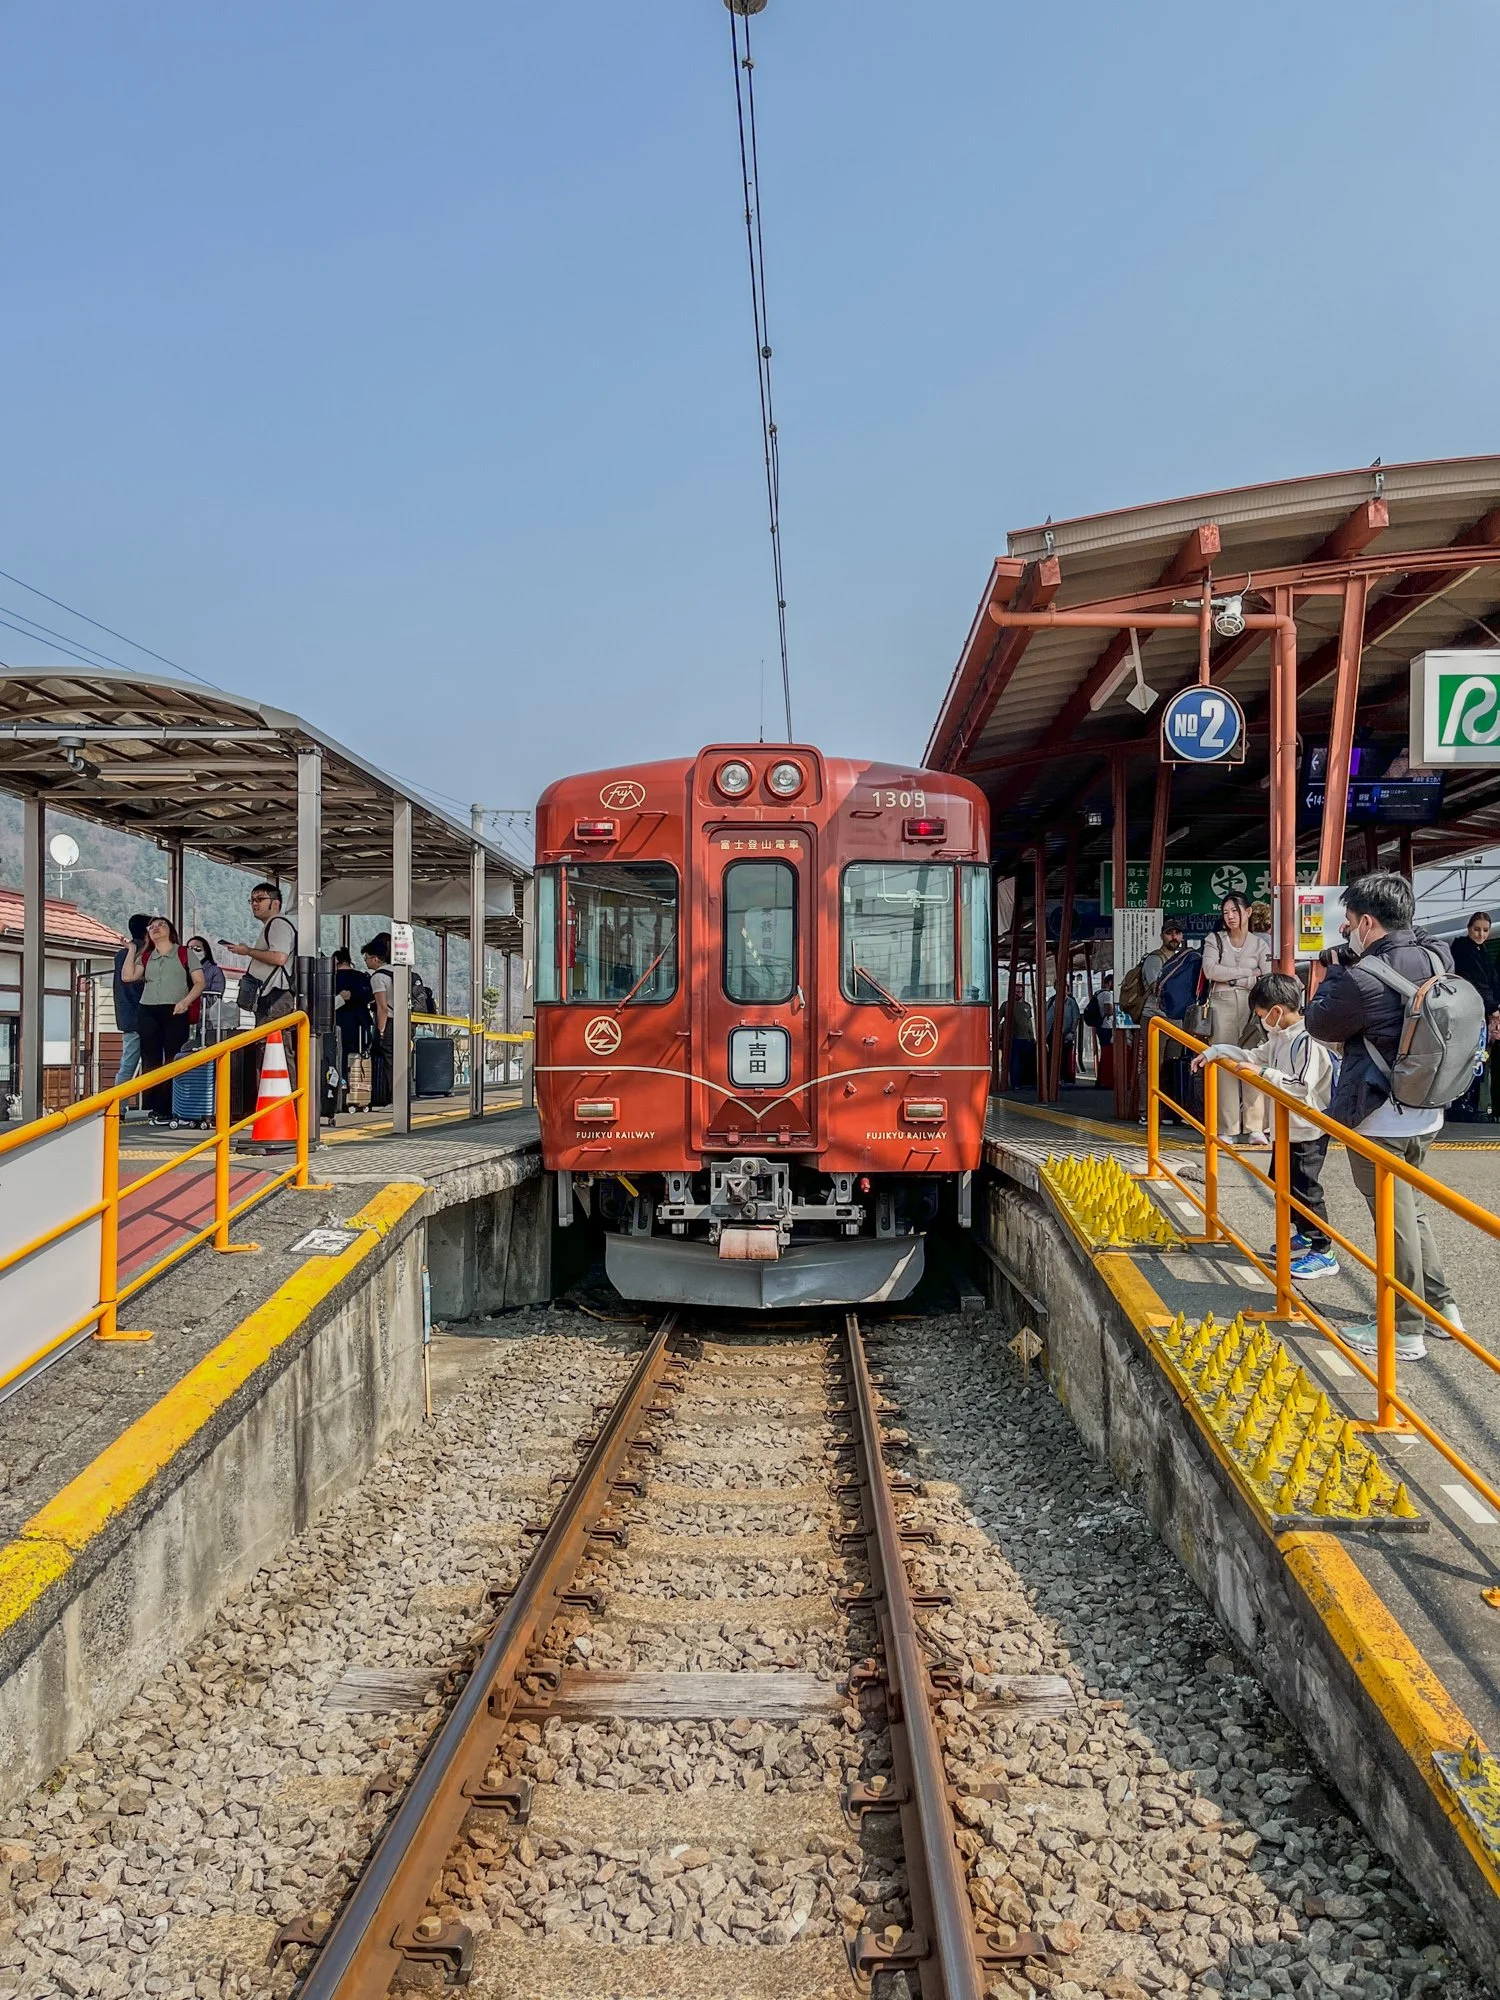
Days 4–5 — Lake Kawaguchiko (Mt. Fuji)
On Day 4’s afternoon, we left Tokyo for Fujikawaguchiko — the town on the shore of Lake Kawaguchiko, and the best base for viewing Mt. Fuji.
There’s no direct Shinkansen to Fujikawaguchiko. We travelled in an inter-city train.
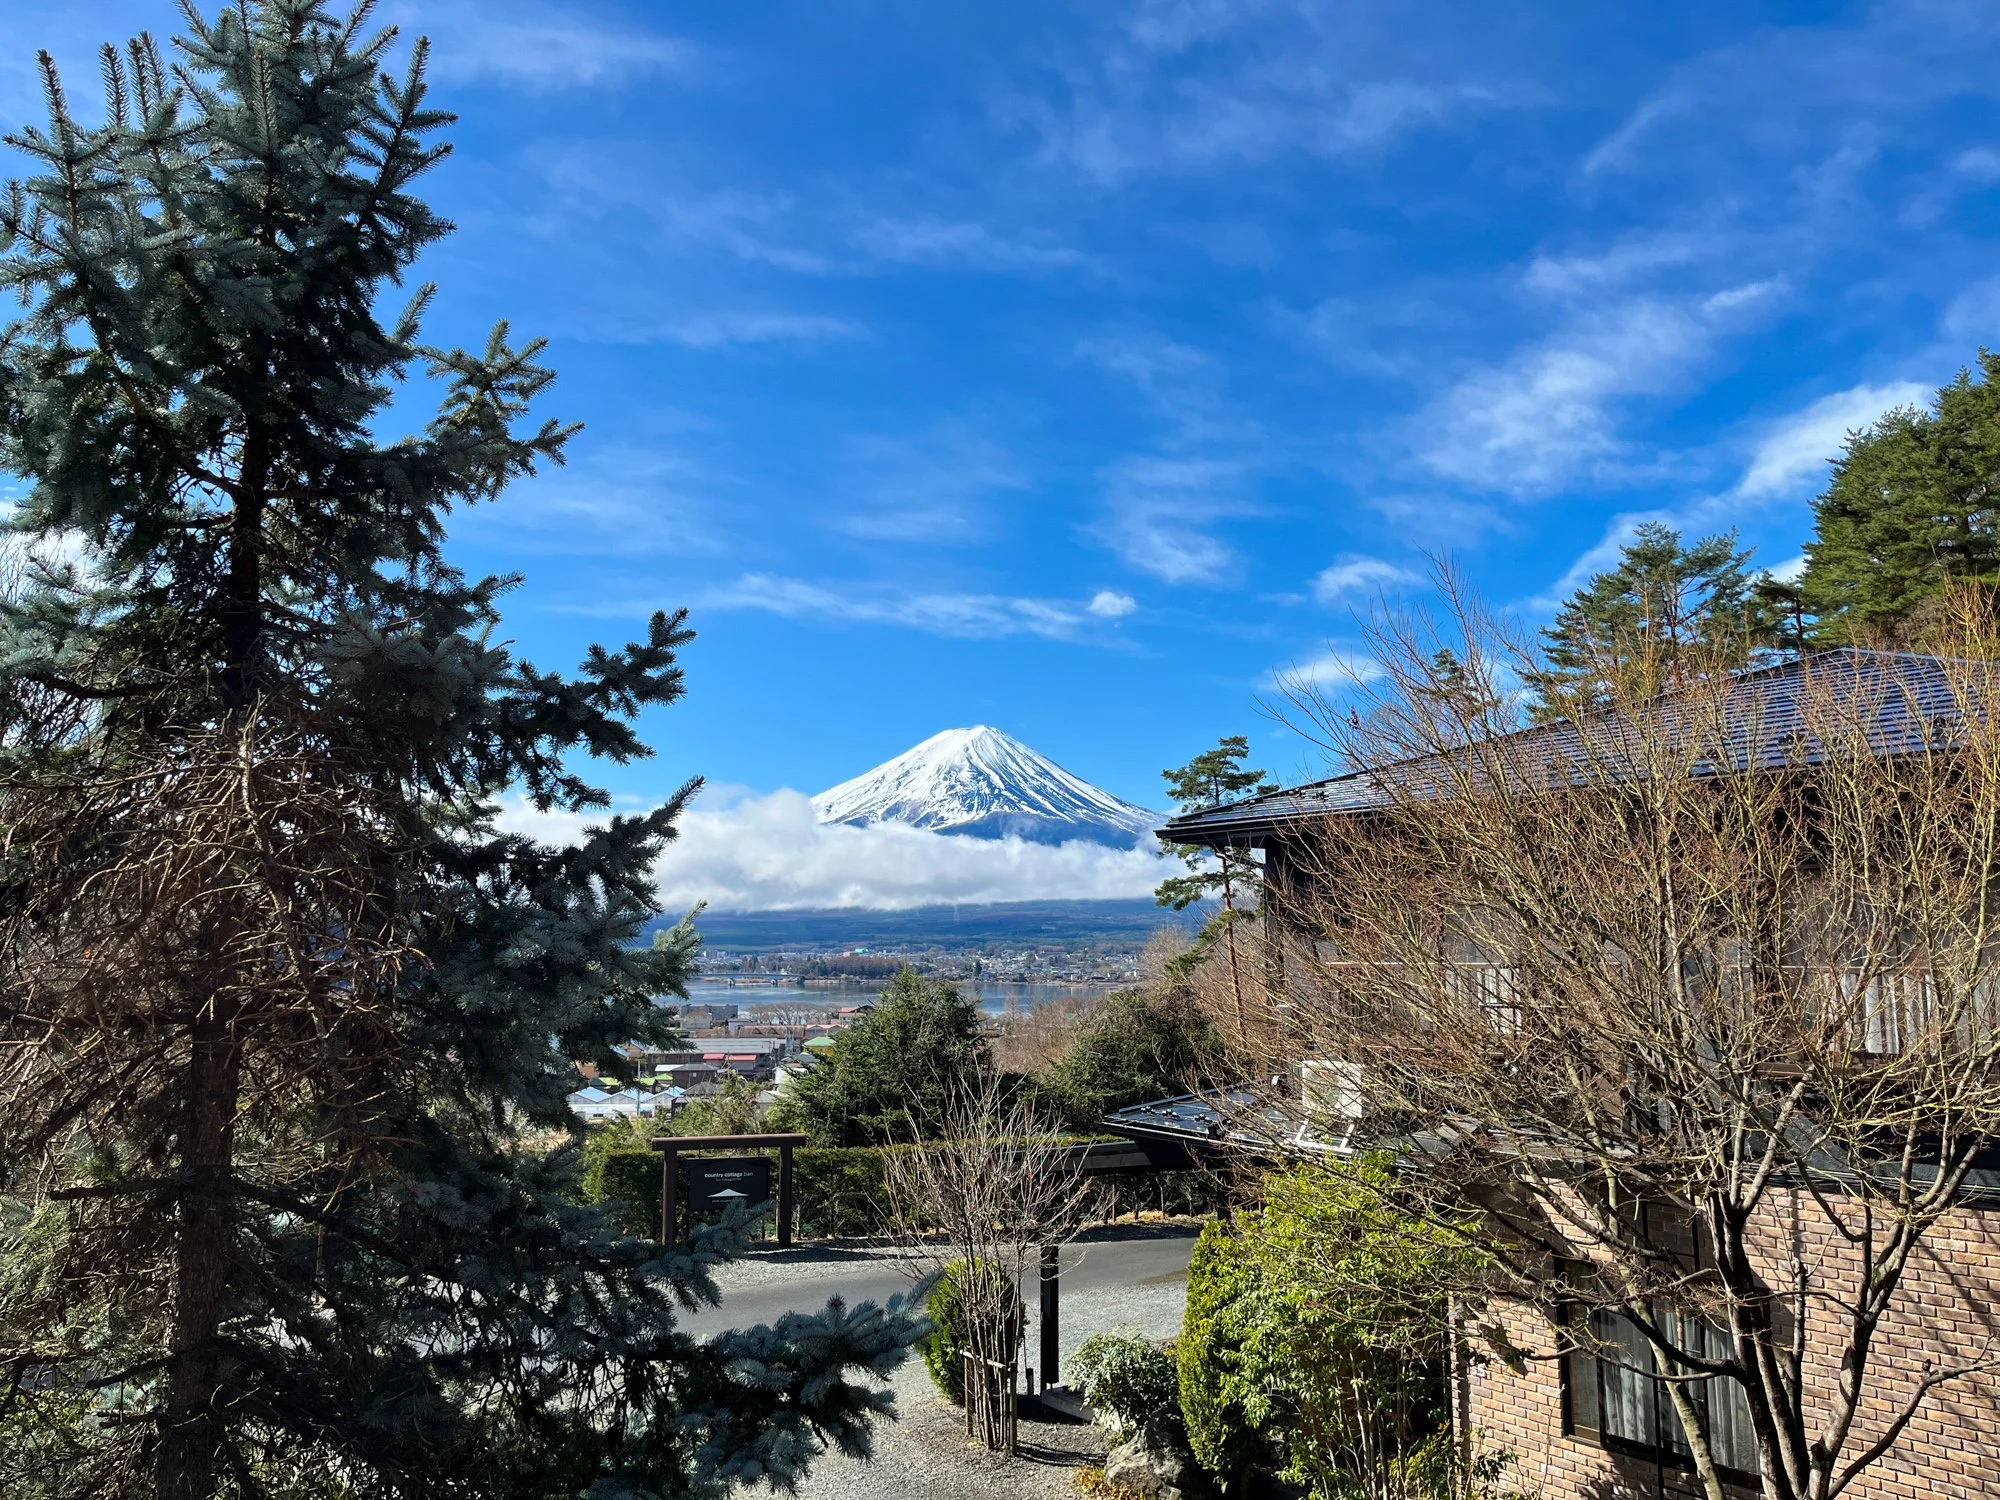
Day 4 evening: Mt. Fuji stayed behind fog for most of the afternoon. Just before sunset, the clouds broke and the mountain appeared clearly from our hotel window.
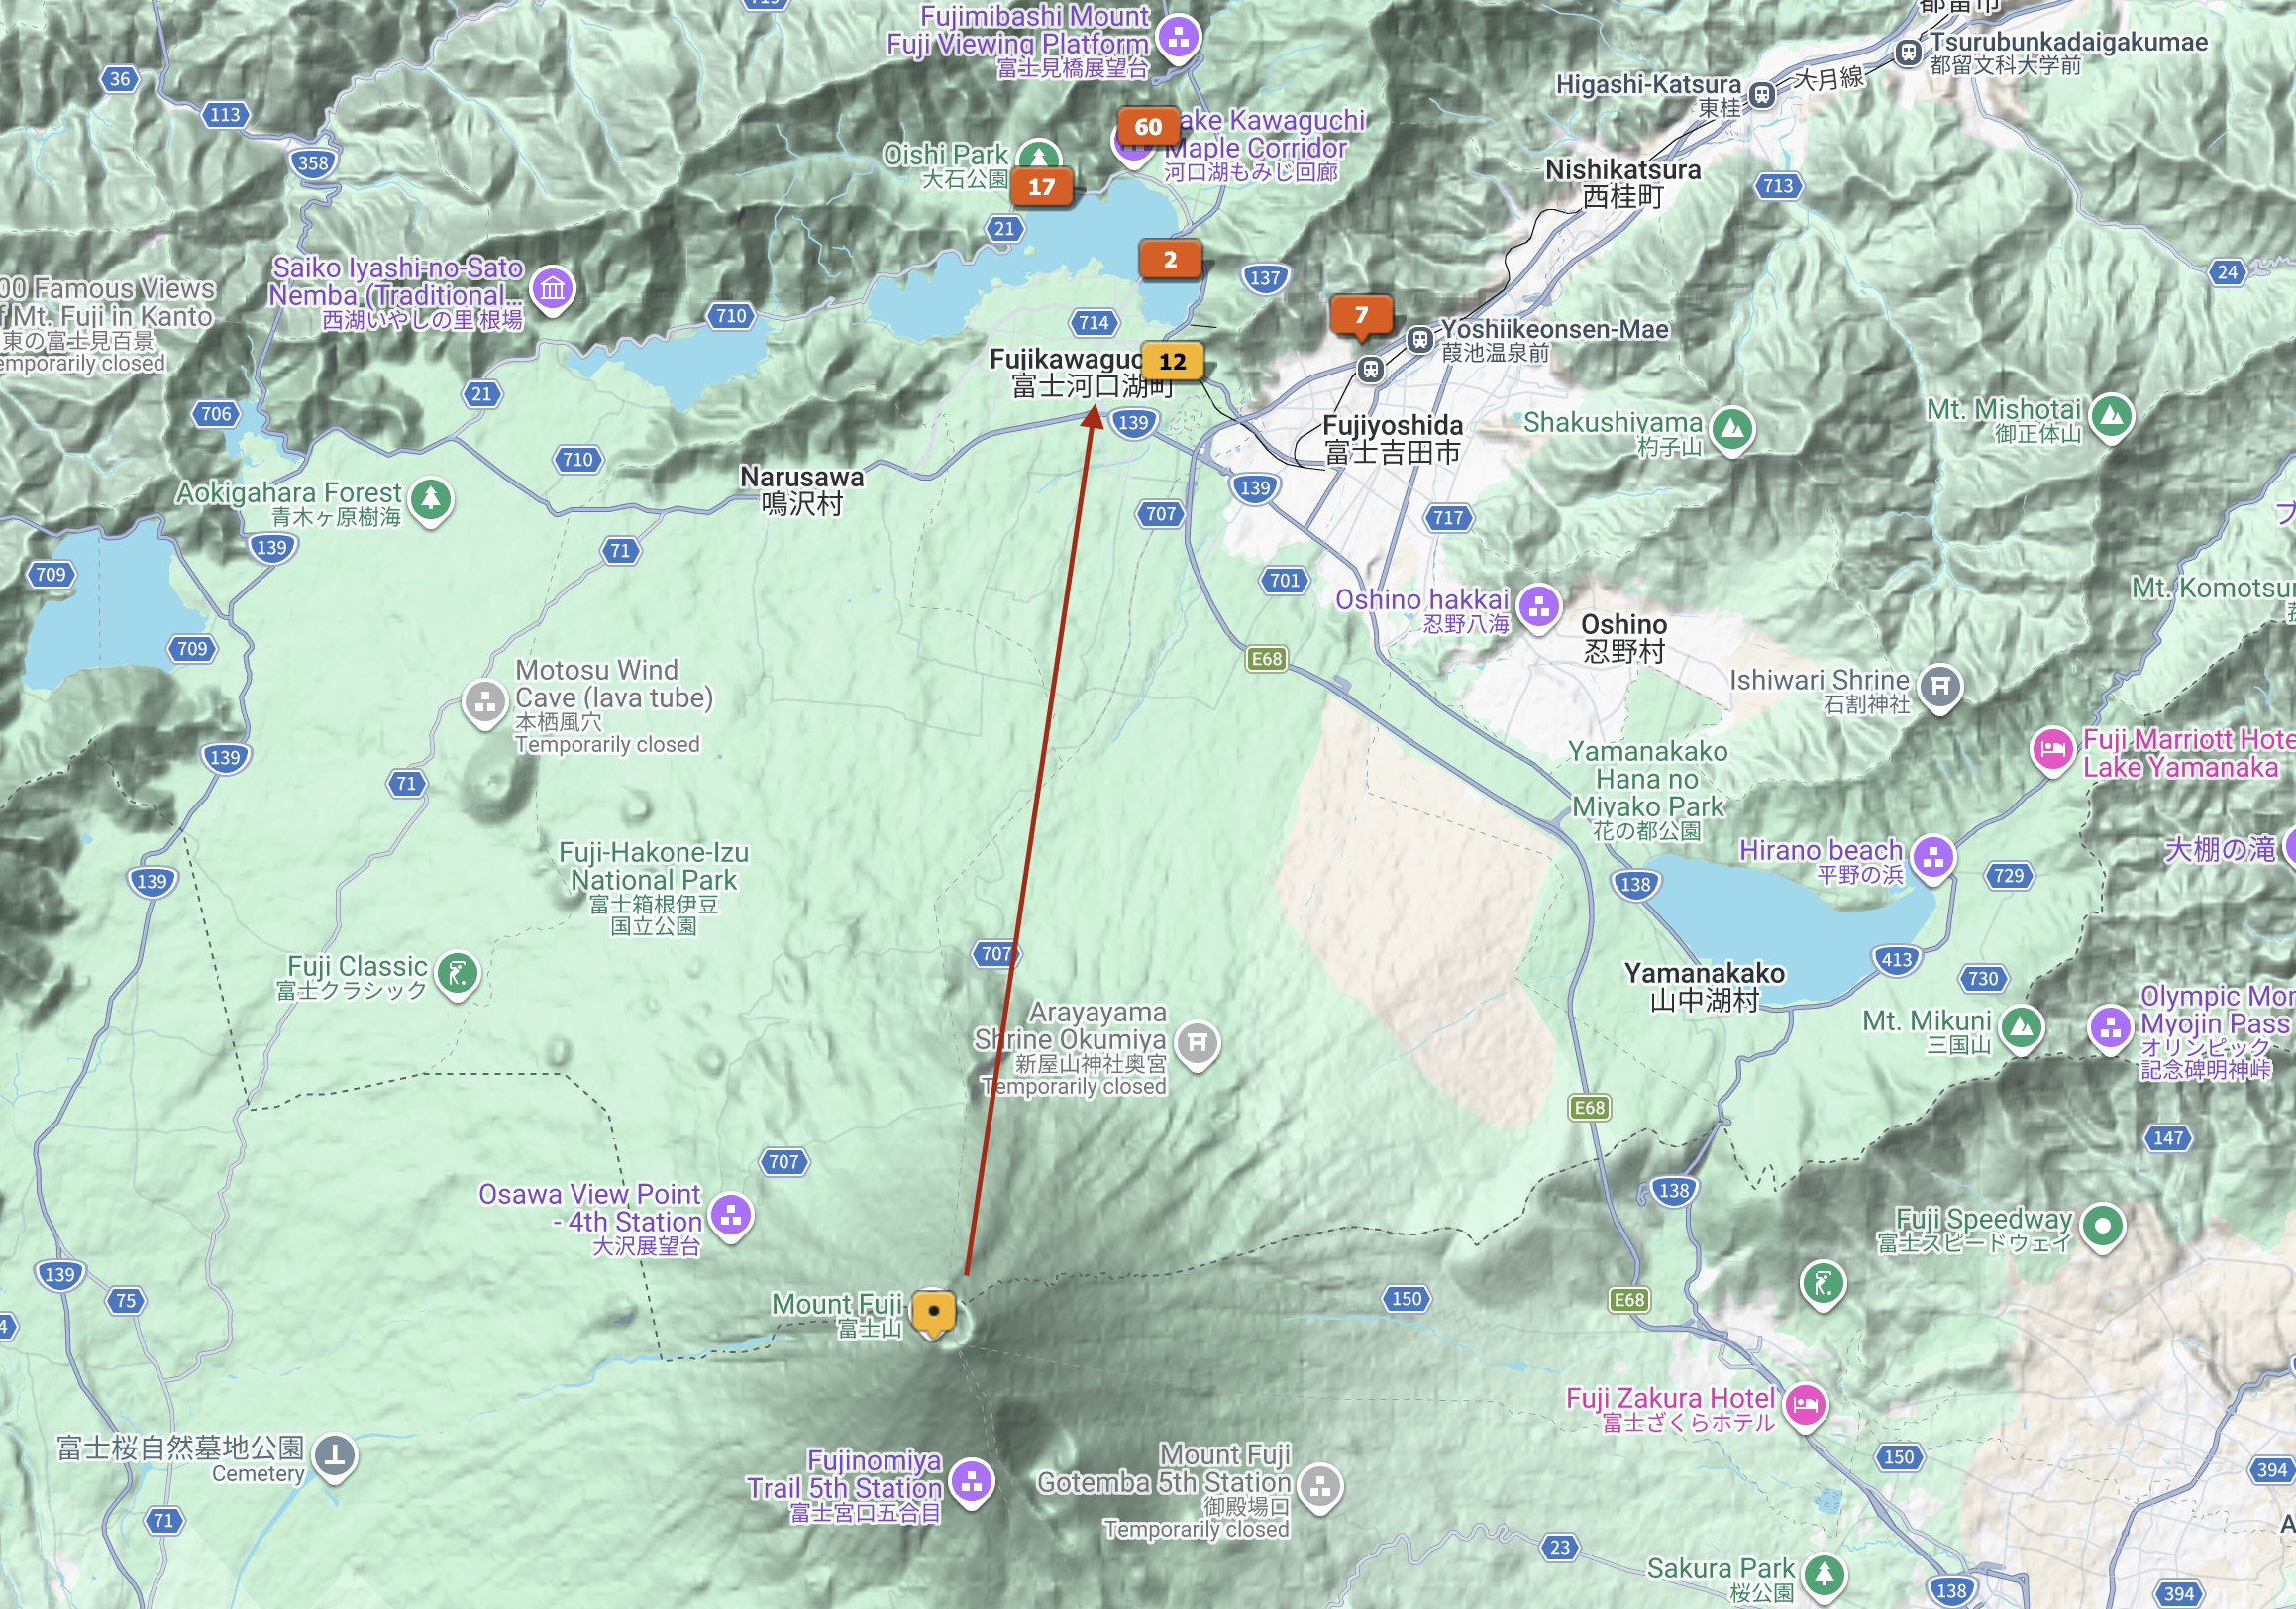
Day 5: We walked through Oishi Park for an open lakeside view of Fuji. Then we climbed to Chureito Pagoda — a five-story pagoda on a hillside above Fujiyoshida city, with Fuji as the backdrop.
Why stay two nights?
Most travelers visit Mt. Fuji as a one-day trip. One overcast day means you see nothing. Two nights gives you two chances at a clear view, and the evenings around the lake carry their own quiet beauty.
Days 6–9 — Kyoto
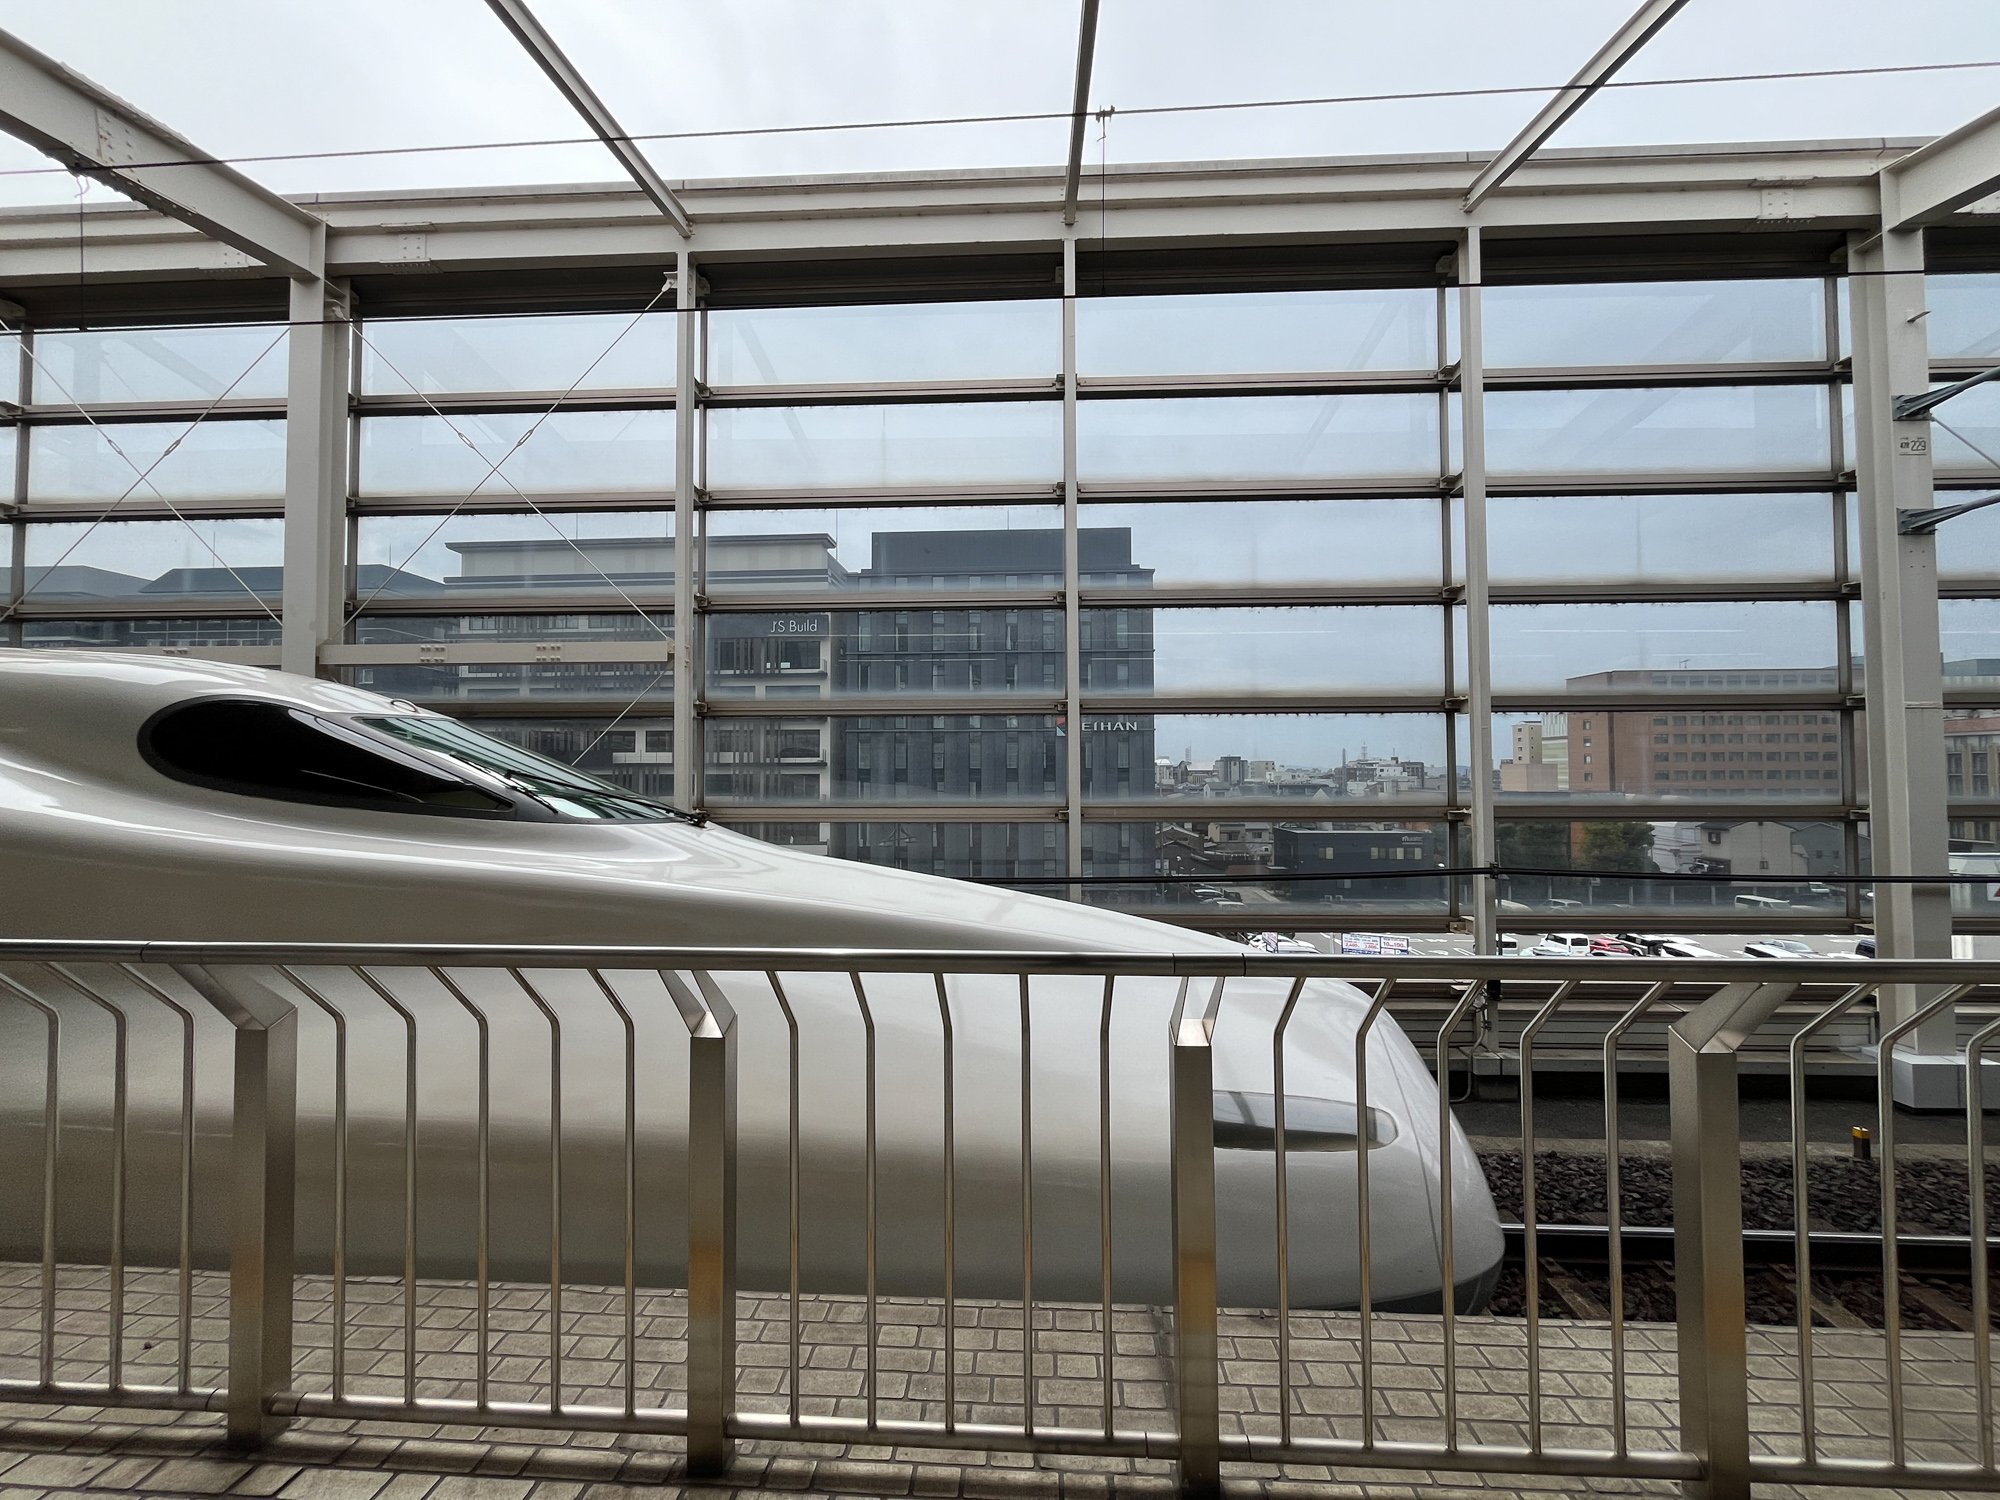
Day 6 involved travel — bus from Kawaguchiko to Mishima, then Shinkansen to Kyoto. The Mishima—Kyoto leg takes about 1 hour 50 minutes on the Hikari (the Nozomi doesn’t stop at Mishima). The speed doesn’t feel real until you notice how fast the landscape outside changes.
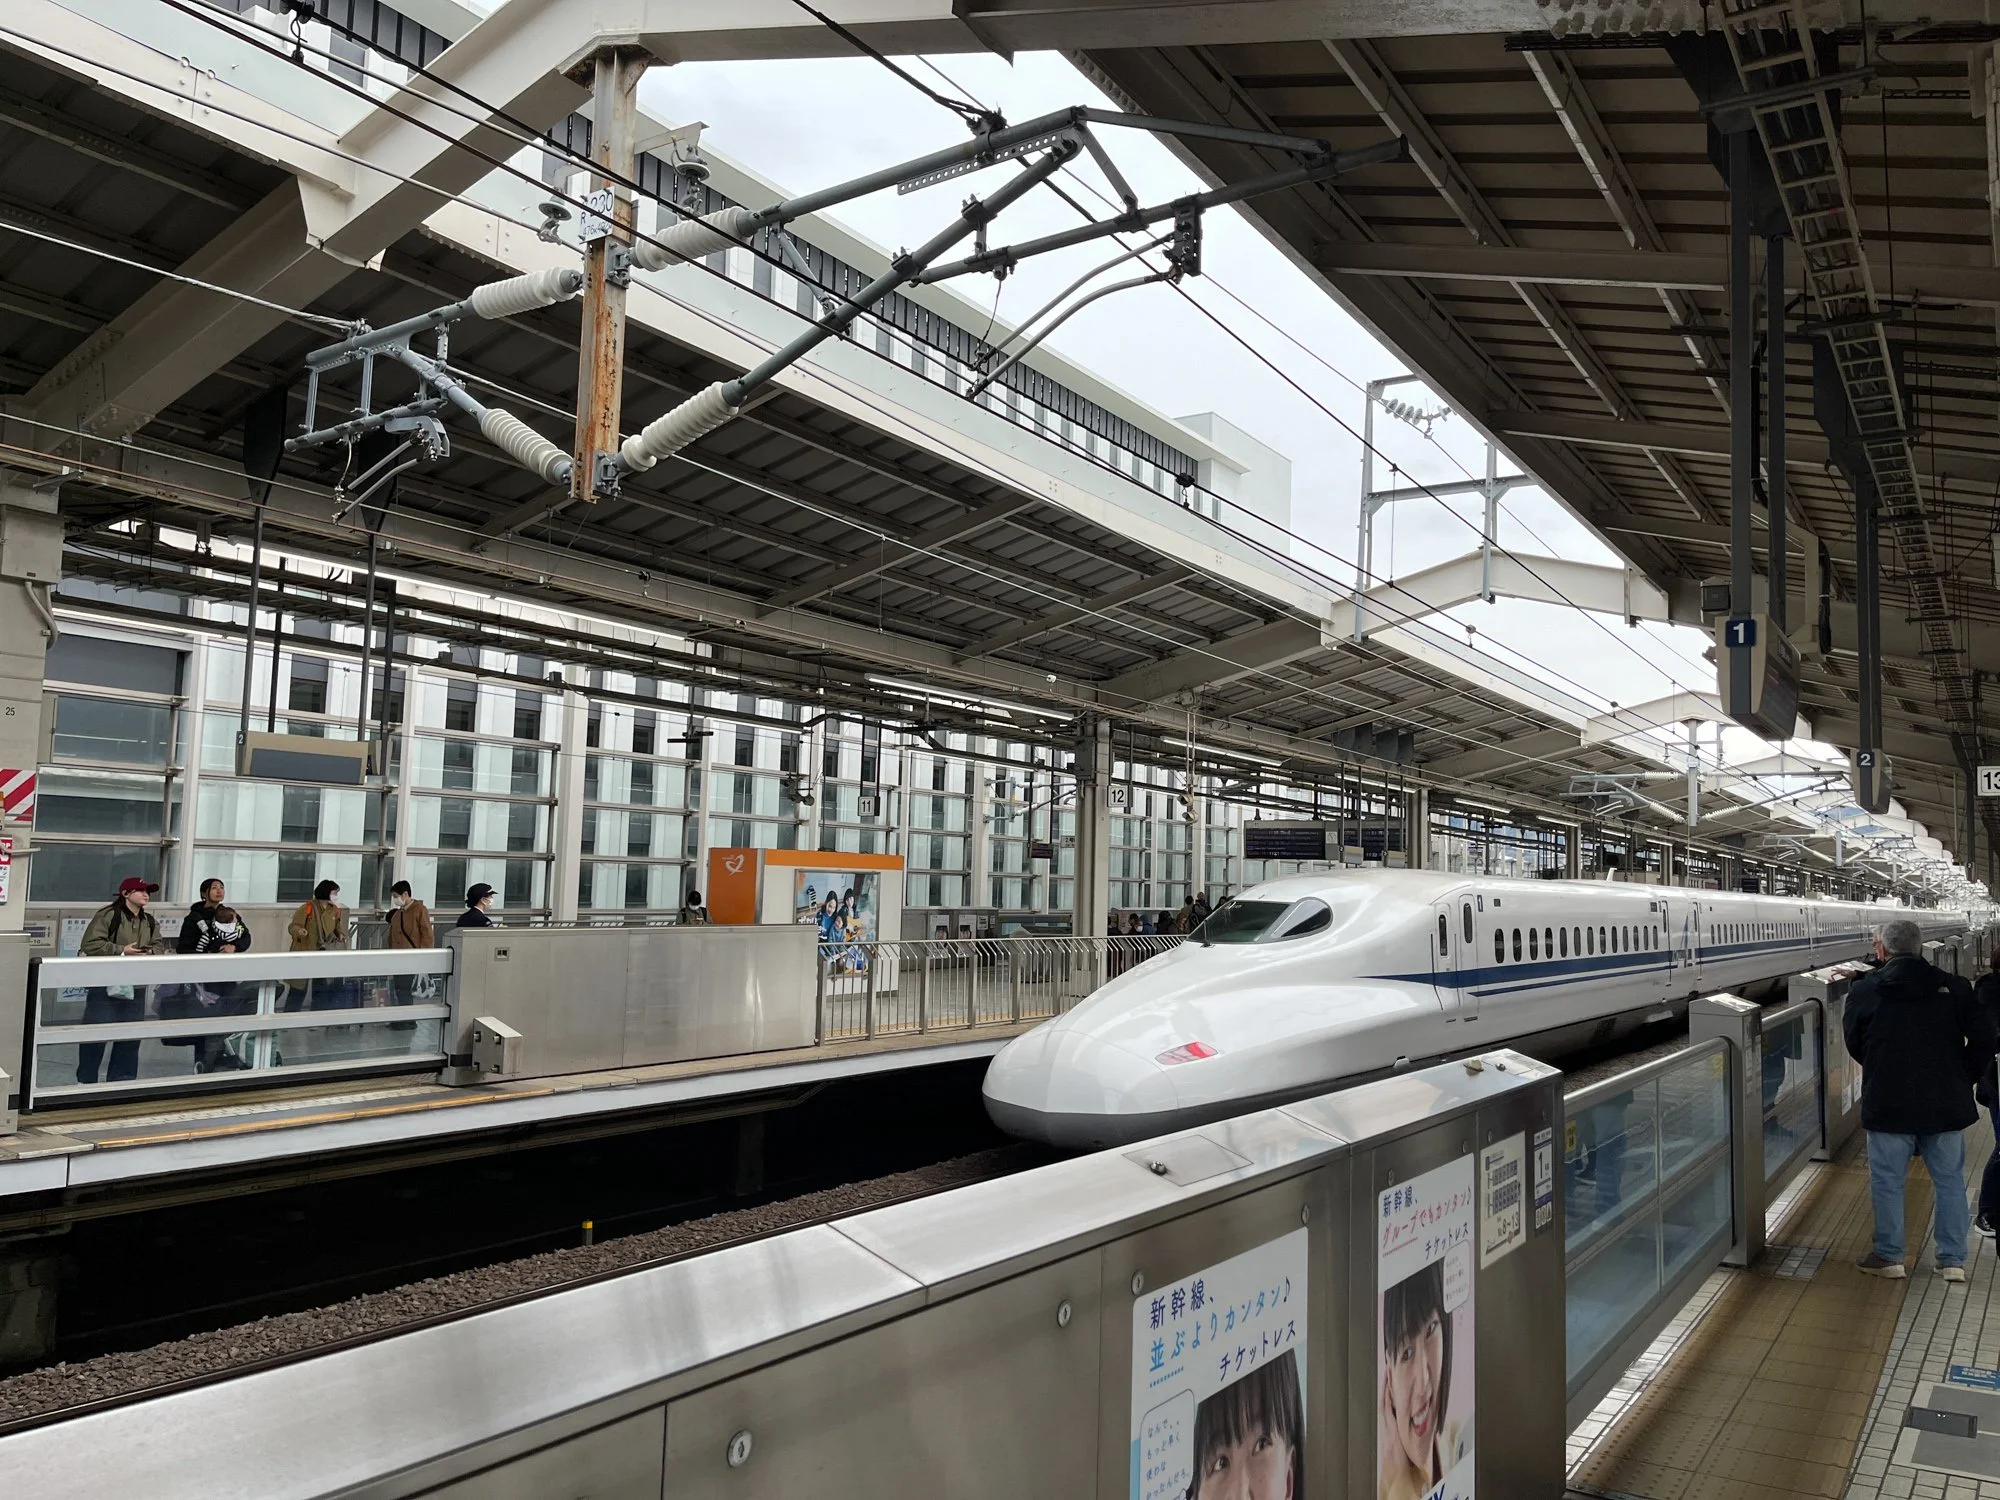
Our first Bullet Train experience
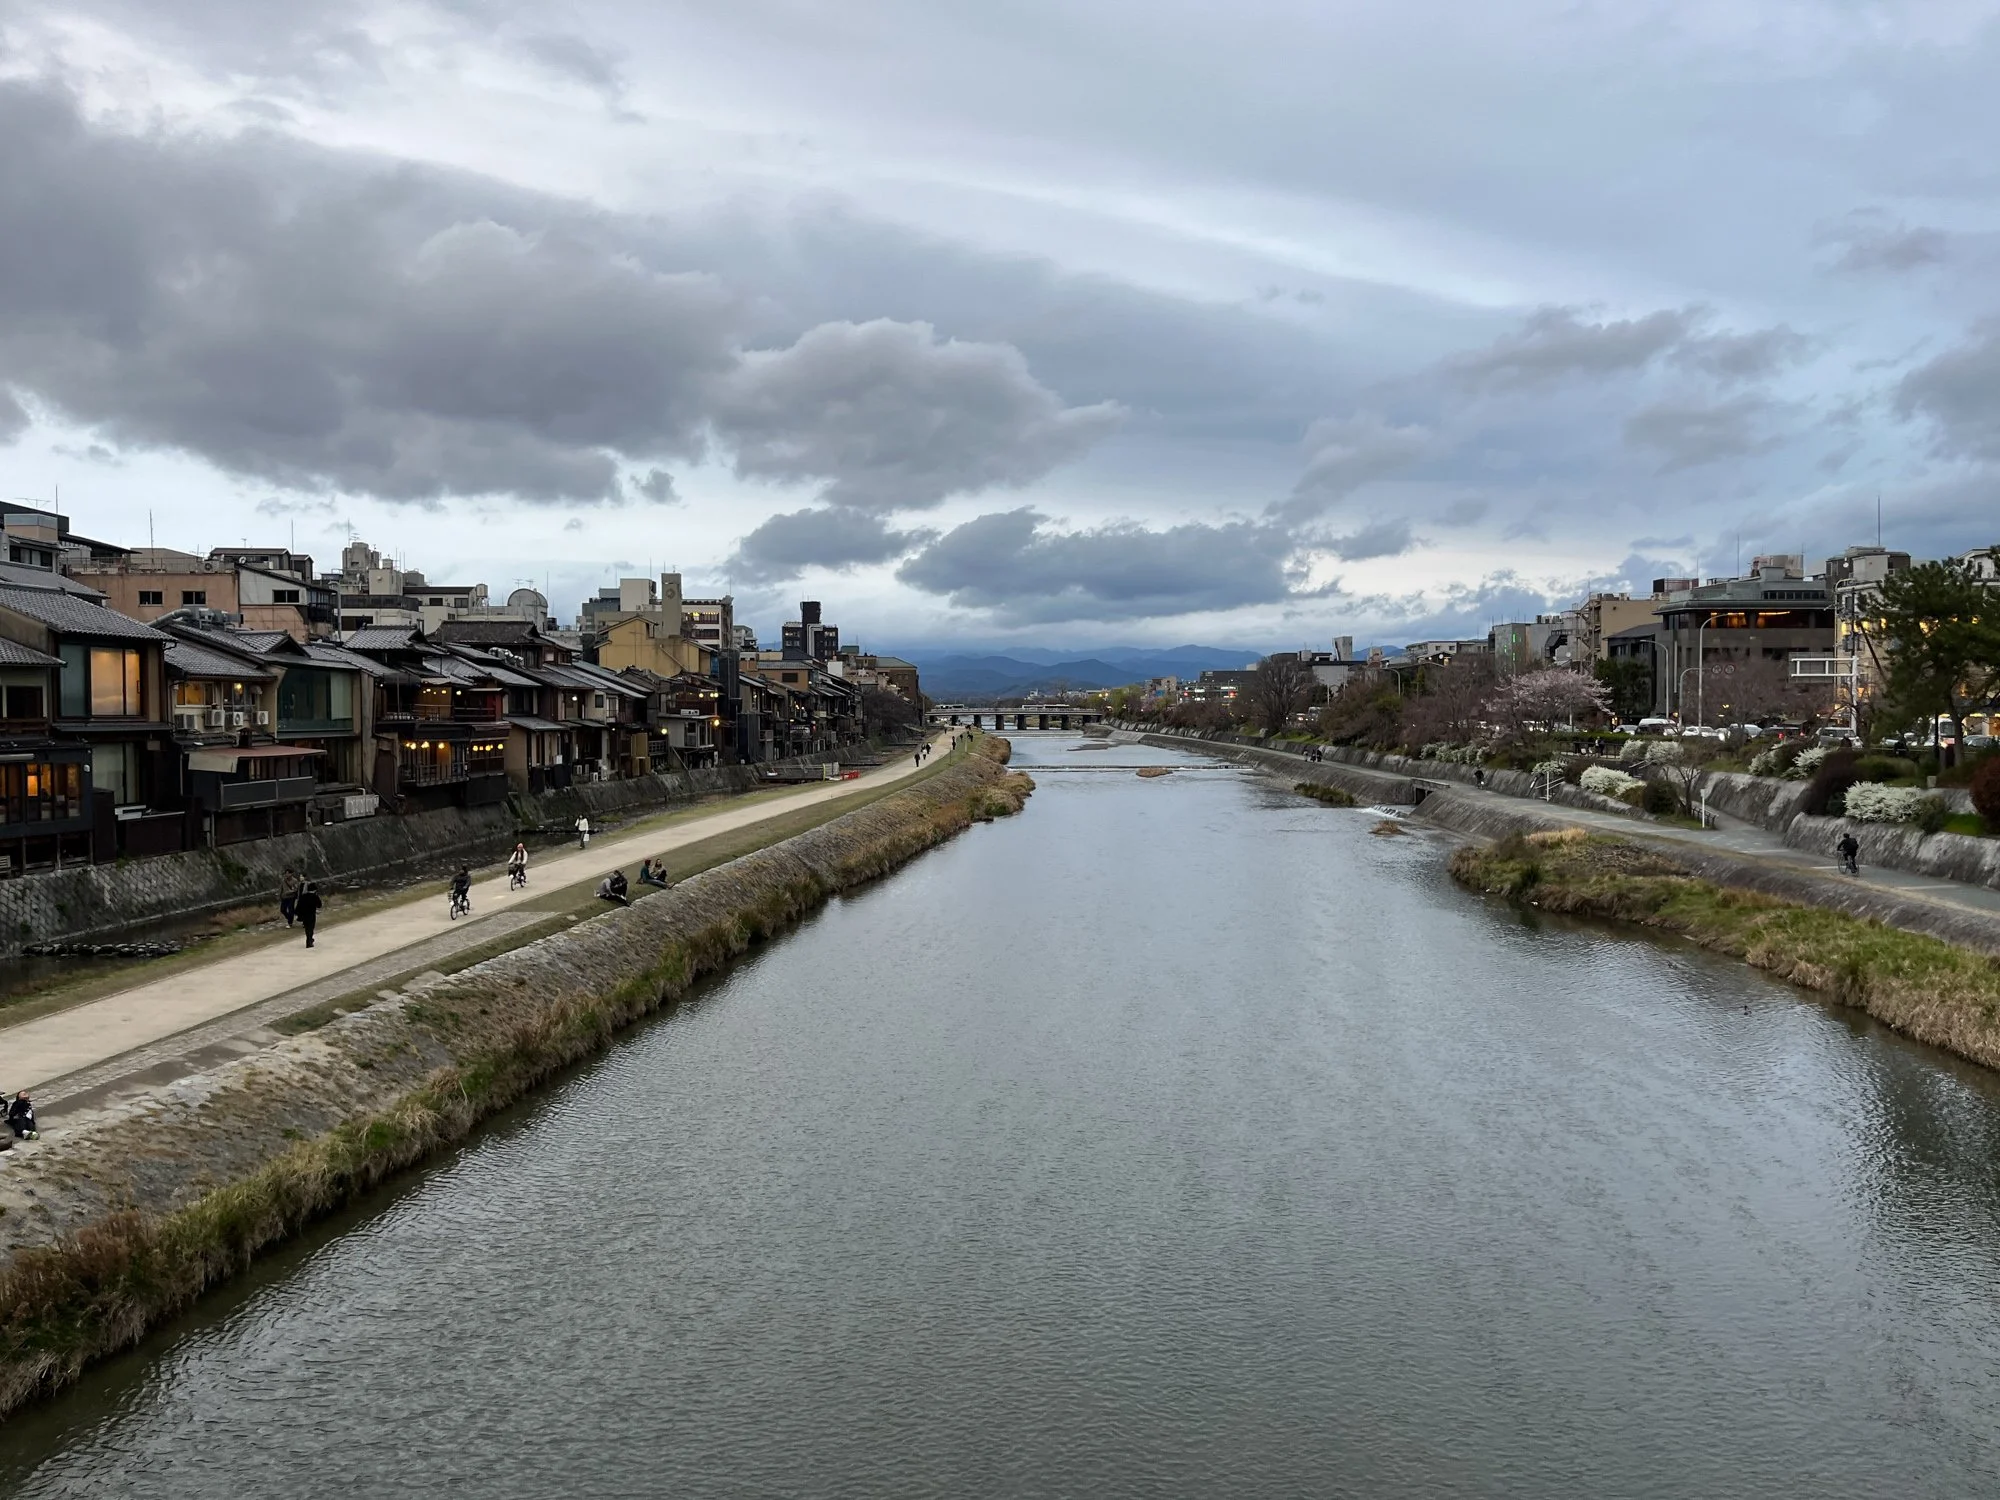
We arrived in Kyoto in the afternoon. Nothing planned — just a slow walk along the Kamo River to settle in.
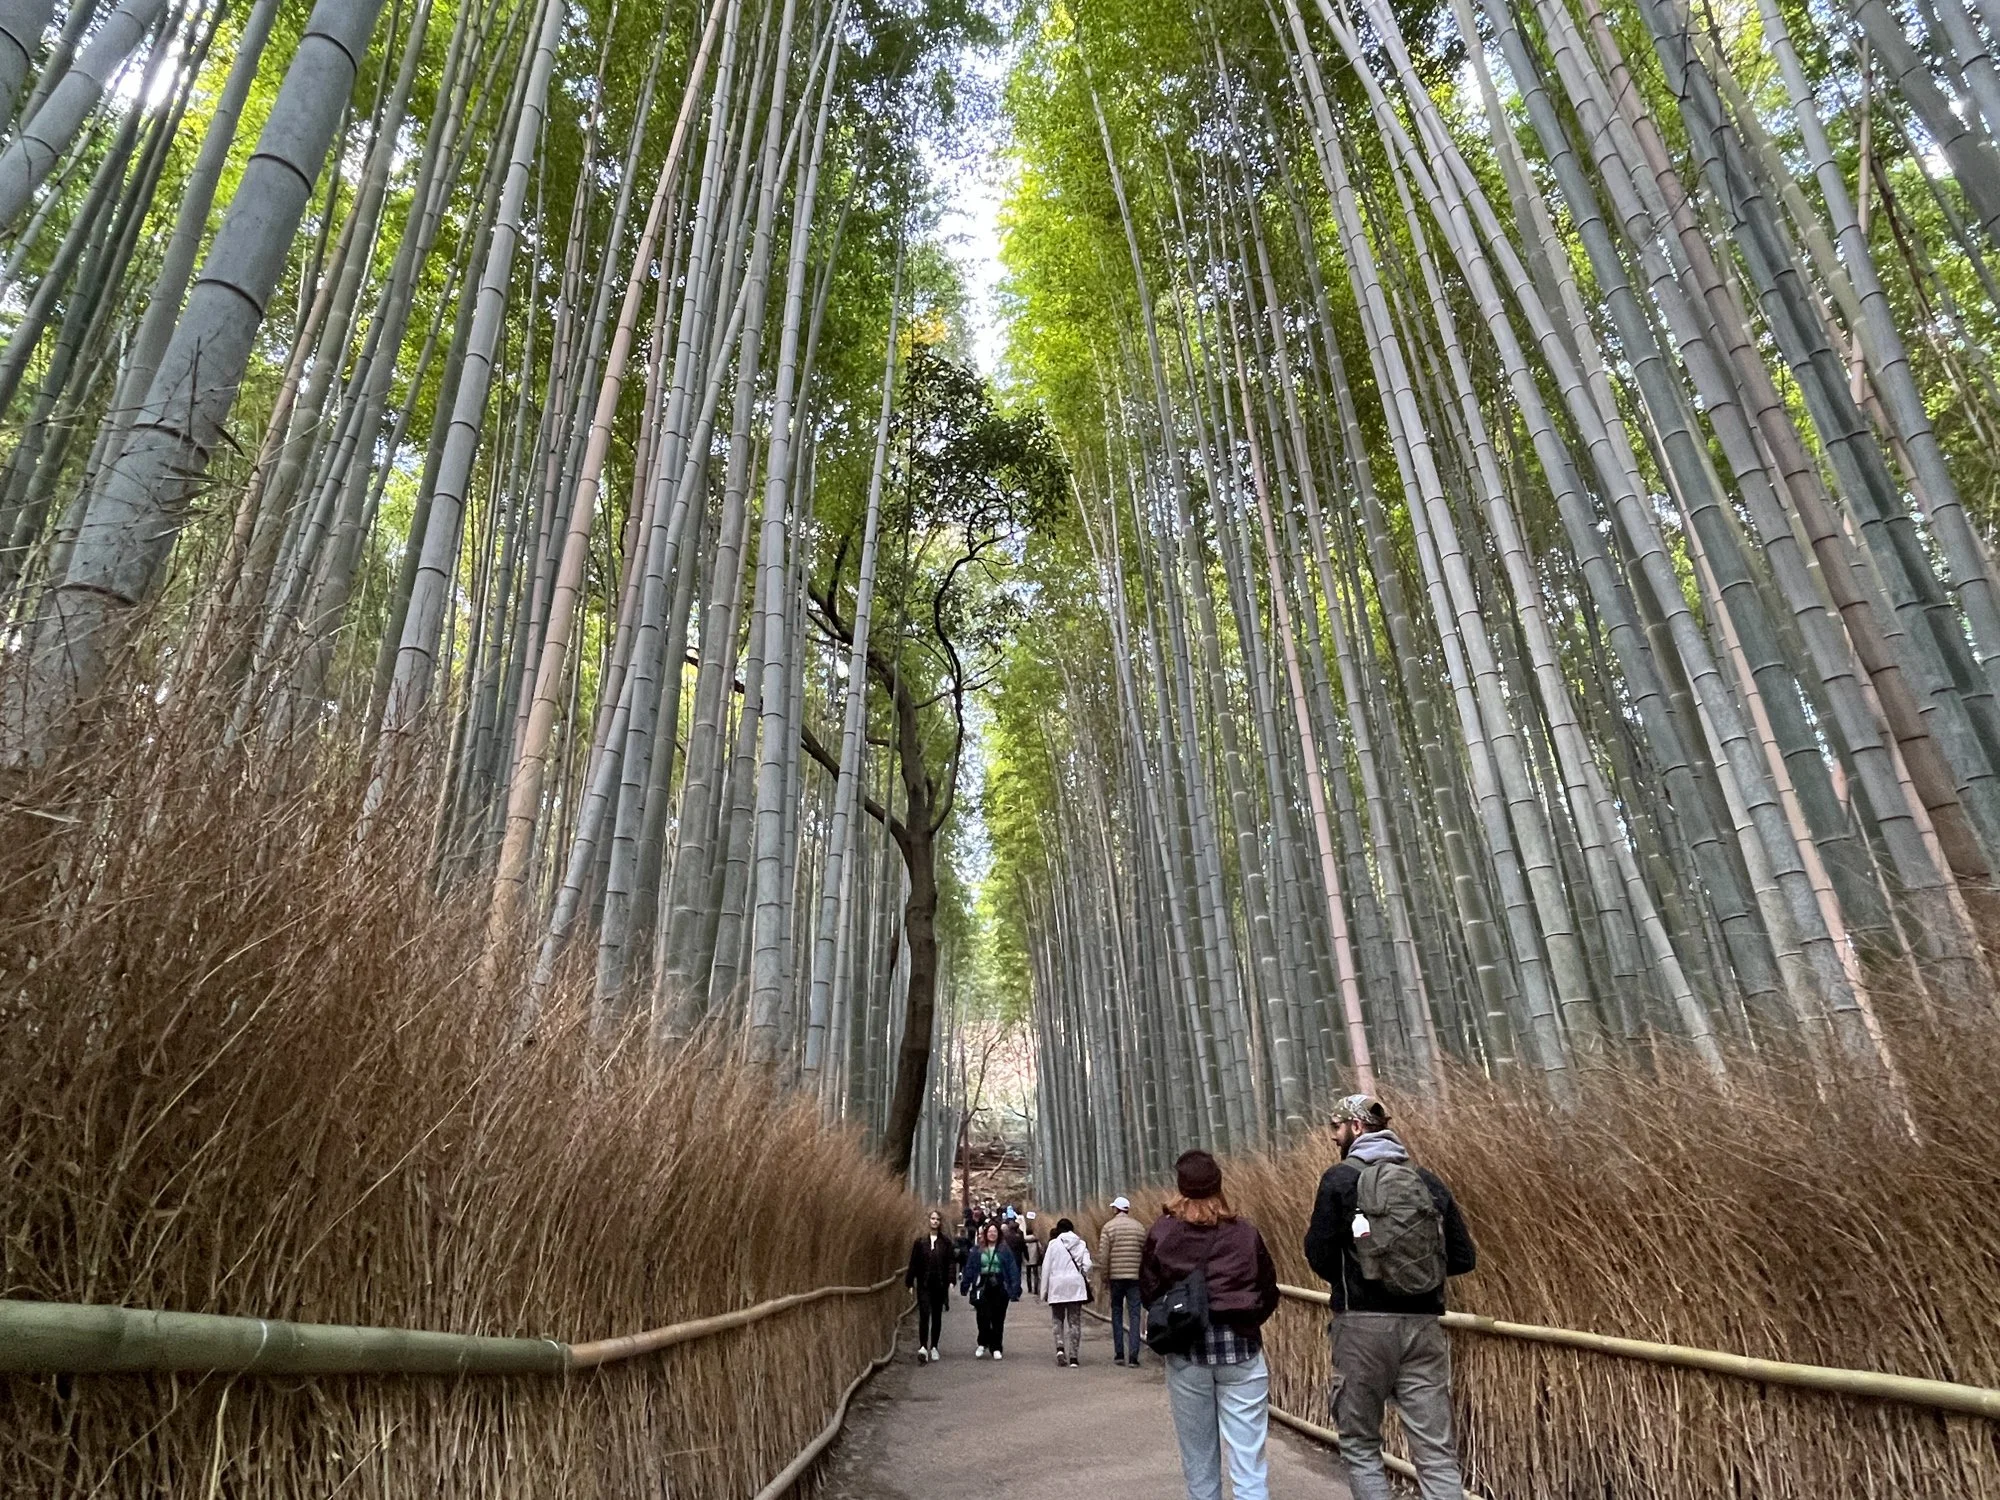
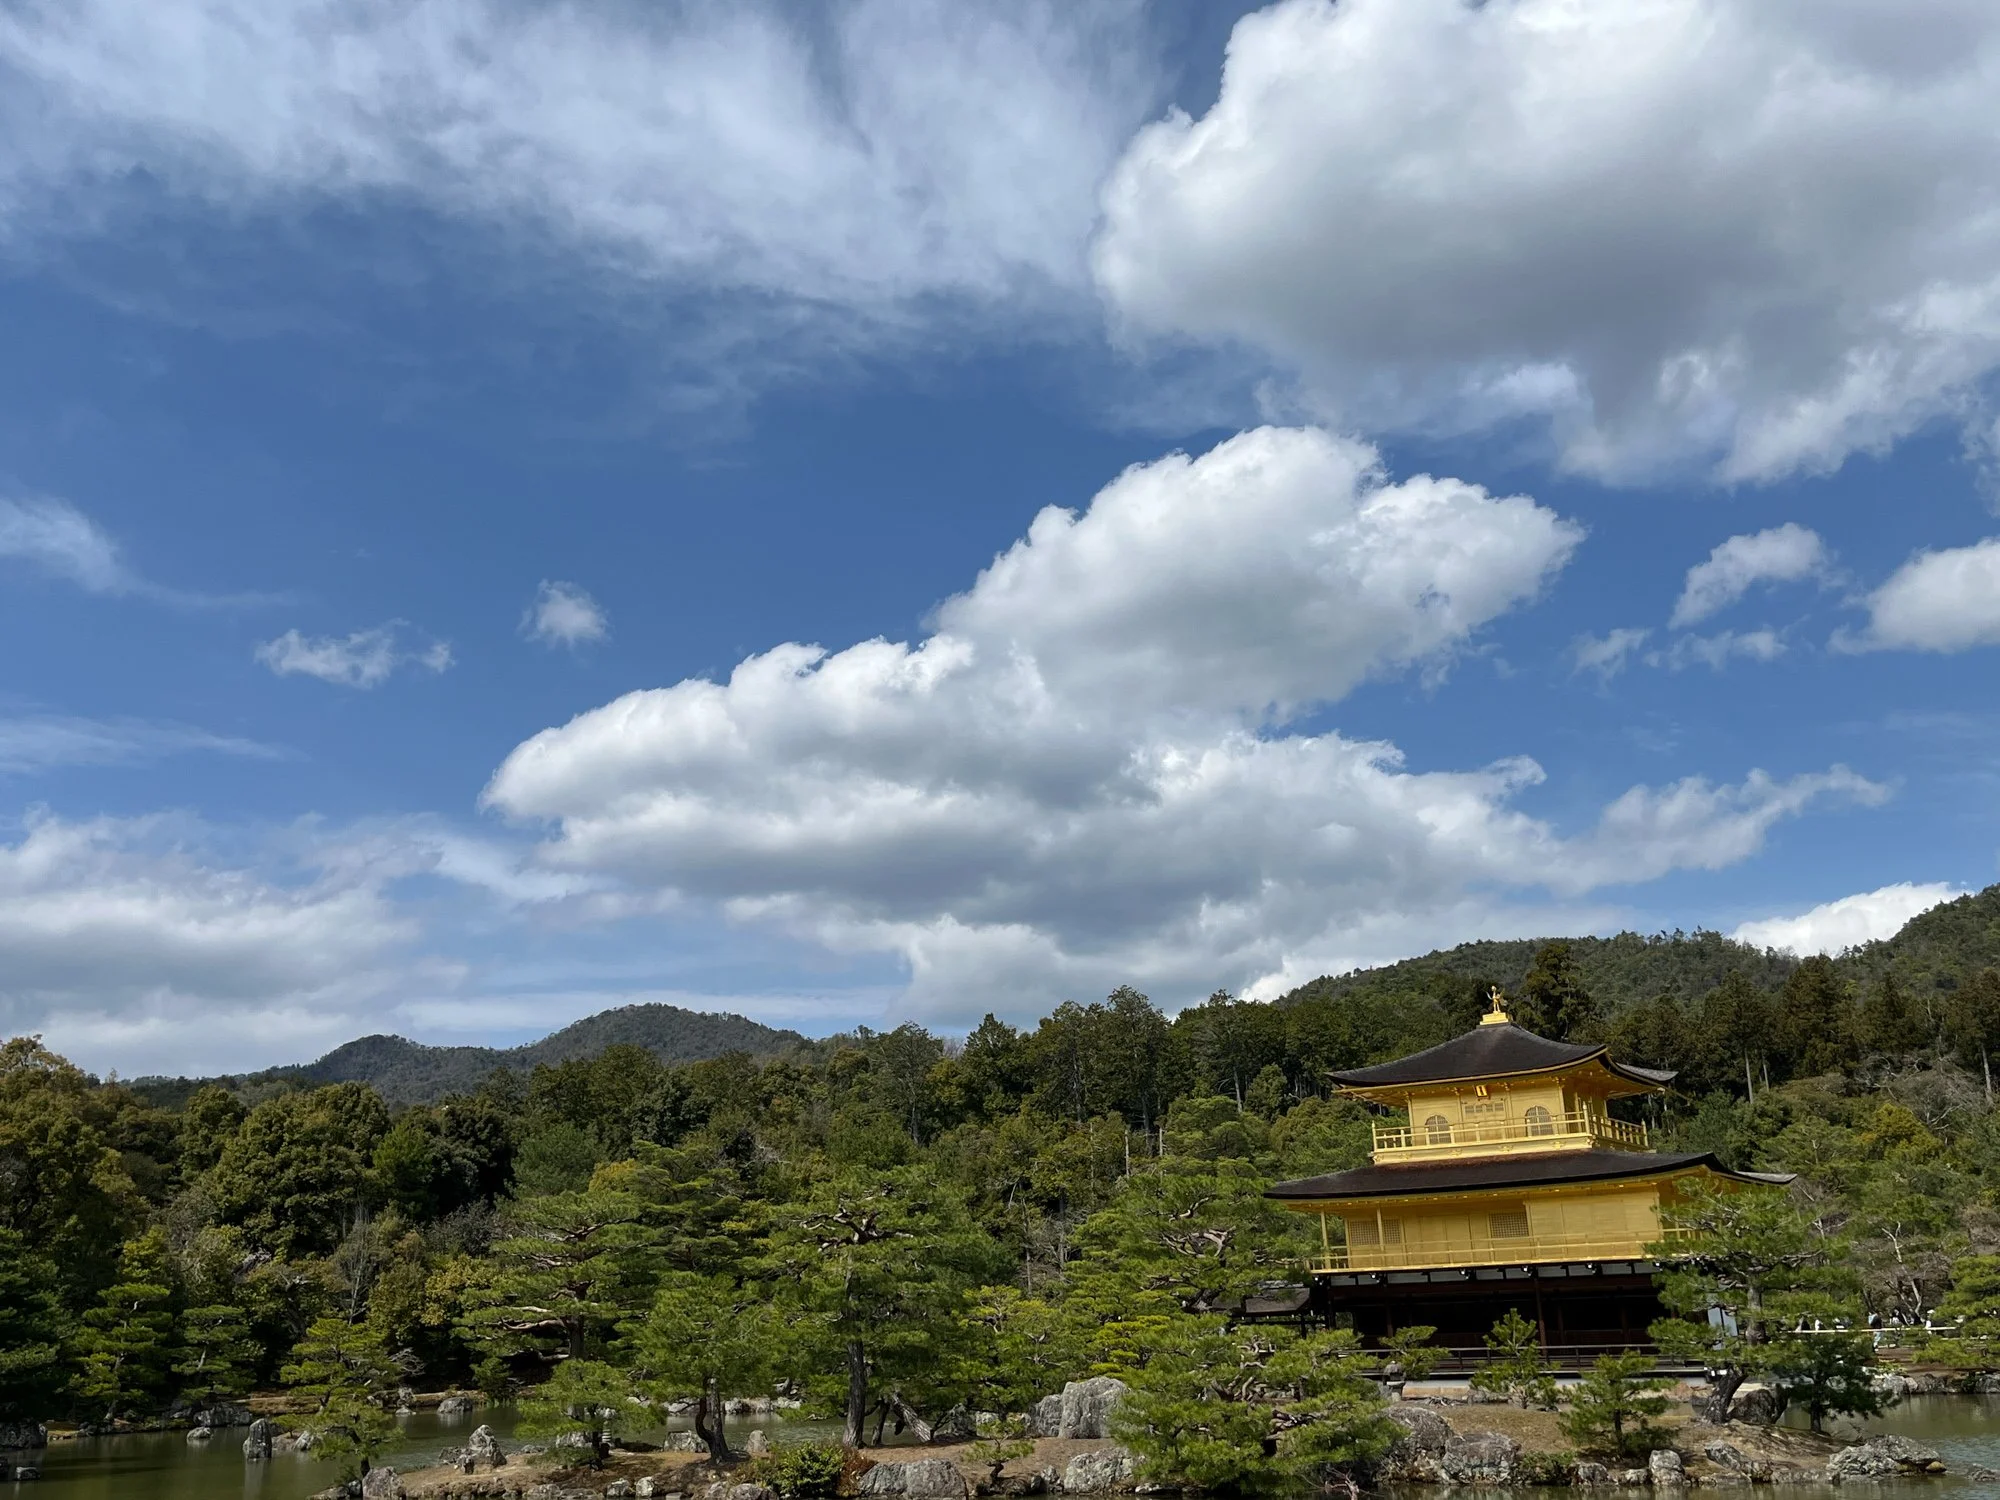
Day 7: Arashiyama Bamboo Grove in the morning, then Kinkaku-ji (the Golden Pavilion) in the afternoon. Evening: Nishiki Market (Kyoto’s famous covered food market) and the Teramachi shopping street.
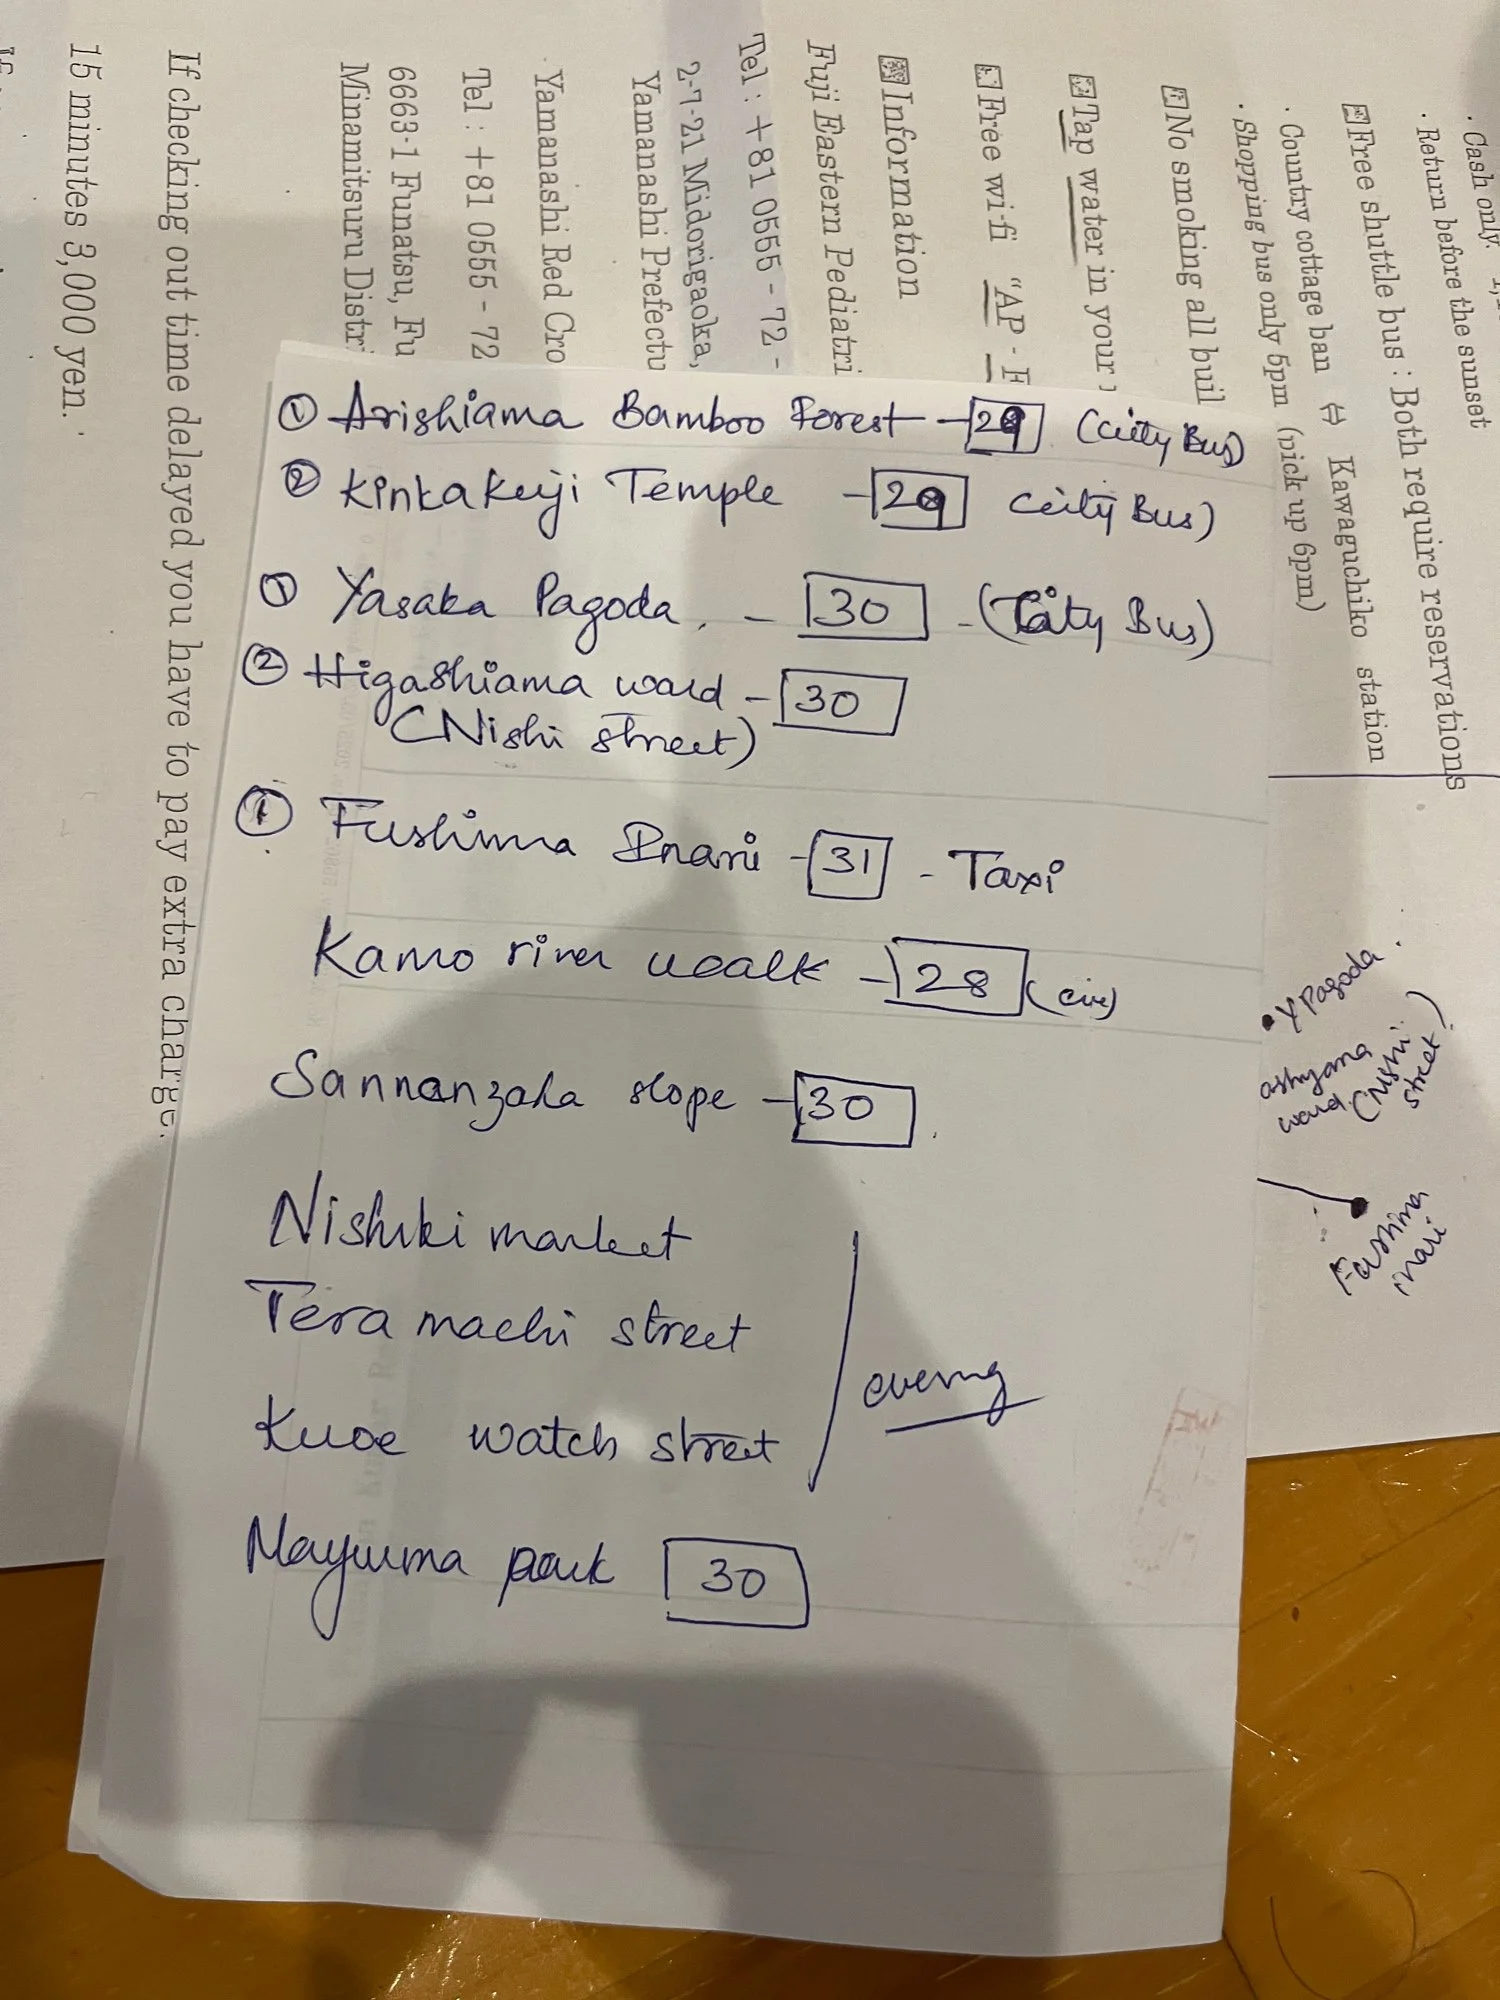
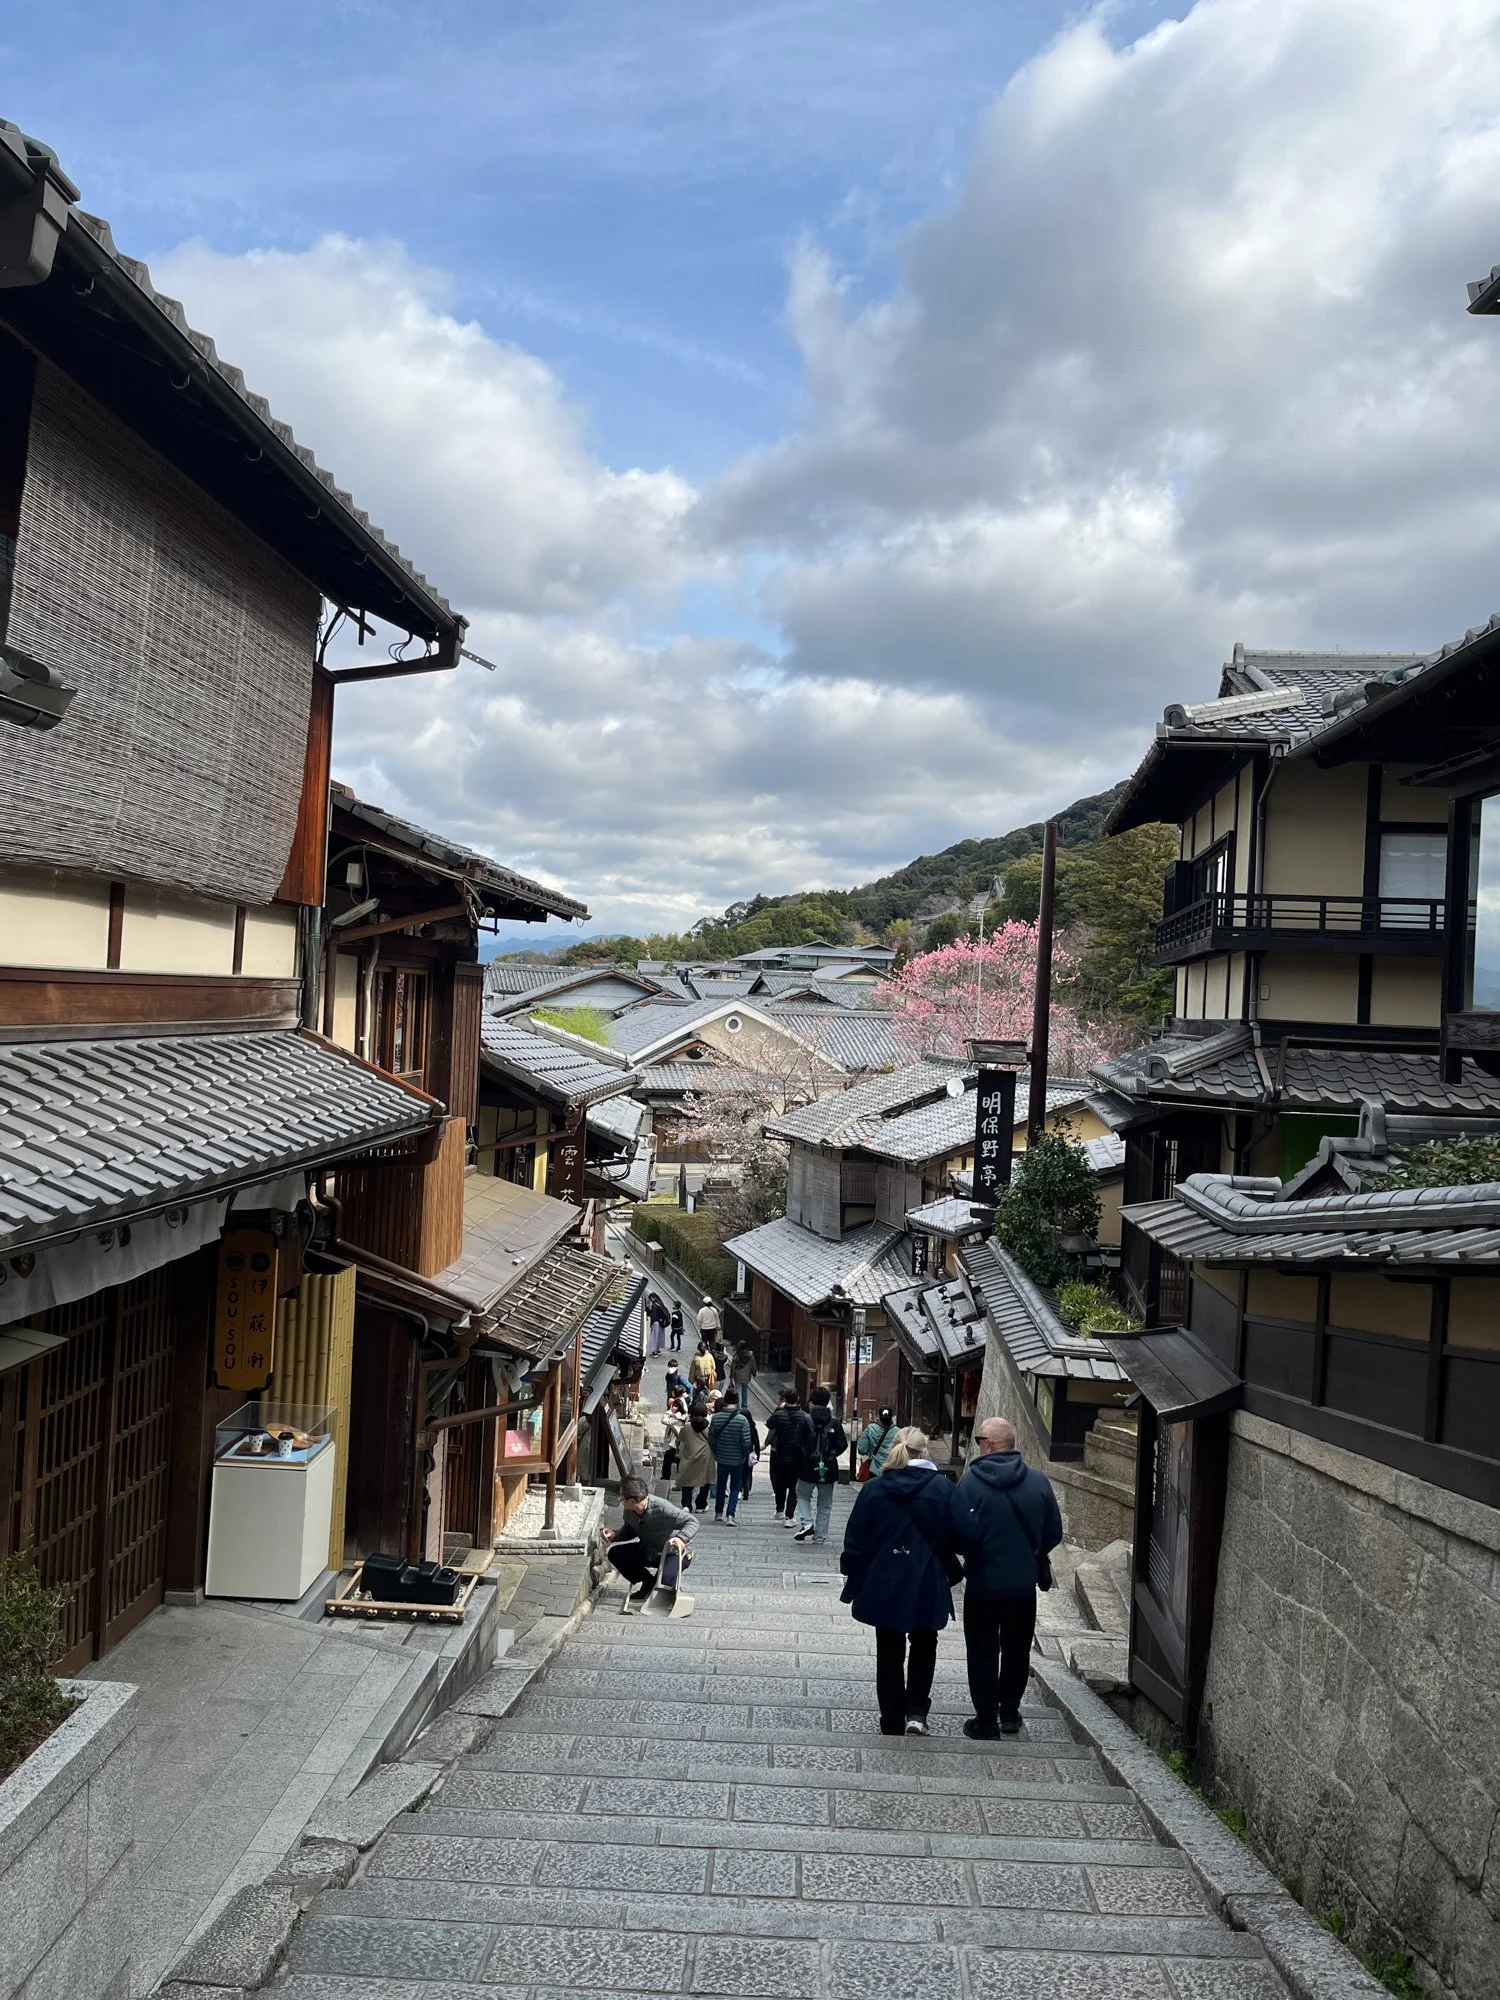
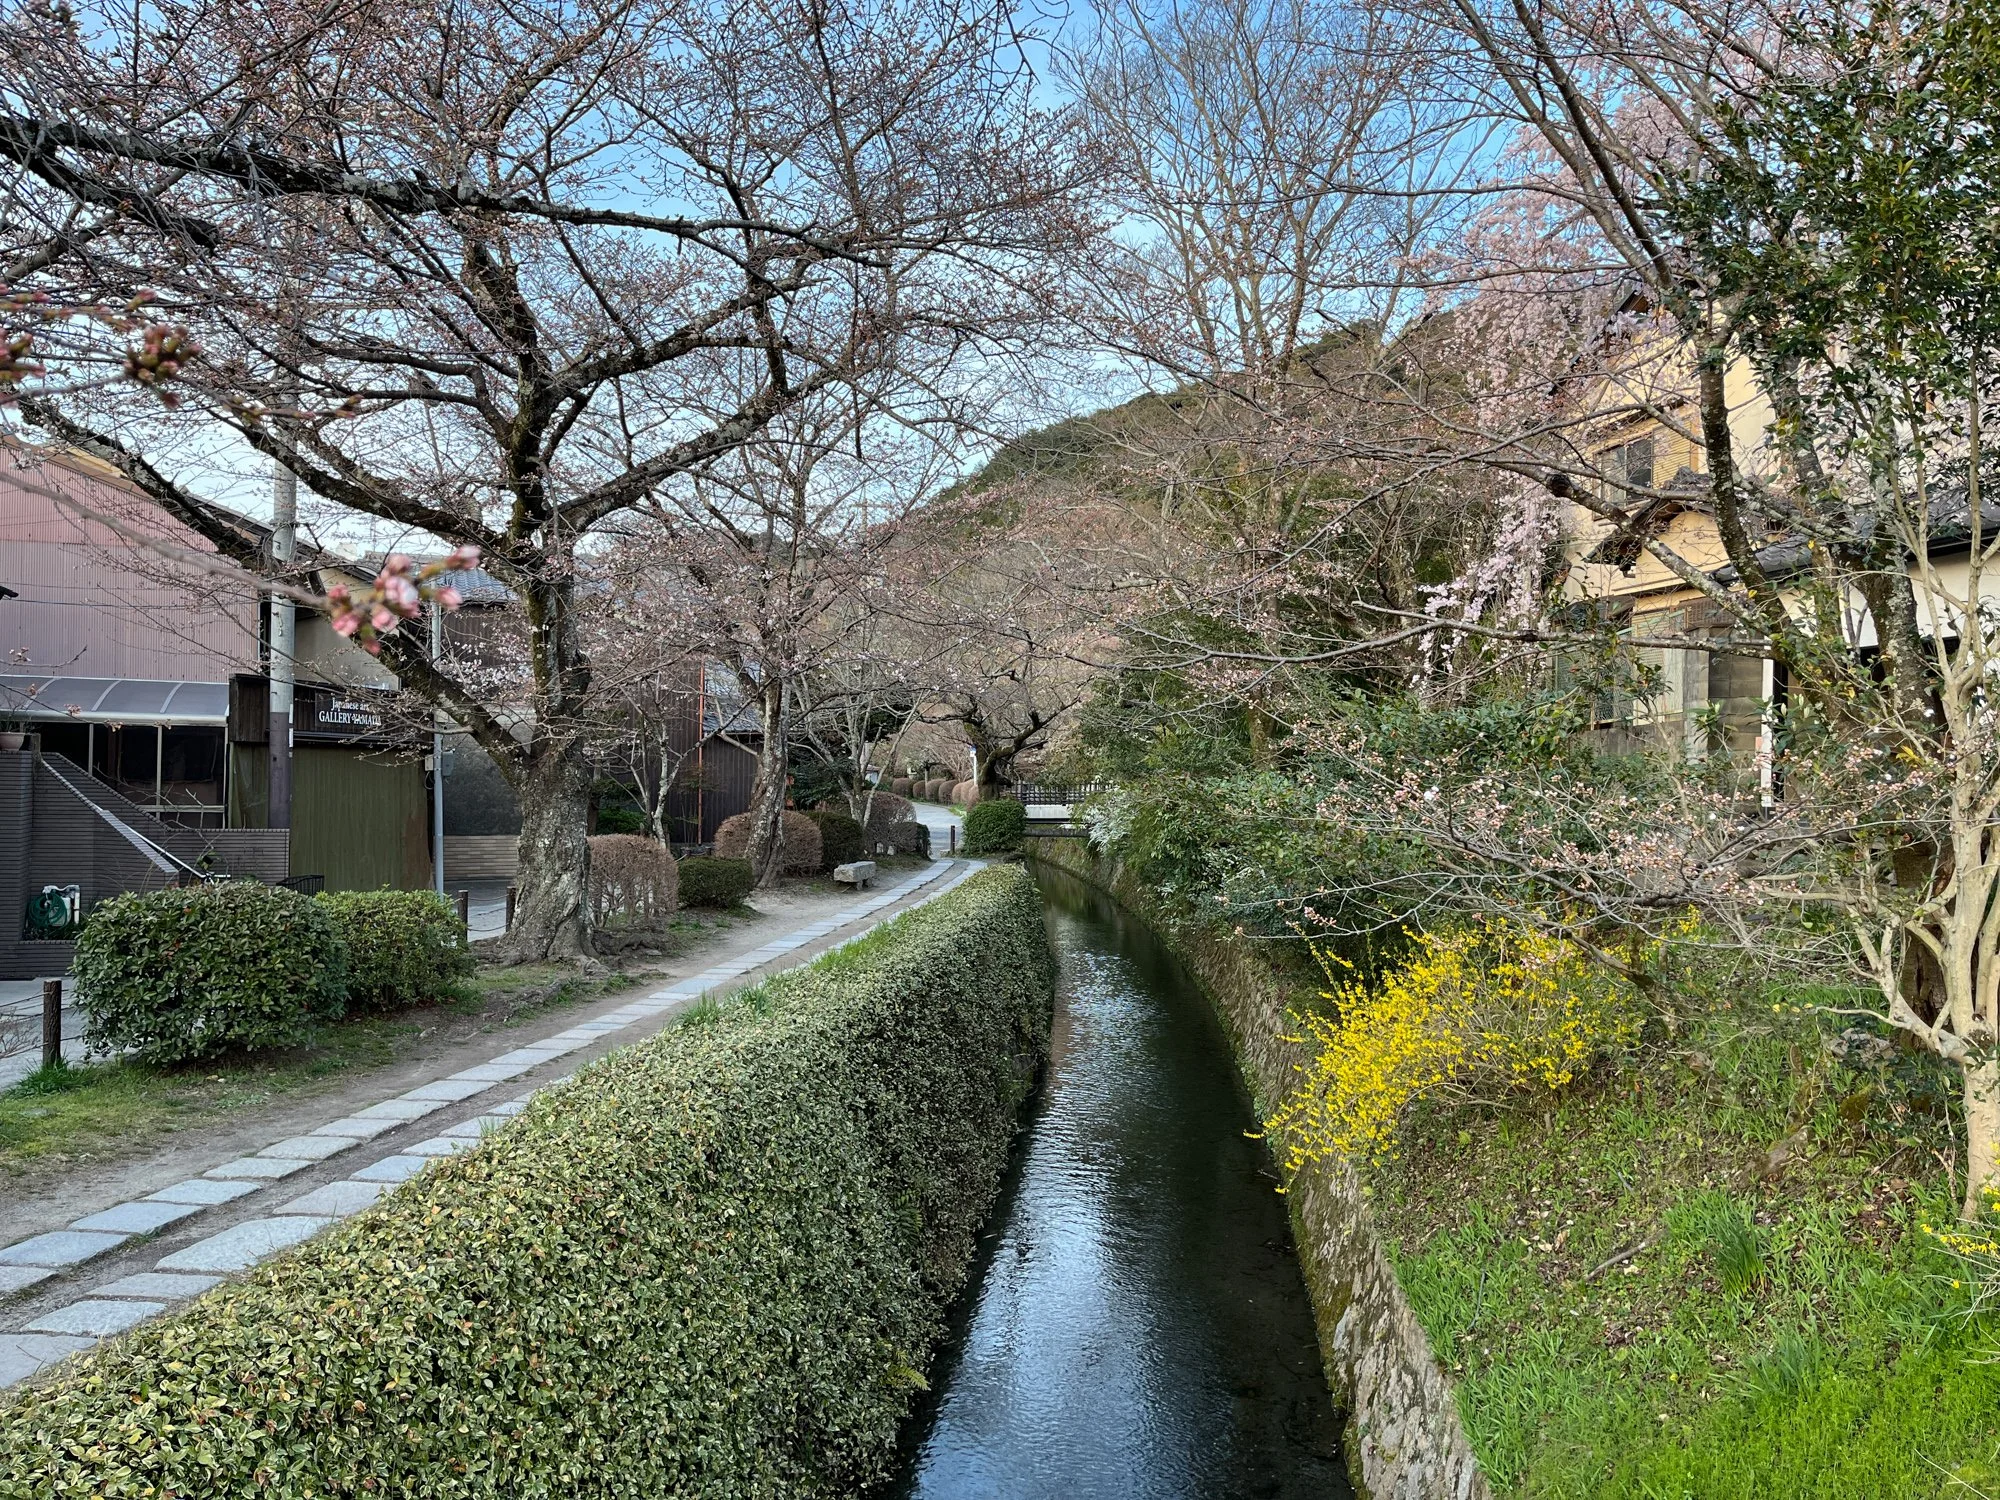
Day 8: We walked the cobblestone lanes of Sannenzaka and Ninenzaka in Kyoto’s Higashiyama district, passing Yasaka Pagoda. Midday we reached Maruyama Park — a few trees in early bloom, and we rented kimono for a couple of hours to walk through the historic district. The evening brought us to the Philosopher’s Path — a 2 km canal-side walk through Higashiyama, almost deserted in the early evening and completely serene.
Day 9:Fushimi Inari Shrine — thousands of torii gates winding up a forested hill south of Kyoto.
Fushimi Inari tip: Most visitors stop halfway up where the crowds concentrate. Push past that point and the crowds disappear. At the summit, the forest, the silence, and the gate tunnels without tourists in your way make the full climb entirely worth it.

Days 10–12 — Osaka
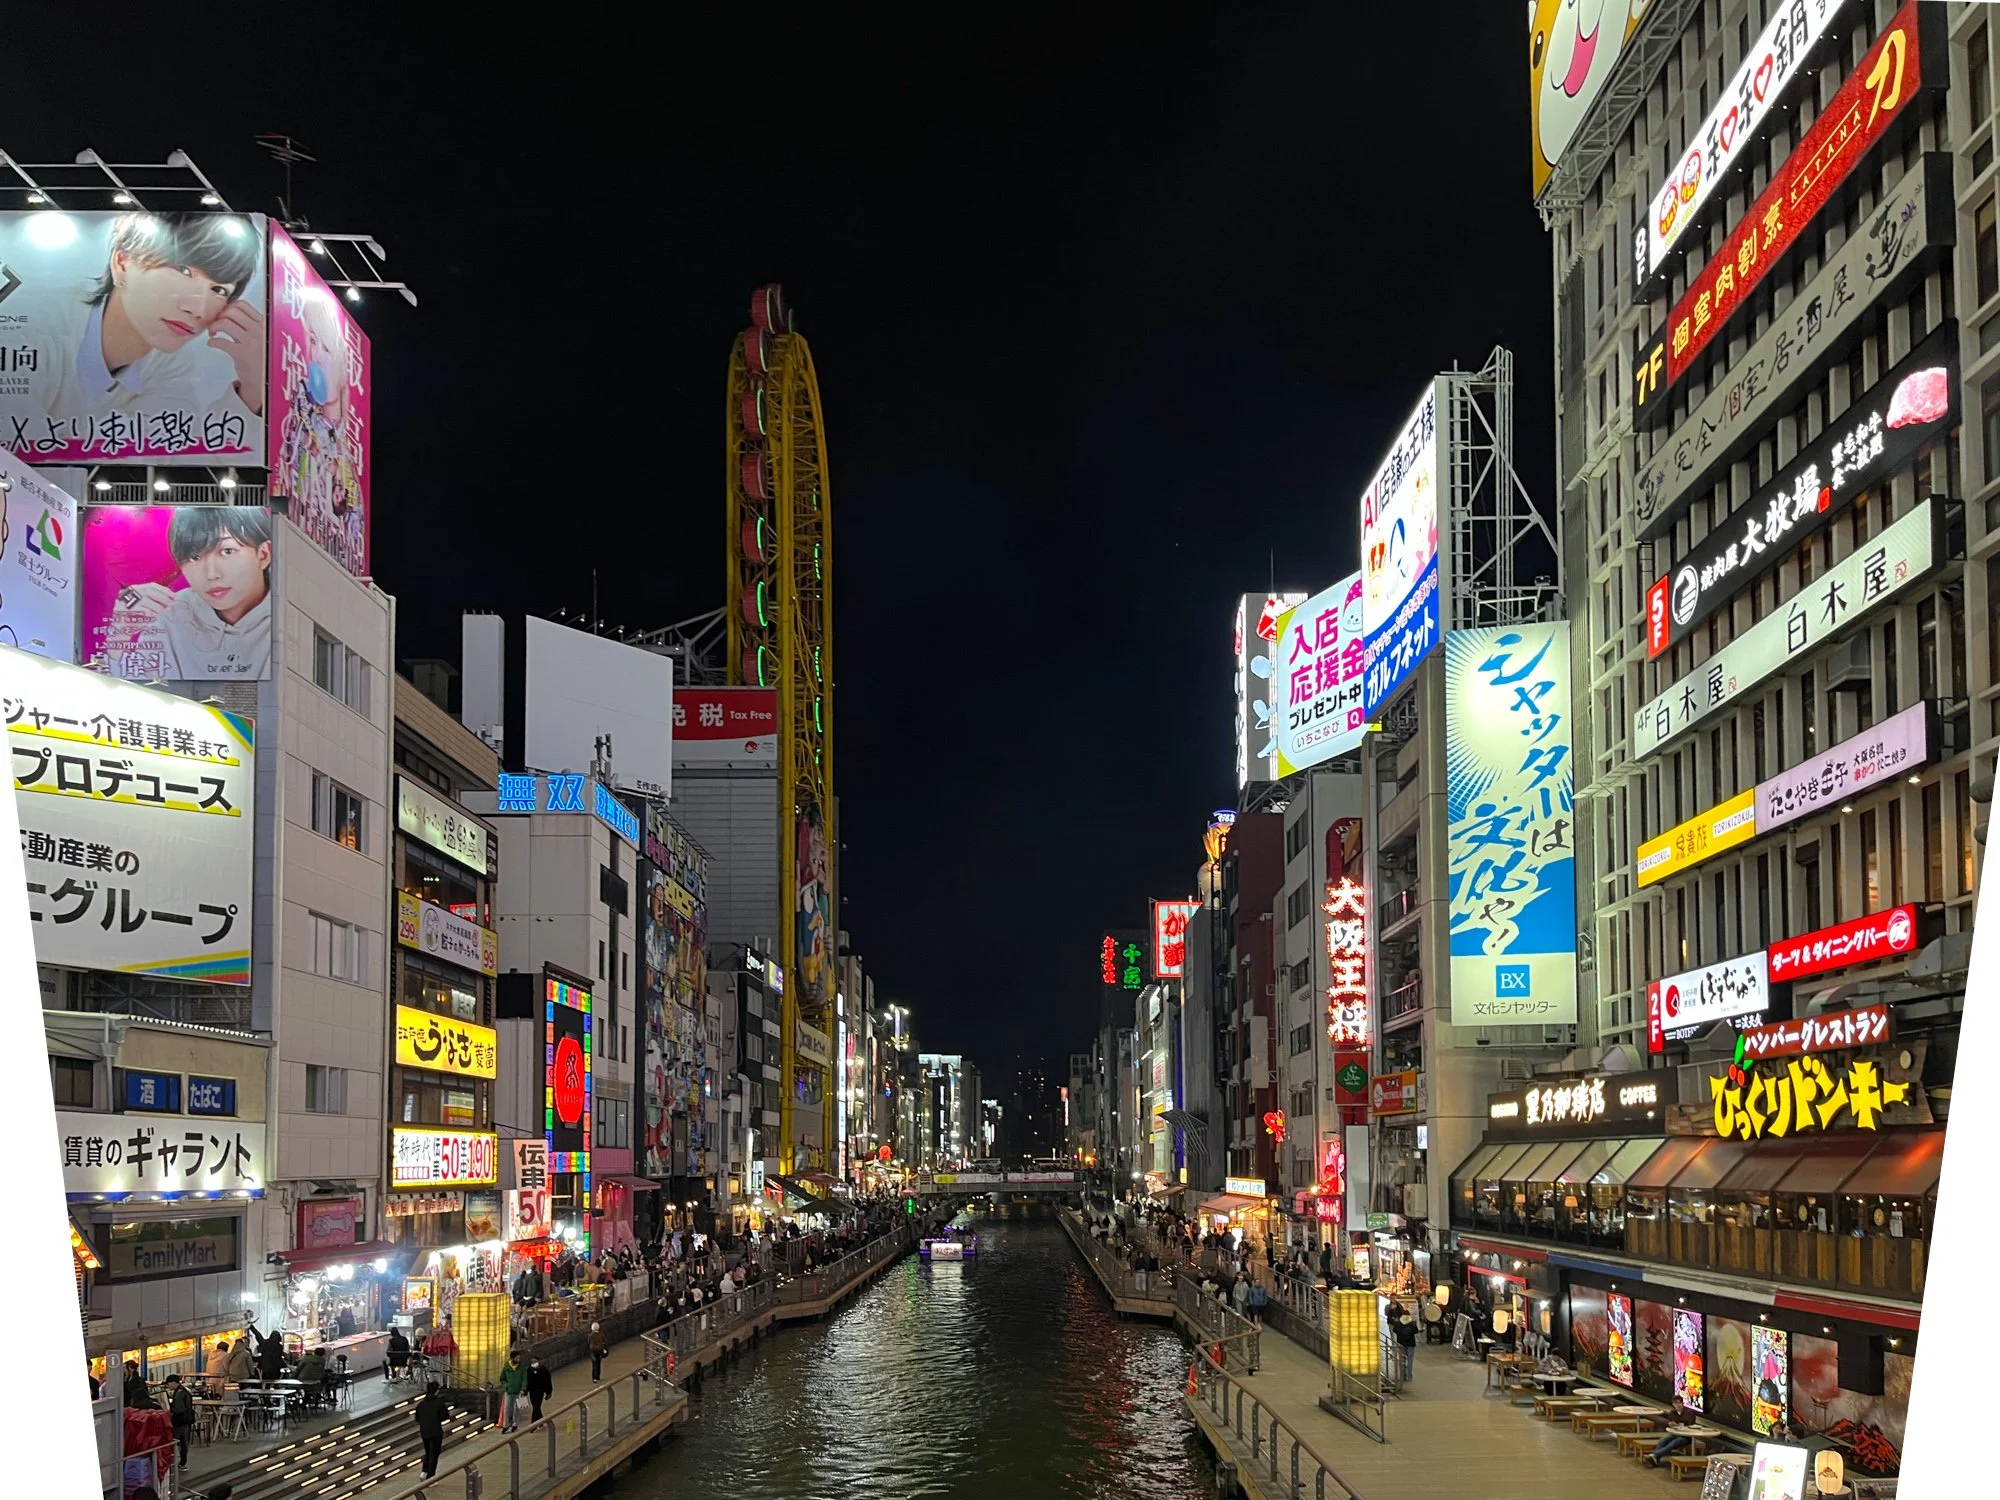
Day 10: We moved from Kyoto to Osaka by Shinkansen — the Kyoto—Osaka leg takes just 12 minutes, one of the shortest Shinkansen rides you can take. That afternoon, a Reddit thread pointed us to Nagara Higashi Park in full sakura bloom — our first time seeing cherry blossoms at their absolute peak. Families spread picnic mats under every tree, eating and talking under pink canopies. We had looked for this moment for 10 days. The evening took us to Dotonbori and the surrounding Namba area.
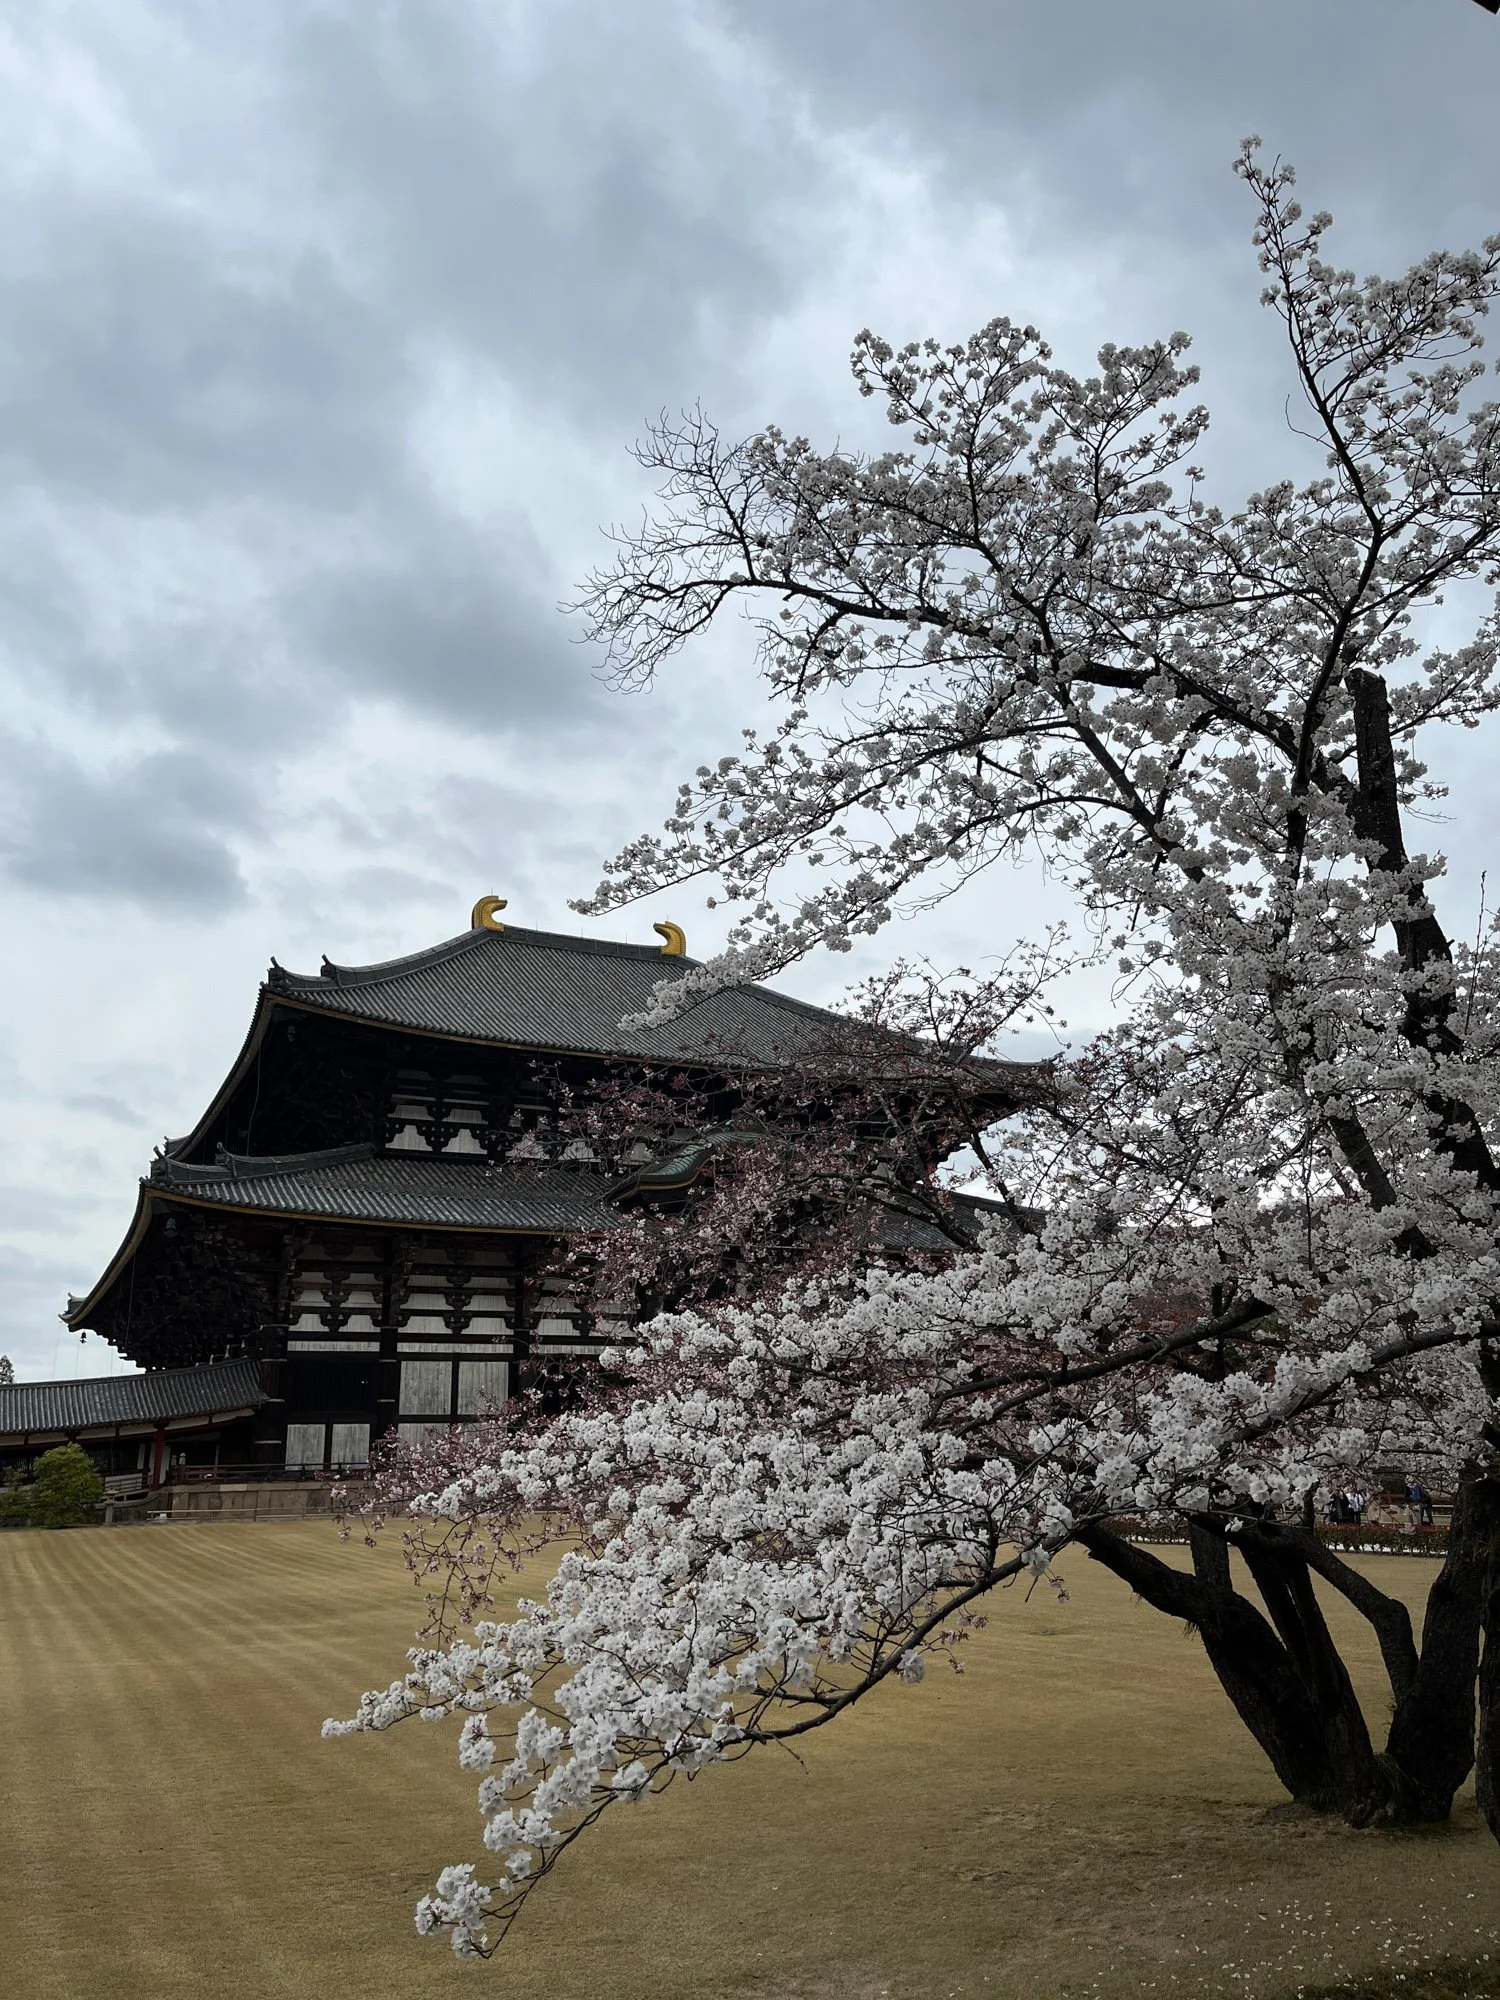
Day 11: Day trip to Nara. We visited Tōdai-ji — one of the world’s largest wooden buildings and home to a 15-metre bronze Buddha — and the Nara National Museum. The deer that roam freely through Nara Park make the place unlike any other. We returned to Osaka in the evening and explored the Umeda district.
Day 12: Day trip to Hiroshima by Shinkansen — about 1 hour 25 minutes from Osaka on the Nozomi. We spent the morning at the Hiroshima Peace Memorial Museum — plan at least 2 hours; the exhibits leave a lasting impression. Afterward we sat in the Peace Memorial Park along the river, taking in the Atomic Bomb Dome (Genbaku Dome), which still stands as it did after the 1945 bombing. We returned to Osaka that evening and continued shopping in Umeda.
Day 13 — Back to Tokyo
The Osaka—Tokyo Nozomi Shinkansen takes about 2 hours 20 minutes. We checked out in the morning and reached Tokyo by early afternoon.
We returned to Tokyo deliberately. Our trip started here, and we timed the return to catch the peak bloom. We went straight to Ueno Park — around 1,000 cherry blossom trees, all in full flower. Hundreds of families gathered under the trees for hanami (flower-viewing picnics), sharing food in the open air. The whole park hummed with a warmth that made it the perfect note to end on.
Day 14 — Departure
Early morning flight from Haneda Airport. Haneda sits within the city — less than 30 minutes from central Tokyo. Far less stressful than departing from Narita. We finished the trip with time to spare before boarding.
Money, Cash, and Daily Budget
Japan still runs on cash
Japan surprises a lot of travelers with how cash-dependent it remains. Smaller temples, local restaurants, street stalls, and rural spots often accept only cash. Always carry yen.
The most reliable ATMs for Indian cards: 7-Eleven ATMs and Japan Post ATMs. Both accept international Visa and Mastercard. Airport ATMs also work on arrival. Withdraw enough to last a few days — you won’t always find a convenient ATM when you need one.
Things That Catch Indians Off Guard
• No tipping. Tipping can actually offend in Japan. Skip it entirely — at restaurants, hotels, taxis, everywhere.
• Carry a trash bag. Public trash cans barely exist on Japanese streets. Carry a small bag for wrappers and bottles until you find a bin (usually at convenience stores).
• Wear slip-on shoes. You’ll remove your shoes constantly — at temples, ryokans, some restaurants, and traditional spaces. Slip-ons save a lot of time and awkwardness.
• Silence on trains. Phone calls on trains are considered rude. Keep your phone on silent, speak quietly, and follow the lead of everyone around you.
• Cash gaps. Even in cities, smaller shops and local eateries only accept cash. Never assume card works. Keep yen on you at all times.
Booking and Logistics
Book hotels early for sakura season
Sakura season fills up Kyoto and central Tokyo hotels months in advance. Book as soon as your dates solidify — ideally 3–4 months out. We booked on Agoda with free cancellation, which also gave us confirmation documents for the visa application.
JR Pass: worth it or not?
Many first-timers buy the JR Pass assuming it saves money. For our specific 5-ride itinerary, individual ticket booking worked out cheaper. Run the numbers for your own route before buying — the JR Pass makes more sense for longer itineraries covering more of Japan.
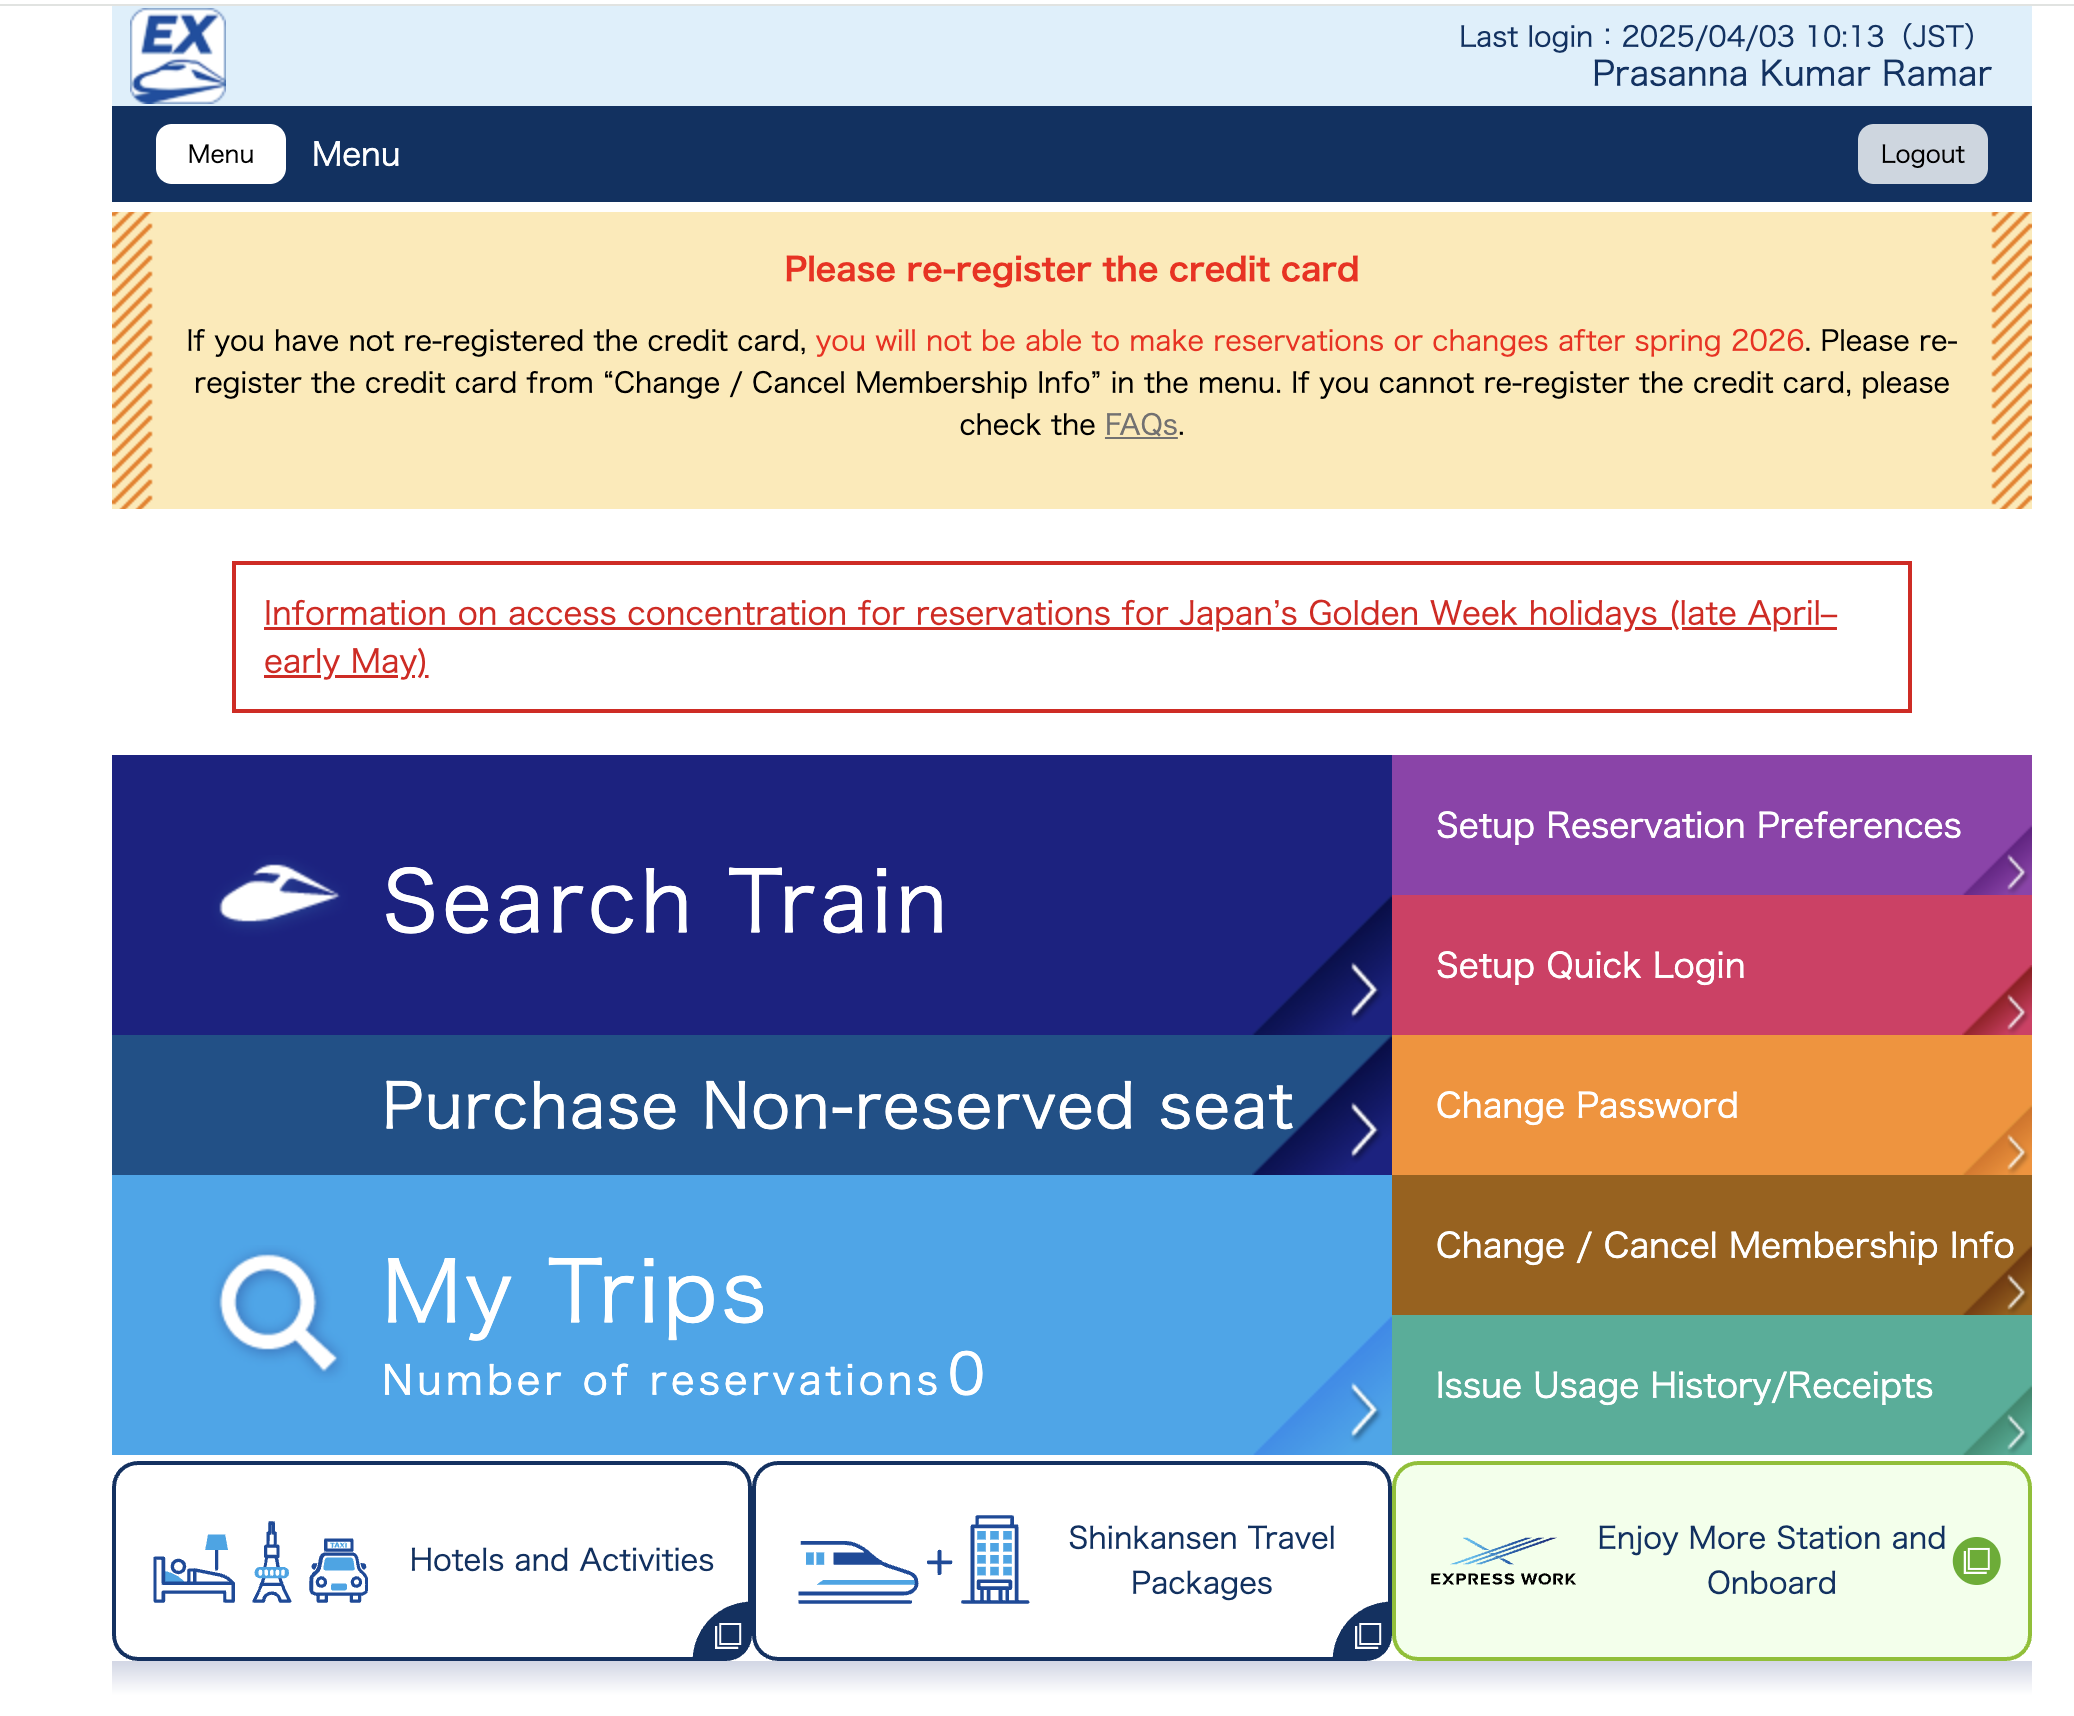
Use the Smart Ex to book individual Shinkansen tickets. Register with a credit card before you leave India, select your trains, and get a QR code. Show the QR code at the station gate to collect your physical ticket. Keep the physical ticket — you need it to exit the station at your destination.

SmartEX portal for booking Shinkansen Trains
eSIM vs. SIM card
We used Ubigi eSIM for data — install the app and activate in India, and it connects automatically on landing. Other reliable options include Airalo, IIJmio and Docomo tourist SIMs, available at major airports. For calls back to India, Airtel international roaming covered us adequately.
Credit Cards and Forex Cards
Credit cards work well at hotels, major restaurants, department stores, and chain shops across Tokyo and other large cities. Cash still rules everywhere else — small restaurants, local shops, vending machines, temples, and transit.
We split roughly 50/50 between cash and card. Hotels and larger purchases went on card. Day-to-day spending — Suica top-ups, street food, small restaurants — used cash. This balance kept us comfortable without carrying too much cash at once.
Before you leave India:
Log into your credit card app and enable international transactions in the settings. Without this step, your card may decline at terminals, ATMs, and kiosks in Japan.
Forex charges:
Most Indian credit cards add a 2–3.5% forex markup to every international transaction. On a trip with large hotel bills, this adds up quickly. Two ways to reduce or eliminate it:
1. Zero-forex credit cards — the IDFC FIRST Bank Mayura Credit Card offers zero forex markup on all international transactions. Research other zero-forex options before you travel; several Indian banks now offer them.
2. Forex prepaid card — HDFC Bank’s Multicurrency ForexPlus Card lets you load Japanese yen before departure. You convert INR to JPY at the current rate and spend from that balance. It works like a standard debit card — at shops, restaurants, and ATMs — and removes per-transaction forex charges. Loading yen onto one before the trip worked everywhere, including vending machines.
ATMs in Japan:
Indian Visa and Mastercard cards work at 7-Eleven (Seven Bank) ATMs, Japan Post ATMs, and AEON ATMs. These accept international cards, offer English menus, and work 24/7 (Japan Post has restricted hours at smaller branches). Standard Japanese bank ATMs (Mizuho, SMBC) generally don’t accept foreign cards — don’t rely on those.
Note: withdrawing cash via a credit card at an ATM attracts a cash advance fee from your Indian bank on top of any forex charges. A forex prepaid card avoids both.
What to Pack
What worked well
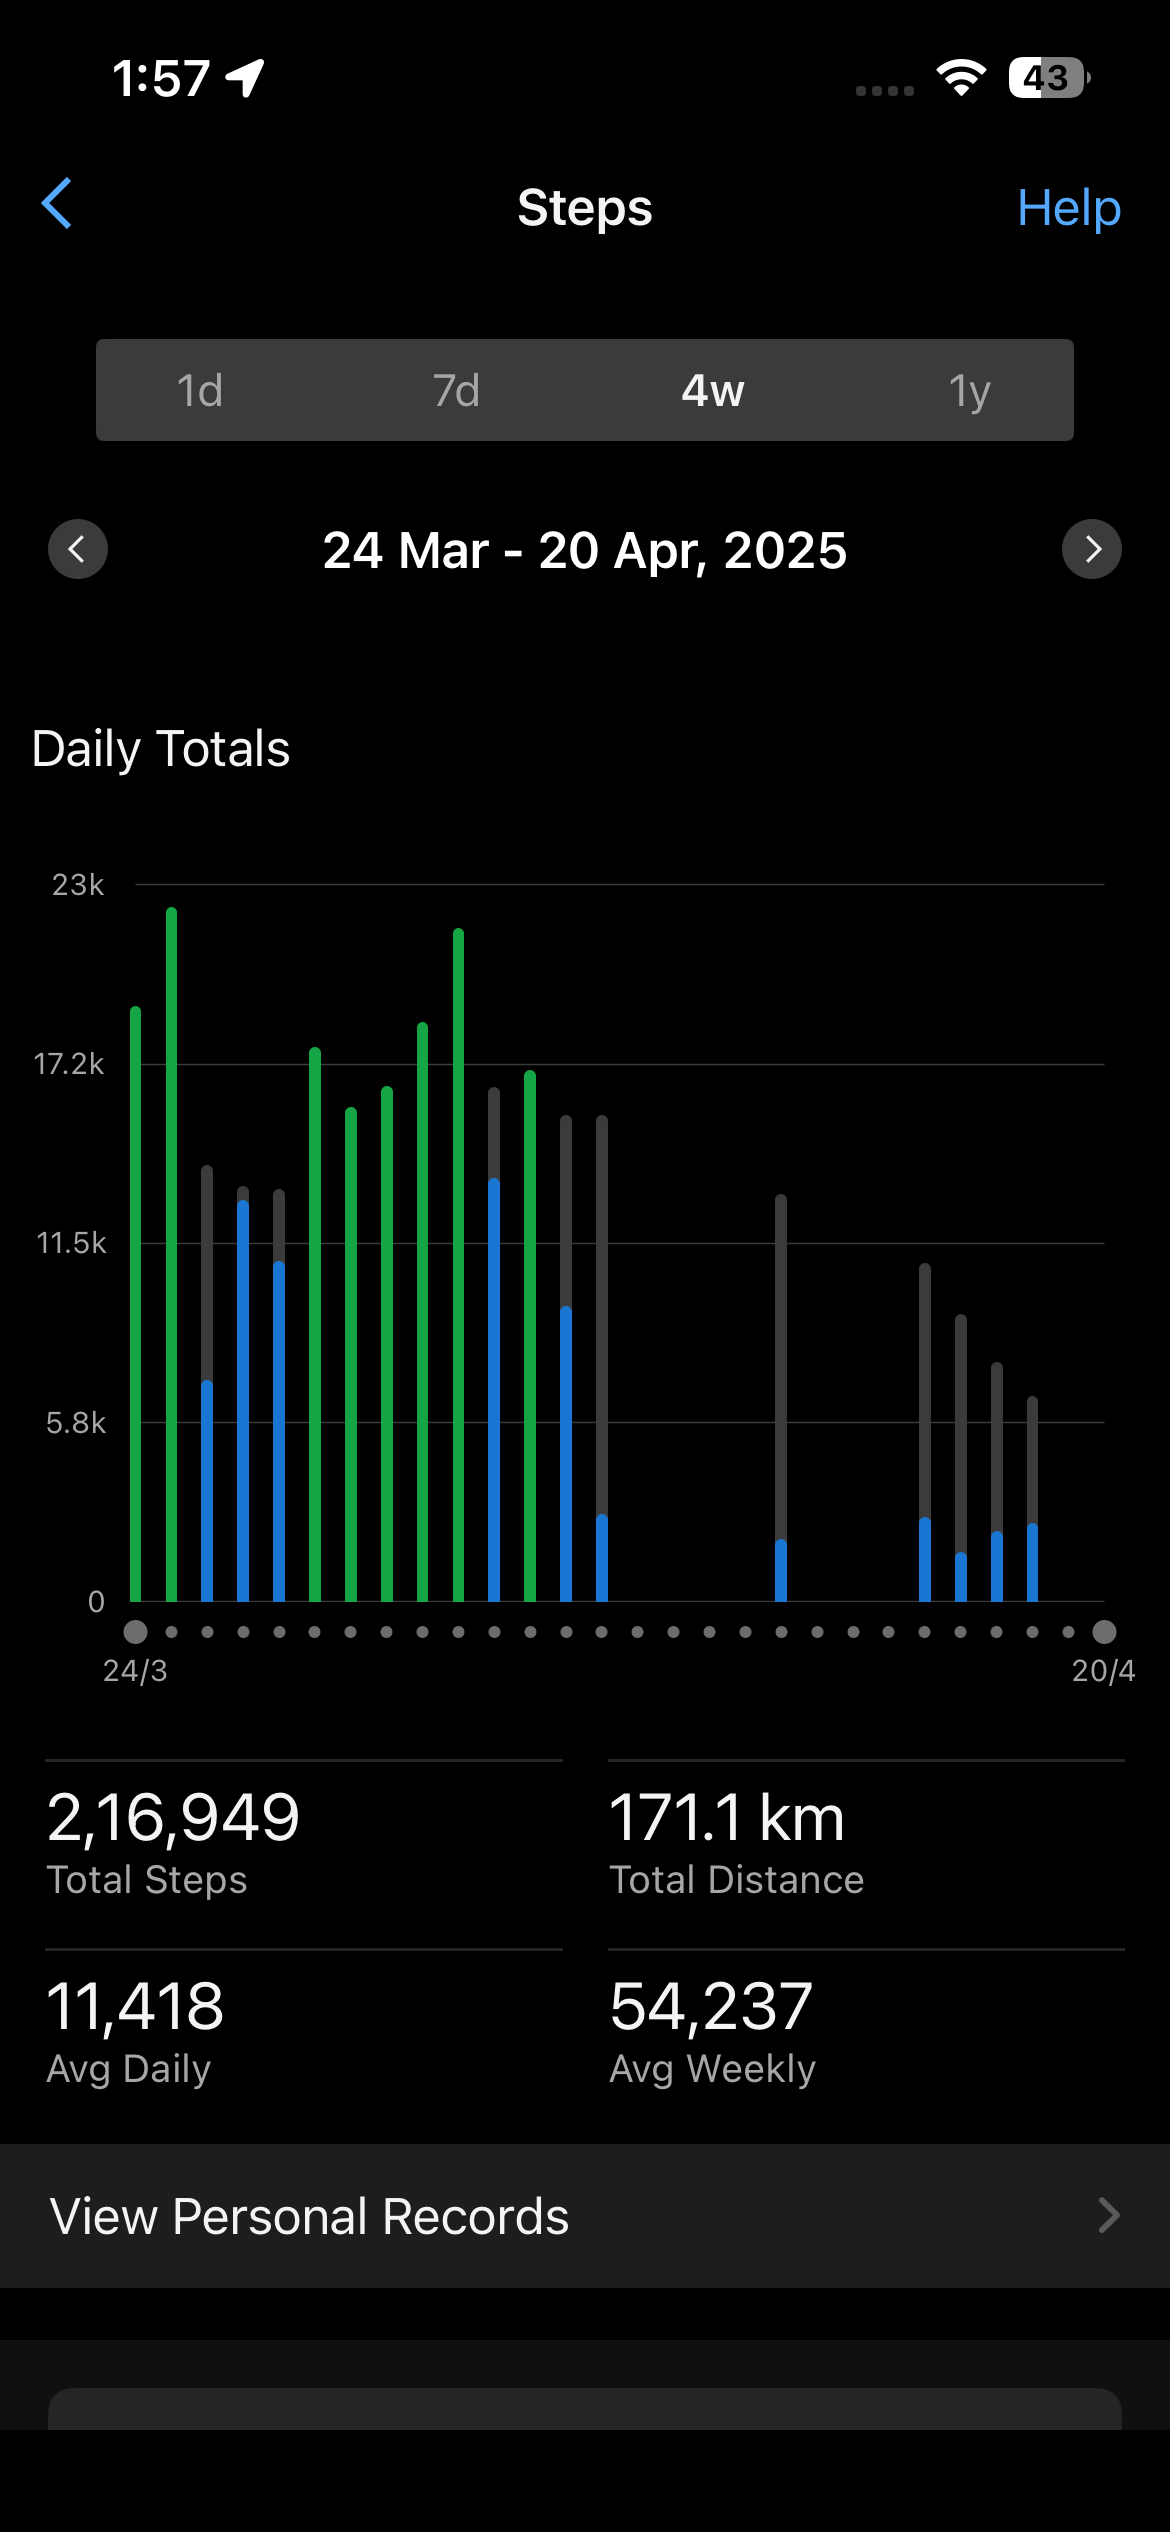
• Comfortable walking shoes — expect 15,000–20,000 steps a day
• Layers — sakura season mornings run cold (4–8°C in Kyoto), afternoons warm up
• A small day backpack for carrying water, snacks, and souvenirs
• Portable power bank — Google Maps and eSIM drain the battery fast
• Yen in cash from India
What we wish we’d brought
• Slip-on shoes — laces at every temple entrance slow you down
• A foldable tote bag — Japan produces beautiful packaging and you accumulate things fast
• More storage on the phone — photos and videos fill up quickly
Things We did not do:
Try at least one night in a Ryokan
A ryokan (traditional Japanese inn) offers a completely different experience from a regular hotel. Tatami floors, futon beds, yukata robes, communal hot spring baths (onsen), and multi-course dinners served in your room. Even one night gives you a side of Japan that most tourists miss. Kyoto and the Lake Kawaguchiko area both offer excellent ryokan options.
Postscript:
All of these maps were generated from the EXIF metadata embedded in my iPhone photographs.
Modern phones often store GPS coordinates alongside each image, so the basic idea was to recursively scan a folder of photos, extract the EXIF fields, pull out the latitude and longitude where available, and then plot those points on an interactive map.
I wrote a short Python script for this using Pillow for EXIF extraction, Folium for rendering the map as a shareable HTML file, pandas for exporting the full EXIF data to CSV, and requests + certifi to reverse-geocode coordinates into human-readable place names using OpenStreetMap’s Nominatim service.
I chose Folium because it produces a lightweight interactive browser map, which was more useful here than a static image. A small detail that mattered in practice: I didn’t want the public map to expose raw coordinates, timestamps, or device metadata, so the version embedded here shows only place names.
The script still saves the full EXIF output to a private CSV for local reference. I also added a simple geocoding cache, so photos taken in roughly the same area reuse the same lookup instead of making repeated API calls. Here’s the script:
Extracted EXIF data for all the photographs
Extracted EXIF data for all the photographs